Espoma Organic
  • Products
    • Close
    • Product Line Overview
    • Plant food finder
    • Garden Fertilizers
    • Potting Soils
    • Liquid Fertilizers
    • Lawn Fertilizers
    • Single Ingredients
    • Conventional Plant Foods
    • Animal Care Products
  • Where to Buy
  • Our Story
    • Close
    • Our Story
    • Locations
    • Historical Timeline
    • Our Commitment
    • Directions
    • Solar
    • Join our Team
    • Espoma Brand Partners
  • Learn
    • Close
    • Espoma Blog
    • FAQ’s
    • Pocket Guide
    • Espoma Guides
    • Garden Clubs
    • Safe Paws Lawn
    • PRODUCT FACT SHEETS
    • Fertilizer Fundamentals
      • Close
      • Understanding Plant Nutrition
      • Reading Labels
      • Choosing the Right Type of Fertilizer
      • Terms & Definitions
    • Gardening Projects
    • Resource Links
  • Contact Us
  • Menu Menu

Tag Archive for: seedlings

Preserving Asian Heritage Through Seeds and Stories

July 10, 2022/in Blog, Bloom and Grow Radio, Fruits & Vegetables, Gardening, Seed Starting, Vegetable Gardening

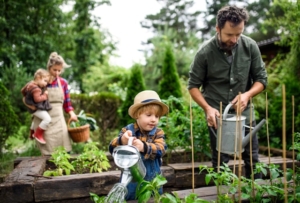
Seeds not only provide us with food to eat, but they represent the future and allow us to reflect on our history. They are heirlooms, a connection to our ancestors and their stories. In this blog, we celebrate stories of Asian culture and connection to nature and food through seeds, with YC Miller from Kitazawa Seed Company. 

YC walks us through the importance of preserving our heritage through seeds with heartwarming stories from Kitazawa customers on how a simple vegetable can carry so much family history and pride. 

This blog is inspired by Episode 152 of Bloom and Grow Radio Podcast, where host Maria Failla interviewed YC Miller from Kitazawa Seed Company. 

How Growing Food Can Reconnect Us with Our Heritage

YC didn’t grow up growing any Korean vegetables. Coming to them as an adult has played a huge part in how she has reconnected with their heritage.

Fifteen years ago, YC went on a heritage trip to Korea. For a portion of the trip, she worked on a farm. She recalls that experience as one of the first times she understood what roots really meant. It really spoke to YC’s soul about who she was as a person and created a deep sense of belonging. 

That moment served as an awakening of their heritage, but also a reconnection with food and the plants, vegetables, and agricultural practices that went along with that. Ever since then, it’s been a constant learning process through their work at Kitazawa Seed Company.

Many Americans, descendants of immigrants, share a similar experience in reconnecting with their culturally significant vegetables and stories of families bringing seeds over from their home countries. With their work at Kitazawa Seed Company, YC says it’s been a pleasure to be able to celebrate and honor that connection, and to be a source of seeds and food that help foster that connection.

How Two Brothers Built Kitazawa Seed Company

Kitazawa Seed Company was started by two brothers in 1917.  It is the oldest Asian seed company in the United States, specializing in Asian varieties. The brothers were selling seeds to Japanese farmers in California, and also providing traditional Japanese vegetable seeds to home gardeners who were growing them for their families and communities.

From 1942 to 1945 Kitazawa Seed Company was forced to abandon the business due to WWII. The Kitazawa family, along with all other Japanese-Americans, were moved and put into Relocation Camps during that time. The brothers restarted the business after the war. Many of their customers had relocated due to land ownership changes. This is when Kitazawa began selling and shipping seeds across the United States and really flourishing. It has continued the tradition of selling both to commercial farmers and to the home gardener. 

A major goal of Kitazawa has been to bring in seeds that are otherwise inaccessible. It started as a company that focused mostly on Japanese vegetables, because that was primarily the customer base. With waves of immigration from Asia to the United States, there’s been a changing demand for different kinds of Asian vegetables. Now Kitazawa has expanded its offerings to be able to provide vegetables for lots of different communities. 

Preserving Seed Diversity and the Immigrant Experience

Kitazawa strives to provide lots of hybrid seed varieties that are reliable, but they also value open pollinated varieties. If you were to grow an open pollinated squash variety in California and grow that same variety in New York, saving seeds year after year, those seeds would adapt to the different microclimates they were grown in. While they’re still the same variety of squash, certain traits would emerge, making them better suited for each region.

An interesting parallel to note is the similarity in the seed and the home grower who originally brought it to the United States. Seeds come from a different homeland and take on the soil, the air, and the sunshine from their new home. As seeds thrive, they continue to change and evolve. Similar to the immigrant experience in adapting to your new environment. 

As home gardeners, we may not think much about saving seeds. But it’s something YC highly encourages us to do to create more locally adapted, resilient seed varieties. 

Where and How Does Kitazawa Source Their Seed Varieties?

A lot of Kitazawa’s seeds are imported from Asia, where they have been working with many of the same reliable growers for decades. There are plans in place to consider more domestic production, especially considering supply chain issues and shipping. There are amazing people doing small batch seed production in the United States that are doing incredible work, specifically with landrace varieties. Landrace seeds have evolved traits naturally over time in response to growing conditions like pests, climate, and diseases in a specific location.

Kitazawa not only considers a particular variety, but also a high standard of quality when bringing in seeds. They grow out new varieties first so they can ensure the health and vigor of the seeds they offer to customers. The process can take several years to not only source the seed, but to also ensure the integrity of the seed packet they sell.

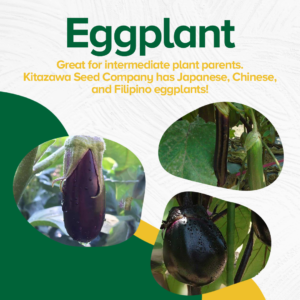
What Are the Differences Between Japanese, Chinese, and Filipino Eggplants?

One of Kitazawa’s new varieties is a Filipino eggplant. They have had customer requests for  years to carry a Filipino eggplant in their seed options. While they have lots of Japanese and Chinese eggplant varieties, none of them were quite right for their Filipino clientele. 

Traditionally, people think of a Japanese eggplant as being long, narrow, and purple. Generally the Japanese eggplants also have a purple calyx, which is the part of the eggplant that attaches to the stem. They are also quite firm with low moisture content, and often used for pickles. 

Chinese eggplants often have a green calyx and are lighter in color than the Japanese eggplants. Their texture is a bit creamier too.

The Filipino eggplant Kitazawa is sourcing is a greenish purple with a green and purple calyx. Generally, Filipino eggplants are more tender and a bit sweet. 

YC’s Recommended Kitazawa Varieties for Beginners

One of the great things about Asian vegetables is there’s such a huge diversity. There is something for everyone from the beginning gardener to the more experienced gardener and everyone in between.

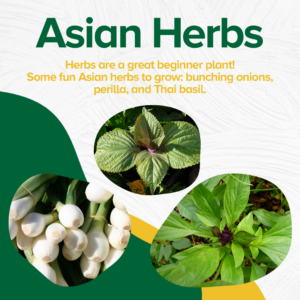
For people who are just starting out, some of the easiest plants to get started are Asian herbs. There is a huge variety of Asian herbs from bunching onions that you can use in pretty much everything to Thai basil and all of the different kinds of perilla. 

And then there are types that YC would consider big payoff varieties. With a crop like peas, you can eat the shoots and the peas once they form. They’re easy to grow and you get a lot of vegetables for your effort. Japanese cucumbers are another wonderful option and fairly easy to grow with a trellis.

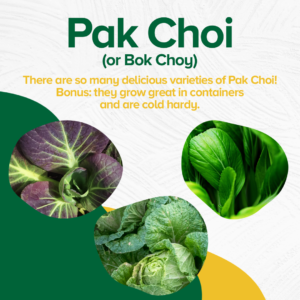
Kitazawa has a huge number of pak choi (or bok choy) available that can be easily grown in a container. They have a bunch of smaller varieties for small space growers. It’s a cold hardy vegetable you can grow in Spring and Fall. 

If that all sounds overwhelming, Kitazawa is always happy to give seed recommendations. You can give them a call and they’d be happy to help assist you. 

YC’s Favorite Recipe to Cook

Korean perilla is a Korean herb, and a very meaningful plant to YC personally, so it’s their go-to plant. She uses it in two ways: one, as a kind of lettuce wrap and two, she pickles it!

It’s really wonderful as a pickle or as a kimchi. Kitazawa carries many of the perilla varieties, including Japanese shiso, a Vietnamese variety, and a Korean variety. They’re also very easy to grow in containers! 

To learn more about different Asian recipes, check out the Kitazawa Recipe Blog. 

Visit  Kitazawa Seed Company

*****

About Bloom & Grow Radio Podcast 

Bloom & Grow Radio Podcast helps people care for plants successfully and cultivate more joy in their lives. Host Maria Failla, a former plant killer turned happy plant lady, interviews experts on various aspects of plant care, and encourages listeners to not only care for plants, but learn to care for themselves along the way.

About Our Interviewee

YC Miller works for Kitazawa Seed Company, which specializes in offering the highest quality Asian seeds to delight the diverse palates of their customers. They offer over 500 seed varieties that produce dento yasai or traditional heirloom vegetables of Japan, to the Asian vegetables popularly found in farmers’ markets, specialty grocery stores, and restaurants. Now you can grow them in your kitchen garden, sell them at your garden center and grow them commercially.

​​Follow Kitazawa Seed Company:

Website

Email

Featured Products:


Where to Buy

https://www.espoma.com/wp-content/uploads/2022/07/Copy-of-Asian-Heritage-1.png 1080 1080 espoma https://www.espoma.com/wp-content/uploads/2023/05/espoma-logo340w-1.png espoma2022-07-10 10:36:342022-07-10 10:44:08Preserving Asian Heritage Through Seeds and Stories

Seed Starting 101: How to Start Seeds Successfully

April 5, 2022/in Blog, Bloom and Grow Radio

Seed starting setup

Seed starting is upon us in the gardening world! There is no better way to connect with the food we eat than by growing it ourselves. Starting edible plants from seed can be intimidating, but we’re here to break it down and answer all your burning questions. 

This blog is inspired by Episode 114 of Bloom and Grow Radio–where host Maria Failla interviewed Joe Lamp’l–the Joe behind The joe gardener Show.

Before we dive into the how of seed starting, let’s understand the why. 

Why Start Your Garden from Seed? 

In our world of instant gratification, what’s better than starting your gardening season way sooner than most gardeners?! When you start seeds indoors, you get your hands in the dirt and get a jump on the growing season. And what a rewarding feeling it is to start your plants from seed, and enjoy the journey of bringing them from seed to plate. 

If you love your edibles, decide what you want to eat and which varieties you want. Don’t leave it up to what’s available at the garden center. Think about how much you can choose when you start from seed: flavor, varieties, and the stories behind different heirlooms. You can really expand your food choices when you get to pick exactly what you grow. 

Another great reason to start your own seeds is to make sure you’re growing the right kind of plant for your needs. Do you absolutely love tomatoes, but only have a small balcony to grow them? Look for microdwarf tomato varieties that only grow about 1-2 feet tall! If you have a short growing season, you’d also want to make sure you choose “early” or “short season” plant varieties. 

Starting from seed offers us the ability to be in control of the varieties we grow, plan in advance, and save lots of money in the long run. Speaking of starting seeds on a budget…

How to Get Your Seed Starting Setup for Under $100

Your seed starting setup can be super budget-friendly if you take the time to look at the components. For under a hundred dollars, you can put together everything you need! Let’s break down the materials, costs, alternatives, and conditions you need for seed starting. 

Seed Starting Mix

To start, you need a good seed starting mix. It’s called a “mix,” because there’s really no soil in it. It’s made of natural ingredients like peat moss, vermiculite, and perlite. A bag of seed starting mix is going to cost between $5-$10.

Espoma Organics takes the guesswork out of your selection by providing their high quality seed starting mix. 

Seed Starting Trays

With one bag of seed starting mix, you can fill about two seed starting trays, which is your next material needed. Seed starting trays can give you anywhere between 18 to 72 cells to sow your seeds. You can get two trays for about $10. 

Look for seed starting trays with cells about 3.5 inches or smaller. In a traditional seed starting tray, cells are deep so seedling roots have more room to grow down. About 4 weeks from germination you’ll have to transplant your seedlings into a larger individual pot, AKA “potting up”.

Best Grow Lights for Seed Starting

Next is a grow light. Grow lights are where you could spend a lot of money in your seed starting setup, but if you’re on a budget, there is nothing wrong with buying an LED or fluorescent shop light for $20. You can get your seeds sprouted and ready for planting outside in good condition with a very inexpensive shop light. Will it be as good as a seedling that’s under a more expensive light? Maybe not, but all you’re really trying to do is rear those seedlings to the point that they are ready to go outside. Once they get outside, Mother Nature knows what to do and so does that seedling.

What are Heat Mats for Seed Starting important?

Heat mats are seed starting game changers. Heat mats raise the soil temperature, which helps your seeds sprout faster. Seeds have an ideal range of soil temperature in which they sprout the best, and can be anywhere from 65 to 85 degrees Fahrenheit. Seed mats will cost you between $15 and $35, depending on whether you get a thermostat attached.

Once most of your seeds have germinated, remove them from the heat mats. If you leave your seedlings on heat too long, they can start to become leggy. 

Humidity Dome for Germination

You’ll also want a humidity dome. It’s a clear plastic top that you put over the seed tray to hold the moisture in the soil until the seed germinates. If you don’t have a cover on your tray, the moisture won’t stay in the soil and the seed is not as likely to germinate. For two humidity domes, you’ll probably pay about $6. You can also use plastic wrap and lay it over the top to hold in moisture for your seedlings. 

A key point to remember with humidity domes: once your seeds germinate, remove the humidity dome so seedlings get enough oxygen. Airflow brings us to the next material needed. 

Small Fan for Seed Starting

Last but not least, a fan. You can get a cheap clip-on fan for $15. Fans are important because once the seed germinates, you need air movement across that soil surface. Air movement reduces the chance of a fungal disease called damping off, which can kill your seedlings. Fans also simulate wind, making the stems sturdier and ready for outdoor conditions.

Total Seed Starting Materials Cost

Here’s the cost breakdown to get your seed starting setup for less than $100:

Bag of seed starting mix: $10

2 seed starting trays: $10

Shop light: $20

Heat mat: $15 – $35

Humidity dome: $6

Clip-on fan: $15

TOTAL: $81 – $96

All about Seeds: Where to Buy Them, Expiration Dates, & Non-GMOs

It’s important to find a good seed company. Here are some tips when you’re searching: 

  • Look for companies that have been around for a while with a good reputation. 
    • Do they have good customer service? 
    • Are their staff knowledgeable about their seeds? 
  • Find local or regional seed companies that grow their seeds close to home. Some seed companies can outsource their seeds from overseas from a huge commercial supplier. It’s important to know where your seeds are grown. 
  • When you grow seeds adapted to your area, plants have a much better success rate. The more you grow those seeds and save them, the more adapted they’ll become to your specific microclimate too! 

Seed Expiration Dates 

Seed packets will show the day that the seed was packed. Assuming you have leftover seeds and you keep them in a cool, dark, dry place, they will last anywhere from as little as one year to many years, depending on the seed. 

How do you know when a seed is still good or if it’s gone bad? Do a germination test! Before you plant your seeds, put about 10 seeds in a damp paper towel in a plastic bag. Check the moisture daily and after about 10-14 days, your seeds will either have sprouted or not. If 7 out of 10 sprouted, your viability is about 70%. Depending on your viability you can either plant extra or compost unusable seeds.

What are Non-GMO Seeds?

GMO stands for Genetically Modified Organism. Many seed companies have jumped on the bandwagon saying all of their seeds are “certified non-GMO.” There actually aren’t any GMO gardening seeds available for home gardeners. None of the seeds you purchase will ever be GMO seeds. GMO seeds are present in the commercial agriculture industry, but it’s expensive to produce a GMO seed and it’s not anything that we’re going to even be able to buy. So if a company is touting non-GMO seeds, that’s true, they are. But so are everyone else’s.

The Best Time to Start Your Seeds

The most important date you need to know is the last day that you are potentially going to have frost. This is called your frost-free date in Spring. You can find yours by Googling “last frost date” in your area. Once you have that date, then you work backward to about 6-8 weeks. That’s when you’ll be sowing most of your seeds.

You want to time your seed starting so you give your seeds about 6-8 weeks of growing time indoors. By the end of the 6-8 weeks, seedlings will have grown to a sturdy size and are then ready to grow outdoors. If you choose a good seed company, there should be lots of information about this on the back of the seed packet.

If you start your seeds too early, you risk your plants getting too big and outgrowing their space. They’re going to be looking for resources that you probably can’t provide indoors, like more light, nutrition in the soil, and space to grow. The longer your seedlings are confined indoors without the right environment, the more stressed they become. Timing when you plant your seeds is crucial to the seed starting process. 

Let’s Get Planting! 

Now that you’ve got your seed starting setup and timing down, how do you get your seeds in the soil? 

First, look at the information on your seed packet. It will typically have all that important seed starting information you need, including how many weeks to start indoors, days to maturity, and growth patterns. 

Make sure your seed starting mix is pre-moistened, like a damp sponge. Most seeds don’t need light to germinate, but they don’t need to be planted very deeply either. Once you have your seeds in, sprinkle a little bit of extra seed starting mix on top. Spray the tops of the soil gently with water so you don’t move the seeds around too much.

When your seeds are planted, place your humidity dome on top, put your tray on your heat mat, and turn your lights on. Your seedlings are going to sprout in a matter of days to a week, maybe two weeks at most. Once your seeds germinate, remove your humidity dome and turn on your fan. From there, you’re just ensuring that the soil stays moist.

The first leaves that come up are called seed leaves, or cotyledons. In a few weeks, your plants will grow new “true” leaves. Once those new true leaves emerge, you can start to add small amounts of supplemental fertilizer.

Your job over the next 4-5 weeks will be monitoring plant growth and making sure everything looks good. Keeping the lights at the proper distance above the tops of the seedlings is also key–not too close, not too far away.

The Final Step: How to Harden Off Your Plants

Hardening off is about 7 to 10 days of transitioning your seedlings slowly to outdoor conditions. You slowly increase the tender, new leaves’ exposure to sun and wind over about two weeks. Make sure outdoor temperatures are above 45 degrees Fahrenheit with no inclement weather during this period, and bring plants indoors every evening.

Here is a rough schedule to follow: 

  • Days 1-2: 1-3 hours outdoors in shade
  • Days 3-4: 3-5 hours outdoors in shade
  • Days 5-6: 3-5 hours outdoors in morning sun
  • Days 7-8: 7-12 hours outdoors in sun
  • Days 9-10: Leave plants outdoors overnight 

Once you’ve gotten your plants used to the outdoor elements, they’re all ready to be planted in their new homes outdoors! 

*****

Featured Products:


Where to Buy

https://www.espoma.com/wp-content/uploads/2022/04/Seed-starting.png 500 500 espoma https://www.espoma.com/wp-content/uploads/2023/05/espoma-logo340w-1.png espoma2022-04-05 08:25:302023-12-06 13:46:36Seed Starting 101: How to Start Seeds Successfully

Video: Winter Seed Sowing with Garden Answer!

January 19, 2022/in Espoma Videos, Garden Answer

Check out how Laura from @Garden Answer is starting seeds early in the winter season with the help of Espoma.


Featured Products:


Where to Buy

https://www.espoma.com/wp-content/uploads/2022/01/Winter-Seed-Sowing_Thumbnail.png 1014 1834 Danielle Kirschner https://www.espoma.com/wp-content/uploads/2023/05/espoma-logo340w-1.png Danielle Kirschner2022-01-19 15:12:492022-12-20 11:32:25Video: Winter Seed Sowing with Garden Answer!

Video: Epic Gardening’s NEW Favorite Seed Starting Method

February 18, 2021/in Blog, Espoma Videos

Kevin @Epic Gardening updates his seed-starting methods annually for better results, consistency, and health of his seedlings. Check out his NEW method featuring the help of some Espoma Organic Seed Starter.


Featured Products:

Where to Buy
https://www.espoma.com/wp-content/uploads/2021/02/thumbnail.jpg 1080 1920 Danielle Kirschner https://www.espoma.com/wp-content/uploads/2023/05/espoma-logo340w-1.png Danielle Kirschner2021-02-18 10:46:402023-02-14 18:41:20Video: Epic Gardening’s NEW Favorite Seed Starting Method

Video: Starting Onion Seeds Indoors with Garden Answer

February 9, 2021/in Blog, Espoma Videos, Garden Answer

When planting onions from seed, Espoma Organic Seed Starter is a key component in promoting root growth and improving moisture retention. Check out how Garden Answer​ uses it!

Featured Products:


Where to Buy


https://www.espoma.com/wp-content/uploads/2021/02/Thumbnail-copy-3.jpg 1080 1920 Danielle Kirschner https://www.espoma.com/wp-content/uploads/2023/05/espoma-logo340w-1.png Danielle Kirschner2021-02-09 11:50:172023-01-11 01:47:45Video: Starting Onion Seeds Indoors with Garden Answer

Are You Ready To Plant?

March 12, 2019/in Spring Gardening

You’ve waited all winter, and spring is so close! It’s just about time to start sowing early spring crops.

You can sow cool season crops directly in the ground as soon as the soil temperature is at or above 40ºF. If the soil is wet and muddy, you’ll want to wait a few days until things dry out. Working wet soil can ruin its structure. Some people use polythene tunnels to warm the soil and give them an even bigger head start.

While you sow, don’t forget to feed your soil. Use Espoma Organic’s Garden-Tone, it is perfectly formulated for your vegetable garden.

Here are our top vegetables for early spring:

Spinach

Spinach sprouts fairly quickly and is remarkably frost resistant, especially when grown under cover. Plants like the morning sun and are happy to have some afternoon shade. Fresh baby spinach is tasty and loaded with vitamins and minerals. Try a springtime salad with spinach and strawberries or put them in your favorite breakfast smoothie.

Swiss Chard

This beet relative is another excellent early spring crop that is easy to grow from seed. Once the leaves are 6 inches tall, you can begin to harvest the outer leaves. Let inner leaves stand for a later harvest. Chard contains 3 times the recommended daily intake of vitamin K and 44 percent of the recommended amount of vitamin A. Eat it raw or cooked.

Lettuce

There are hundreds of different kinds of lettuce; they come in all colors, shapes and sizes. Harvesting baby greens is quick and easy. Look for varieties  you can cut back that will regrow. Many can be harvested in just 30 days. They won’t flourish during cold snaps, but they won’t die unless temperatures dip below 28ºF.

Radishes

Radishes are one of the fastest vegetables you can grow. They’re fun to grow with little ones because they come up before you know it. You can plant radishes alongside lettuce or other spring greens. As you harvest the radishes, the greens have more room to grow. Use them as an addition to salads and tacos or roast them for a delicious treat.

Kale

We all know kale is a super food — cooked kale delivers more iron than beef. Lucky for us it grows easily from seed. Harvest the outer leaves for baby kale and let the rest of the foliage grow to full size. It can produce a great deal of food with little effort. Sow kale early and protect from hard frosts.

Peas

Fresh grown peas are so sweet and delicious, even your kids will love them. And, the seeds are big enough for little hands to plant them. Plant them in the ground around St. Patrick’s Day or 4 to 6 weeks before that last frost free date. Some varieties will need a low trellis. Check the seed packet to see how tall they’ll grow. Grow sugar snaps or snow peas if you don’t want to do all the shelling regular peas require.

 Learn more about starting a kid friendly vegetable garden.

Products

Where to Buy
https://www.espoma.com/wp-content/uploads/2019/03/Seedlings-773x1030.jpg 1030 773 Kevin Pyles https://www.espoma.com/wp-content/uploads/2023/05/espoma-logo340w-1.png Kevin Pyles2019-03-12 22:46:522019-05-07 09:57:01Are You Ready To Plant?

3 Common Seed Starting Problems and How to Fix Them

February 27, 2018/in Gardening

Keywords: starting plants indoors, can you grow tomatoes indoors, growing vegetables indoors

Starting seeds indoors is great way to make your garden successful from the start. Nurturing and watching seedlings grow from nothing into a fully grown plant can be incredibly rewarding.

Gardeners have asked how to be more successful with starting their own seeds and the problems usually boil down to simple, common mistakes. Here are the three most common mistakes and how to fix them.

In a few short weeks your seedlings will be ready to transplanted into the garden!

1. Problem: Not Enough Light

A common mistake beginner seed starters make is not giving their seeds enough light. New seeds need a lot of light to get growing. You can start with a south facing window, but if it doesn’t get 6+ hours a day, it probably won’t do.

Solution: Artificial lights.

Using grow lights, found at your local garden center, can provide the ample amount of light your seedlings need. Hang lights from chains, so you can lower and raise them as they grow. Keep lights about 2-3 inches above the seedlings.

2. Problem: Too Much or Not Enough Water

This is the most challenging part about starting seeds. Seedlings are incredibly delicate and need to be watered just right. Keep potting mix moist, but not wet.

Solution: Check seedlings regularly.

First, cover your seed starting container with plastic until the seeds germinate. This will trap any moisture in and will help keep the soil moist. Use a misting spray bottle until seedlings appear to avoid overwatering. Once your seedlings are established, water from the bottom. Your container should have drainage holes, so let your plants soak up the water from the holes to minimalize the risk of overwatering. Lastly, check your plants every day.

3. Problem: Starting Too Soon

Many beginners try to start seeds as soon as they buy them, instead of when the package advises. We all get a little excited to have green plants growing again, but if started too soon, they can die off from the cold.

Solution: Find out when your expected last frost is.

Seeds should usually be started four to six weeks before your last frost date. This will ensure that by the time your seedlings are ready to be transplanted, your soil will have started to warm up.  You may need to place your seedlings outside during the day and bring them in at night for a few days to get them acclimated to the outside temperatures. Before you plant your seedlings in the ground, use Espoma’s Bio-Tone Starter Fertilizer to give your soil and new seedlings the head start they deserve.

In a few short weeks you’ll be ready to transplant!


Ready for tomatoes?
https://www.espoma.com/wp-content/uploads/2018/02/Seedling-e1522271372241.jpg 400 600 espoma https://www.espoma.com/wp-content/uploads/2023/05/espoma-logo340w-1.png espoma2018-02-27 10:55:022022-04-12 09:09:083 Common Seed Starting Problems and How to Fix Them

May Gardening Checklist: 5 Essential To-Dos for a Thriving Garden

May 2, 2017/in Blog, Spring Gardening

May is one of the busiest and most exciting months in the garden. Flowers are blooming, veggies are sprouting, and summer crops are ready to go in. But to keep your garden thriving naturally, it’s important to use the right organic products to nurture your soil, plants, and harvest.

Here’s your Espoma-approved May checklist to prep your garden for a healthy, productive summer season.

Garden Clean up

1: Tidy Up Your Garden Space

Start fresh by clearing out weeds, dead plants, and old debris — this keeps pests and diseases in check and opens up space for new growth. As you tidy up, top off your beds with Espoma Organic Land & Sea Gourmet Compost to enrich the soil with nutrients and improve texture.

Once your garden is clean, you can apply a layer of mulch to help conserve moisture and regulate soil temperature. This simple prep sets the stage for everything that comes next.

spring crops

2: Harvest Early Spring Crops

Your cool-weather crops like lettuce, spinach, radishes, and peas are likely ready to harvest. After picking, don’t leave that soil depleted! Replenish it by working in Espoma Organic Garden-tone or Plant-tone to restore nutrients before planting your summer vegetables.

For container gardens, refresh the mix with Espoma Organic Raised Bed Mix or Potting Mix so your new plants have a rich, organic base to grow in. Healthy soil = healthy crops.

People planning a project

3: Plan Your Garden Layout Thoughtfully

Before you rush to plant, take a little time to sketch out your garden plan. Group plants with similar needs together, and research what varieties perform best in your area. If you’re unsure, visit a local garden center and look for recommendations — and while you’re there, pick up organic fertilizers suited for what you’re planting (like Espoma Organic Tomato-tone for tomatoes, Berry-tone for berries, or Rose-tone for roses).

Planning ahead ensures you can match the right organic products to the right plants, maximizing growth and minimizing problems down the line.

planting with organic fertilizer

4: Get Planting — and Feed Organically

Once your area is frost-free, it’s time to plant! Whether you’re planting veggies, flowers, or herbs, give them the best start by enriching the planting hole with Espoma Organic Bio-tone Starter Plus. This starter fertilizer contains mycorrhizae, which help plants establish strong root systems and reduce transplant shock.

As the season goes on, continue feeding regularly with Espoma Organic Tone Fertilizers, depending on what you’re growing. These slow-release, organic fertilizers keep plants nourished naturally, without the risk of burning or chemical buildup.

planting

5: Transfer Indoor Seedlings Outdoors Carefully

If you started seeds indoors, harden them off gradually before moving them outside. Once ready, plant them in your garden or containers and mix Espoma Organic Bio-tone Starter Plus into the soil. This ensures young plants have access to the nutrients and beneficial microbes they need to get established and grow strong healthy roots.

For containers, fill pots with Espoma Organic Potting Mix, which provides excellent drainage and moisture retention while feeding plants with organic ingredients. Don’t forget to water thoroughly after transplanting to help roots settle in.

family in vegetable garden

🌸 Bonus Tip: Keep Feeding and Caring All Season Long

Throughout the summer, keep an eye on your plants. Feed every month or as needed with the appropriate Espoma Organic fertilizer for each plant type. Water deeply at the base, mulch to retain moisture, and enjoy the lush, organic garden you’ve worked so hard to create.

With the right products and a little care, you’ll be harvesting beautiful, homegrown food and flowers all summer long — the organic way!

Featured Products:

Espoma Organic Potting soil Mix Big bagEspoma Organic Land and SeaEspoma Raised Bed Mix bag  Espoma Organic Tomato-toneEspoma Organic Rose-tone bagEspoma Organic Plant-tone organic fertilizer

Where to Buy

https://www.espoma.com/wp-content/uploads/2018/05/Curb-appeal-hosta-black-eyed-susan.jpg 850 1280 espoma https://www.espoma.com/wp-content/uploads/2023/05/espoma-logo340w-1.png espoma2017-05-02 08:00:312025-05-06 14:10:27May Gardening Checklist: 5 Essential To-Dos for a Thriving Garden

The April Garden Checklist

April 6, 2017/in Blog, Spring Gardening

Spring is here! Shed off those winter blues and head outdoors to restore your lawn and garden. The days are getting longer and your soil is beginning to wake up. April is a great time to get out in your yard and begin again.

Wondering where to start? We’ve got 6 tasks you can accomplish this month in your own yard.


April Garden Checklist:


1. Start tomato seeds.

The best way to get a head start on growing tomatoes is to start seeds indoors 4-6 weeks before the last spring frost date in your region. See our Guide to Growing Tomatoes. Start your seeds with Espoma Organic Seed Starter and feed your tomatoes with Espoma Organic Tomato-tone.

2. Get planting.

Hydrangeas embody everything we love about gardening. They have billowy textures, come in bright colors, and are easy to care for. Plant some this month for the best blooms. Feed your Hydrangeas with Espoma Organic Holly-tone fertilizer.

3. Grow berries.

Did you know blackberries have almost as many antioxidants as blueberries? And raspberries make the perfect addition to jam, cobblers, and pies. Berries are just so delicious, scrumptious, and oh-so-juicy. Plus, many berries are easy to grow and care for. Find out when, where, and how to plant your favorite berries. Feed your berry-producing plants with Espoma Organic Berry-tone fertilizer.

4. Revitalize lawns.

Perform a soil test to find out what your lawn needs, then amend and choose organic. Organic lawns need less watering, fertilizing, and mowing all summer long. Yes — that means you get to spend more time enjoying your beautiful lawn and less time caring for it! Plus, as natural lawn foods break down, your soil becomes stronger on its own and needs less help. Feed your lawn with Espoma Organic All Season Lawn Food.

5. Plant blooms.

Azaleas and Rhododendrons are some of the most popular flowering shrubs. Blooming from late spring to early summer, these shrubs thrive in almost any garden. Plus, they come in virtually every color of the rainbow — from bold pinks, purples, and reds to soft, muted yellows and whites. Make sure you’re adding these bloomers to your garden this year. Feer your beautiful Azaleas and Rhododendrons with Espoma Organic Azalea-tone fertilizer.

6. Feed roses.

Your roses are waking up now, they’ve made it through a long winter and they are starving! Choose Espoma’s organic Rose-tone. It includes more nutrients than any other rose food. Most rose fertilizers contain three nutrients — nitrogen, phosphorus, and potassium (N-P-K). Here’s how to feed with Rose-tone.

Roses in the Mist

Sit back and relax once you’re done.

April showers will give way to May flowers in no time at all.

*****

Check out our Total Guide to Growing Organic Berries!


Featured Products:

Where to Buy

https://www.espoma.com/wp-content/uploads/2017/04/hydrangeas-898043_1920.jpg 1079 1920 espoma https://www.espoma.com/wp-content/uploads/2023/05/espoma-logo340w-1.png espoma2017-04-06 17:03:132024-10-02 08:27:41The April Garden Checklist

Smarty Plants: 5 Easy Planting Tips

March 15, 2016/in Spring Gardening

Raise new plants that grow as big and mighty as Jack’s Beanstalk with these five tips for planting success. Your new plants will look so perfect your neighbors will think you plucked them right from a fairy tale!

Before you even think about picking up your garden trowel, check out these tips.

Bio-tone starter, potting soil, organic fertilizer

Say Yes to Success: 5 Tricks for Planting New Flowers, Veggies and More  

1. Start with the Best. Make sure you have the right light, space and soil for each plant. Then select plants with shiny, blemish-free leaves that you can easily lift out of the container.

2. Royal Soil. Before planting, test the soil and add necessary amendments. If your soil is lacking, your plants will be too. For an extra oomph, add Espoma Organic Vegetable & Flower Garden Soil or compost to the planting hole. And if direct sowing seeds, mix in an organic seed starting potting soil, so seeds can take root easily.

3. Feed Now… and Later. When planting, mix in an organic starter plant food. Adrianna, an Espoma customer, loves Bio-tone Starter Plus. She can even tell “when the roots begin to take up the plant food because they start to grow MUCH faster.” Bio-tone Starter Plus’ secret is mycorrhizae, which promotes bigger blooms and helps plants get established faster.

Bio-tone starter, potting soil, organic fertilizer

4. Stay Strong Seedlings. Before moving indoor seedlings outside, toughen them up. Otherwise, they may not make it. To help seeds adjust, begin hardening them off two weeks before transplanting. How-to instructions here.

5. Don’t Forget to Water. While still in their nursery containers, water your plants. Then water deeply after planting. Water reduces plants’ stress levels and helps them adjust to their happy, new abode.

Get ready, your organic flowers, veggies and plants are about to be bigger and healthier than ever! You grow, gardener!  

https://www.espoma.com/wp-content/uploads/2016/03/garden-spade.jpg 1280 1920 espoma https://www.espoma.com/wp-content/uploads/2023/05/espoma-logo340w-1.png espoma2016-03-15 08:31:072019-05-07 10:07:03Smarty Plants: 5 Easy Planting Tips
Page 2 of 212
Where to Buy

Get News & Updates

Recent Posts

  • VIDEO: Planting Potatoes & Ranunculus 🥔🌱🌸 with Garden Answer
  • VIDEO: Spring Garden Awakening with Summer Rayne Oakes 🌿
  • VIDEO: Planting Raised Beds 🌿 with Wyse Guide
  • VIDEO: How to 🌱 Grow a Whole Salad 🥗 in One Pot! 🪴 | Growing Joy with Maria
  • VIDEO: Prune & Feed Trees Like a Pro with Wyse Guide 🌳

Tags

All-Purpose Potting Mix bio-tone Bio-tone Starter Bio-tone Starter Plus cactus and succulents Cactus Mix caring for houseplants Container Gardening DIY project Espoma espoma grown espoma organic Espoma Organics Espoma Video fall gardening flower garden flowers garden Garden Answer Gardening gardening tips gardens grow holly-tone houseplants Indoor! indoor gardening indoor plants Kaleb Wyse organic organic fertilizer Organic Gardening organic plant food Organic Potting Mix Outdoor Gardening Planting plants Potting Mix potting soil Spring Gardening succulents summer rayne oakes vegetable garden Vegetable Gardening Wyse Guide

Espoma. A Family Tradition Since 1929.

Espoma Organic logo
  • Espoma Dealer
  • Espoma Pro
  • Garden Club
  • Privacy Policy

Scroll to top