Espoma Organic
  • Products
    • Close
    • Product Line Overview
    • Plant food finder
    • Garden Fertilizers
    • Potting Soils
    • Liquid Fertilizers
    • Lawn Fertilizers
    • Single Ingredients
    • Conventional Plant Foods
    • Animal Care Products
  • Where to Buy
  • Our Story
    • Close
    • Our Story
    • Locations
    • Historical Timeline
    • Our Commitment
    • Directions
    • Solar
    • Join our Team
    • Espoma Brand Partners
  • Learn
    • Close
    • Espoma Blog
    • FAQ’s
    • Pocket Guide
    • Espoma Guides
    • Garden Clubs
    • Safe Paws Lawn
    • PRODUCT FACT SHEETS
    • Fertilizer Fundamentals
      • Close
      • Understanding Plant Nutrition
      • Reading Labels
      • Choosing the Right Type of Fertilizer
      • Terms & Definitions
    • Gardening Projects
    • Resource Links
  • Contact Us
  • Menu Menu

Tag Archive for: water

Growing Joy with Maria Blog – How to Grow Citrus Indoors ??

March 21, 2024/in Blog, Growing Joy with Maria, Indoor Gardening

Growing citrus indoors, complete with flowers and fruit, may sound too good to be true. However, by choosing the right citrus varieties and providing them with the ideal growing conditions, you can indeed become a successful indoor citrus farmer.

This blog is inspired by Episode 210 of Growing Joy with Maria Podcast, where host Maria Failla chatted with citrus expert Danny Trejo of Via Citrus to talk about how to choose citrus varieties, set up the right growing environment, and how to effectively care for them.


Popular Citrus Varieties for Indoors

Some of the best citrus trees for growing inside include:

  • Calamansi – bears fruit year-round
  • Key lime – small in stature like calamansi, perfect for containers
  • Meyer lemon – a classic lemon variety that flowers beautifully indoors
  • Kumquat – sweet edible fruits

You can also consider unique varieties like the Buddha’s Hand with its unique fruit, the thorny Australian finger lime, or fragrant yuzu. Blood oranges require lots of light but their antioxidant-rich fruit may be worth the effort.

Prepping for Your Citrus Tree

Before bringing home a new citrus plant, make sure that you have the proper growing conditions it requires. Citrus trees originate from subtropical climates and do best with 6-8 hours per day of direct sunlight, warm interior temperatures, and plenty of humidity. 

Have an appropriate sunny window or consider investing in a grow light like the Soltech Aspect™ LED Growlight. These lights can help your citrus tree grow well, and you can place them wherever you need to.

How to Grow Citrus Successfully

Citrus trees require deep yet infrequent watering. Use a well-draining soil like Espoma Organic Cactus Mix, which is designed not just for cactus, but also succulents, palms, and citrus. Wait until the top part of the soil is dry, and then water the tree a lot until water comes out from the bottom holes.

Place your citrus in terracotta to allow excess moisture to evaporate. Notably, Danny offers a range of pots crafted from recycled materials for this purpose.

Small adjustments to your citrus care can make all the difference, so observe them closely. Leaves that curl upward typically indicate underwatering while leaves that yellow or brown at the tips signal overwatering issues.

Feeding Your Citrus

Fertilize citrus plants during the active growing season. We recommend pairing Espoma Citrus-Tone with Espoma Bloom! liquid fertilizer when fertilizing indoor citrus. Bloom! is an effective option that ensures your citrus indoor plants receive the necessary nutrients without the risk of unpleasant smells. Slow or stop feeding over winter when trees enter a period of dormancy. 

Pruning and Pest Prevention

Prune citrus trees in early spring to remove any dead branches and shape them for better growth habits. Before you bring your citrus trees inside in the late fall, keep an eye out for tiny bugs like spider mites and aphids on them. Spray neem oil or insecticidal soap to prevent bringing pests indoors.


From Flower to Fruit

Don’t feel sad if your citrus has lots of blooms but only a portion of them form into actual fruit. Citrus decide how many fruits they can make depending on how much light and nutrients they get. So just enjoy the wonderful smell of citrus blooms!

Humidity for Healthy Citrus

Keep the air moist (40-60% humidity) for your citrus plants during dry winter when heaters are running. Using a humidifier can help keep the higher humidity during dry seasons. Even though citrus slows down in winter, don’t expose them to sudden temperature changes or drafts. 

Are You Ready to Grow Citrus?

Growing citrus indoors can be a rewarding experience for indoor gardeners. Observe them closely, make small adjustments, practice patience with fruiting times, and soon you’ll enjoy homegrown citrus for gourmet dishes and cocktails!

*****


Featured Products:


Where to Buy


https://www.espoma.com/wp-content/uploads/2024/03/1.png 1080 1080 Matt Dauphinais https://www.espoma.com/wp-content/uploads/2023/05/espoma-logo340w-1.png Matt Dauphinais2024-03-21 16:13:572024-03-21 16:46:20Growing Joy with Maria Blog – How to Grow Citrus Indoors ??

Growing Joy with Maria Blog – DIY Houseplant First Aid Kit

February 28, 2024/in Blog, Growing Joy with Maria, Indoor Gardening

As any experienced houseplant parent knows, emergencies happen. Maybe you discover mealybugs infesting your favorite plant. Perhaps a fungal leaf spot is spreading quickly on your Monstera. 

When these problems with your houseplants happen, you have to act quickly. You can’t waste time searching for the right tools to fix them. That is why a DIY houseplant first aid kit is very important.

This blog is inspired by Episode 208 of Growing Joy with Maria Podcast, where host Maria Failla chatted with certified horticulturist Leslie Halleck to talk about the important items to include in your DIY houseplant first aid kit so you can effectively address plant problems as they arise.

Must-Have Products for Your Houseplant First Aid Kit
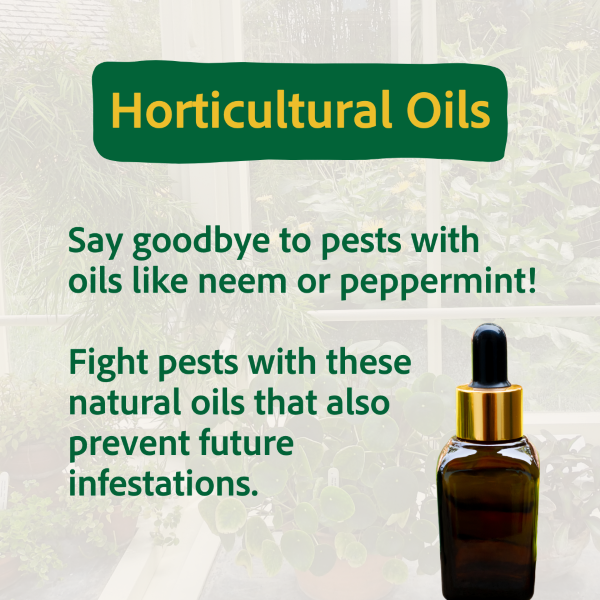
Horticultural Oils

Horticultural oils like neem oil, peppermint oil, etc. work to “smother” soft-bodied insects and fungal spores on contact. Some oils also help prevent future infestations.

Remember that when using these natural oils, pay attention to application instructions as some risk causing leaf burn if left on too long. 

Fungicides

Sometimes those annoying fungal leaf spots and powdery mildews just won’t quit. For these or other fungal issues, use a fungicide like copper soap or a bio-fungicide spray made from helpful soil bacteria.

These products can stop fungal diseases in their tracks and prevent their spread. For similar insect issues, some companies now offer bio-insecticides with ingredients like spinosad to repel pests.

Insecticidal Soap

Made from plant-based fats/oils, insecticidal soaps effectively gets rid of pests that have soft bodies by breaking down their protective coatings when it touches them.

The good thing is that it usually doesn’t harm most plants. If you need to spray or clean up pests from time to time, it’s a good idea to start with insecticidal soap first before resorting to stronger methods.

Systemic Pesticides

When all else fails, it’s time to bring out the final boss—systemics. Unlike other treatments, systemics are absorbed by the plant after application to the soil, causing any pest that feeds on it to ingest the poison.

But this should be used as a last resort due to toxicity concerns, especially if you have curious pets. Still, they’re very effective at managing pest issues.

Hydrogen Peroxide  

Best known for disinfecting human wounds, hydrogen peroxide eliminates pest larvae in potting soil and also increases oxygen flow to plant roots to aid struggling plants. Always dilute it first before applying.

Rooting Hormone 

When restoring a plant that has experienced root loss or damage, using powdered rooting hormone can help it grow back faster after being replanted. It’s also useful to have on standby for propagating cuttings!


Tools to Add to Your Houseplant First Aid Kit

Sticky Traps

Sticky traps can catch adult fungus gnats and other flying pests. Put these traps just above the soil level to keep tabs on potential infestations. 

But if you find a lot of pests stuck to the traps all at once, it’s a sign to do something about it.  While sticky traps alone won’t completely fix the pest problem, using them with soil treatments can help prevent more pests in the future.

Gloves

It’s important to shield your hands from irritation and chemicals with quality gloves. Leslie recommends these types of gloves when gardening:

  • Nitrile gloves – protect hands and allow you to physically remove pests by squishing or rubbing them off of leaves.
  • Cotton gloves – a softer option for gently cleaning leaves and polishing plants.
  • Rubber/latex gloves – offer hand protection when working with oils and chemicals.

Scissors and Pruners

Invest in a pair of sharp scissors and pruners solely for your houseplants. Not only do clean cuts improve healing, but using kitchen scissors risks bringing diseases inside.

Repotting Mat

These portable silicone mats provide a temporary clean surface for potting and treating plants. They prevent spilled soil or plant debris from dirtying floors and easily hose or wipe off afterward. No mess, no stress!

Humidity Domes

Is your Calathea being a “diva” again and wanting more moisture? Consider creating a mini greenhouse effect by either using plastic wrap to cover the pots or by placing transparent domes over your plants. This extra humidity will help the wilting leaves become healthy again!

Grow Lights  

Supplementing natural light helps stressed plants recover faster. Compact LED grow lights provide therapeutic light when nursing plants back to health.

PAR Meter

Advanced plant parents invest in handheld PAR meters to precisely measure usable light reaching their plants.

Magnifying Glass

A small magnifying glass equipped with a built-in LED light lets you inspect plants close up for early pest detection. The sooner you spot those tiny insects or fungal spores, the quicker you can spring into action before major damage occurs!

Moisture Meter 

These secondary tools monitor moisture content in potting mixes. While somewhat unnecessary for experienced gardeners, soil probes help prevent underwatering/overwatering issues for new plant parents.

DIY Houseplant First Aid Kit Essentials—Assembled!


*****

Compile your basic houseplant products and tools into a houseplant first aid kit for indoor gardening emergencies. Store supplies in tackle boxes, label them clearly, and keep the kit easily accessible near your plants. Don’t wait until it’s too late; prepare your DIY houseplant care first aid kit today!

Featured Products:


Where to Buy

https://www.espoma.com/wp-content/uploads/2024/02/DIY-First-Aid-Kit-1.png 1080 1080 Matt Dauphinais https://www.espoma.com/wp-content/uploads/2023/05/espoma-logo340w-1.png Matt Dauphinais2024-02-28 16:20:192024-10-21 12:36:09Growing Joy with Maria Blog – DIY Houseplant First Aid Kit

3 Tips for Anyone that Wants to Start Growing! ??|| Farmer Nick

February 22, 2024/in Blog, Farmer Nick, Indoor Gardening

3 Tips to Get GROWING! ?

1. Seeds!

Experiment with seeds! Yes, it may take longer, but it is incredibly rewarding and very cost-efficient. Plus you can start indoors with microgreens and level up to growing crops that can be transplanted (or succession planted) all throughout the growing season.

2. Lights!

Invest in grow lights. Not only will grow lights be valuable for your edible plants, but they also supplement the lighting for your houseplants during the darker winter months. Grow lights nowadays are very energy efficient and can blend in with most house lighting fixtures.

3. Check in!

Perform daily check-ins with your plants. This will allow you to be proactive and catch potential problems early and often. I do this for my indoor and outdoor plants (time permitting depending on the size of your garden) and it will save you lots of time and heartache in the future.

*****

Learn More about Farmer Nick here: 

Website: https://www.farmernick.com/

Instagram: https://www.instagram.com/farmernick/

Facebook: https://www.facebook.com/farmernick/

YouTube: https://www.youtube.com/channel/UCasGgFeyrf2V81w3KxnE4qQ


Featured Products:


Where to Buy


https://www.espoma.com/wp-content/uploads/2024/02/farmernick_1666207163_2952682151306243375_201959487.jpg 1440 1440 Matt Dauphinais https://www.espoma.com/wp-content/uploads/2023/05/espoma-logo340w-1.png Matt Dauphinais2024-02-22 12:03:112024-02-22 13:11:353 Tips for Anyone that Wants to Start Growing! ??|| Farmer Nick

Seed Starting 101: How to Start Seeds Successfully

April 5, 2022/in Blog, Bloom and Grow Radio

Seed starting setup

Seed starting is upon us in the gardening world! There is no better way to connect with the food we eat than by growing it ourselves. Starting edible plants from seed can be intimidating, but we’re here to break it down and answer all your burning questions. 

This blog is inspired by Episode 114 of Bloom and Grow Radio–where host Maria Failla interviewed Joe Lamp’l–the Joe behind The joe gardener Show.

Before we dive into the how of seed starting, let’s understand the why. 

Why Start Your Garden from Seed? 

In our world of instant gratification, what’s better than starting your gardening season way sooner than most gardeners?! When you start seeds indoors, you get your hands in the dirt and get a jump on the growing season. And what a rewarding feeling it is to start your plants from seed, and enjoy the journey of bringing them from seed to plate. 

If you love your edibles, decide what you want to eat and which varieties you want. Don’t leave it up to what’s available at the garden center. Think about how much you can choose when you start from seed: flavor, varieties, and the stories behind different heirlooms. You can really expand your food choices when you get to pick exactly what you grow. 

Another great reason to start your own seeds is to make sure you’re growing the right kind of plant for your needs. Do you absolutely love tomatoes, but only have a small balcony to grow them? Look for microdwarf tomato varieties that only grow about 1-2 feet tall! If you have a short growing season, you’d also want to make sure you choose “early” or “short season” plant varieties. 

Starting from seed offers us the ability to be in control of the varieties we grow, plan in advance, and save lots of money in the long run. Speaking of starting seeds on a budget…

How to Get Your Seed Starting Setup for Under $100

Your seed starting setup can be super budget-friendly if you take the time to look at the components. For under a hundred dollars, you can put together everything you need! Let’s break down the materials, costs, alternatives, and conditions you need for seed starting. 

Seed Starting Mix

To start, you need a good seed starting mix. It’s called a “mix,” because there’s really no soil in it. It’s made of natural ingredients like peat moss, vermiculite, and perlite. A bag of seed starting mix is going to cost between $5-$10.

Espoma Organics takes the guesswork out of your selection by providing their high quality seed starting mix. 

Seed Starting Trays

With one bag of seed starting mix, you can fill about two seed starting trays, which is your next material needed. Seed starting trays can give you anywhere between 18 to 72 cells to sow your seeds. You can get two trays for about $10. 

Look for seed starting trays with cells about 3.5 inches or smaller. In a traditional seed starting tray, cells are deep so seedling roots have more room to grow down. About 4 weeks from germination you’ll have to transplant your seedlings into a larger individual pot, AKA “potting up”.

Best Grow Lights for Seed Starting

Next is a grow light. Grow lights are where you could spend a lot of money in your seed starting setup, but if you’re on a budget, there is nothing wrong with buying an LED or fluorescent shop light for $20. You can get your seeds sprouted and ready for planting outside in good condition with a very inexpensive shop light. Will it be as good as a seedling that’s under a more expensive light? Maybe not, but all you’re really trying to do is rear those seedlings to the point that they are ready to go outside. Once they get outside, Mother Nature knows what to do and so does that seedling.

What are Heat Mats for Seed Starting important?

Heat mats are seed starting game changers. Heat mats raise the soil temperature, which helps your seeds sprout faster. Seeds have an ideal range of soil temperature in which they sprout the best, and can be anywhere from 65 to 85 degrees Fahrenheit. Seed mats will cost you between $15 and $35, depending on whether you get a thermostat attached.

Once most of your seeds have germinated, remove them from the heat mats. If you leave your seedlings on heat too long, they can start to become leggy. 

Humidity Dome for Germination

You’ll also want a humidity dome. It’s a clear plastic top that you put over the seed tray to hold the moisture in the soil until the seed germinates. If you don’t have a cover on your tray, the moisture won’t stay in the soil and the seed is not as likely to germinate. For two humidity domes, you’ll probably pay about $6. You can also use plastic wrap and lay it over the top to hold in moisture for your seedlings. 

A key point to remember with humidity domes: once your seeds germinate, remove the humidity dome so seedlings get enough oxygen. Airflow brings us to the next material needed. 

Small Fan for Seed Starting

Last but not least, a fan. You can get a cheap clip-on fan for $15. Fans are important because once the seed germinates, you need air movement across that soil surface. Air movement reduces the chance of a fungal disease called damping off, which can kill your seedlings. Fans also simulate wind, making the stems sturdier and ready for outdoor conditions.

Total Seed Starting Materials Cost

Here’s the cost breakdown to get your seed starting setup for less than $100:

Bag of seed starting mix: $10

2 seed starting trays: $10

Shop light: $20

Heat mat: $15 – $35

Humidity dome: $6

Clip-on fan: $15

TOTAL: $81 – $96

All about Seeds: Where to Buy Them, Expiration Dates, & Non-GMOs

It’s important to find a good seed company. Here are some tips when you’re searching: 

  • Look for companies that have been around for a while with a good reputation. 
    • Do they have good customer service? 
    • Are their staff knowledgeable about their seeds? 
  • Find local or regional seed companies that grow their seeds close to home. Some seed companies can outsource their seeds from overseas from a huge commercial supplier. It’s important to know where your seeds are grown. 
  • When you grow seeds adapted to your area, plants have a much better success rate. The more you grow those seeds and save them, the more adapted they’ll become to your specific microclimate too! 

Seed Expiration Dates 

Seed packets will show the day that the seed was packed. Assuming you have leftover seeds and you keep them in a cool, dark, dry place, they will last anywhere from as little as one year to many years, depending on the seed. 

How do you know when a seed is still good or if it’s gone bad? Do a germination test! Before you plant your seeds, put about 10 seeds in a damp paper towel in a plastic bag. Check the moisture daily and after about 10-14 days, your seeds will either have sprouted or not. If 7 out of 10 sprouted, your viability is about 70%. Depending on your viability you can either plant extra or compost unusable seeds.

What are Non-GMO Seeds?

GMO stands for Genetically Modified Organism. Many seed companies have jumped on the bandwagon saying all of their seeds are “certified non-GMO.” There actually aren’t any GMO gardening seeds available for home gardeners. None of the seeds you purchase will ever be GMO seeds. GMO seeds are present in the commercial agriculture industry, but it’s expensive to produce a GMO seed and it’s not anything that we’re going to even be able to buy. So if a company is touting non-GMO seeds, that’s true, they are. But so are everyone else’s.

The Best Time to Start Your Seeds

The most important date you need to know is the last day that you are potentially going to have frost. This is called your frost-free date in Spring. You can find yours by Googling “last frost date” in your area. Once you have that date, then you work backward to about 6-8 weeks. That’s when you’ll be sowing most of your seeds.

You want to time your seed starting so you give your seeds about 6-8 weeks of growing time indoors. By the end of the 6-8 weeks, seedlings will have grown to a sturdy size and are then ready to grow outdoors. If you choose a good seed company, there should be lots of information about this on the back of the seed packet.

If you start your seeds too early, you risk your plants getting too big and outgrowing their space. They’re going to be looking for resources that you probably can’t provide indoors, like more light, nutrition in the soil, and space to grow. The longer your seedlings are confined indoors without the right environment, the more stressed they become. Timing when you plant your seeds is crucial to the seed starting process. 

Let’s Get Planting! 

Now that you’ve got your seed starting setup and timing down, how do you get your seeds in the soil? 

First, look at the information on your seed packet. It will typically have all that important seed starting information you need, including how many weeks to start indoors, days to maturity, and growth patterns. 

Make sure your seed starting mix is pre-moistened, like a damp sponge. Most seeds don’t need light to germinate, but they don’t need to be planted very deeply either. Once you have your seeds in, sprinkle a little bit of extra seed starting mix on top. Spray the tops of the soil gently with water so you don’t move the seeds around too much.

When your seeds are planted, place your humidity dome on top, put your tray on your heat mat, and turn your lights on. Your seedlings are going to sprout in a matter of days to a week, maybe two weeks at most. Once your seeds germinate, remove your humidity dome and turn on your fan. From there, you’re just ensuring that the soil stays moist.

The first leaves that come up are called seed leaves, or cotyledons. In a few weeks, your plants will grow new “true” leaves. Once those new true leaves emerge, you can start to add small amounts of supplemental fertilizer.

Your job over the next 4-5 weeks will be monitoring plant growth and making sure everything looks good. Keeping the lights at the proper distance above the tops of the seedlings is also key–not too close, not too far away.

The Final Step: How to Harden Off Your Plants

Hardening off is about 7 to 10 days of transitioning your seedlings slowly to outdoor conditions. You slowly increase the tender, new leaves’ exposure to sun and wind over about two weeks. Make sure outdoor temperatures are above 45 degrees Fahrenheit with no inclement weather during this period, and bring plants indoors every evening.

Here is a rough schedule to follow: 

  • Days 1-2: 1-3 hours outdoors in shade
  • Days 3-4: 3-5 hours outdoors in shade
  • Days 5-6: 3-5 hours outdoors in morning sun
  • Days 7-8: 7-12 hours outdoors in sun
  • Days 9-10: Leave plants outdoors overnight 

Once you’ve gotten your plants used to the outdoor elements, they’re all ready to be planted in their new homes outdoors! 

*****

Featured Products:


Where to Buy

https://www.espoma.com/wp-content/uploads/2022/04/Seed-starting.png 500 500 espoma https://www.espoma.com/wp-content/uploads/2023/05/espoma-logo340w-1.png espoma2022-04-05 08:25:302023-12-06 13:46:36Seed Starting 101: How to Start Seeds Successfully

Plant Care Is Self-Care: Nurture Yourself as You Nurture Your Plants

December 11, 2019/in Blog, Indoor Gardening

Plant care - person watering a potted plant

Ever notice how a moment spent tending your plants feels like a mindful pause in a busy day? You’re not just watering—you’re nurturing calm, presence, and connection. We believe that caring for your green companions is one of the most natural forms of self-care. And just like you thrive on nourishing food, your plants thrive when you feed them regularly with Espoma Organic fertilizer —gentle, effective, and safe for people, pets, and the planet.


man working in an office filled with plants

The Science Behind the Serene

Sharper Mind + Better Mood
Studies show that being around plants can boost memory and attention by about 20%, while reducing background noise and enhancing productivity and creativity—especially in home or little work-from-home nooks.

Soil for the Soul
That earthy scent? It comes from microbes like Mycobacterium vaccae (lovingly nicknamed “outdoorphins”), and they don’t just feed your plants—they may help boost your mood and immunity, too.


Maria from Growing Joy with Maria with plants and organic potting soil and organic fertilizer from Espoma Organic Potting Mix and Bio-tone on her balcony

Self-Care That Doesn’t Feel Selfish

Pulling weeds, misting leaves, or simply observing new growth—these are gentle rituals that anchor us in the now. As one soothing tip from our brand partner, Maria Failla of Growing Joy with Maria, reminds us:

“Use watering or caring for them as an excuse to get up from your computer and take some ‘me-time’—because plant care is self-care.”

Pair that with feeding your plants Espoma Organic fertilizer, and you’re nourishing life in every sense.


Indoor Joy: Caring for Your Plants with a Gentle Boost

Your indoor plants do more than brighten a room—they improve your air, calm your mind, and remind you to slow down. To keep them thriving year-round, a little extra nourishment goes a long way.

That’s where Espoma Organic Indoor! liquid fertilizer comes in. This gentle, balanced formula is made from natural ingredients and feeds instantly, giving your leafy friends the nutrients they need for lush growth and vibrant color—even in the lower light of winter months.

Self-Care Tip: Pair your plant feeding with your own wellness ritual. Set a reminder every 2–4 weeks to water and feed your plants, then take a few minutes to enjoy a cup of tea nearby. Watch how your plants respond over time—you’ll notice deeper greens, healthier new leaves, and a little spark of joy in your day.


Norfolk-Island-Pine-in-a-white-pot

Festive Downtime: Holiday-Ready Green Retreats

During the busy holiday season, a mini Christmas cypress or Norfolk Island Pine—with its fresh sap-like scent—can be both a peaceful décor choice and a mindful project. Pot it up in our Espoma Organic Potting Mix, give it a slow sip of water, and feed it with an organic fertilizer like Indoor! for lasting joy. It’s a gift that grows for you, not just from you.


Fresh Ways to Deepen Plant-Based Self-Care

  1. Micro-Meditation Moments
    Set a daily two-minute ritual—touch the soil, check a leaf, breathe deeply. Call it a “plant-powered reset.”

  2. Mini Salad Gardens with Maria Failla
    Maria Failla of Growing Joy with Maria, makes self-care—and dinner—even simpler. She grows an entire salad (including herbs, lettuce, mini-tomatoes, and edible blooms) in a single container using Espoma Organic Potting Mix, Bio-tone Starter Plus, and Garden-tone organic fertilizer for steady nourishment. 

  3. Create a Kitchen Corner of Calm
    A small shelf of herbs like basil, lavender, or even mint provides an aromatic escape and practical joy when cooking. Watering and feeding them with organic fertilizer like Indoor! can become a lovely action in your daily rhythm.

  4. Mindful Mondays with Biophilia
    Start your week by simply sitting with your plants—observing new buds, leaf shapes, and subtle color shifts. This biophilic practice connects you to growth and groundedness.


woman watering indoor plants

Let Your Care Shine Through

Plant care is not just about pretty greenery—it’s caring for yourself, too. You pause, breathe, tune in, and the soil responds. Whether it’s a festive tree, a potted herb, or a tranquil succulent, your green space is your sanctuary. And with a little love, light, and organic fertilizer, your plants—and your spirit—can truly thrive.

*****

Here are some of our other blogs and videos we think you will enjoy.

Give Some Green for the Holidays

Parenting Advice for New Plant Parents

Poinsettia Care Guide from Garden Answer

Featured Products:

Espoma Organic Indoor! Liquid Plant Food Image

Espoma Organic Bio-tone Starter Plus Bag ImageEspoma garden-tone

Where to Buy

https://www.espoma.com/wp-content/uploads/2019/03/IMG_3162.jpeg 3368 6000 espoma https://www.espoma.com/wp-content/uploads/2023/05/espoma-logo340w-1.png espoma2019-12-11 11:54:012025-08-13 14:53:41Plant Care Is Self-Care: Nurture Yourself as You Nurture Your Plants

VIDEO: Spring Flowers Melt the Winter Blues with Garden Answer!

March 19, 2019/in Blog, Flowers, Garden Answer

Spring has sprung and it’s time to get outside and plant up some early spring containers. A trip to the local garden center will surely inspire you. Plant big pots of brightly colored bulbs and annuals to liven up entryways, patios and balconies. Laura from Garden Answer shows you just how easy it is to do in the video below.

Laura fills her containers with tulips and violas, true harbingers of spring. Alternatively, you could also use daffodils and other cold hardy annuals like Iceland poppies or nemesia. In cold climates, it’s important to select plans that are hardy enough to withstand a cold snap.

These early spring containers will flower for a month or so, bridging the gap from early spring to the frost-free date. When it’s time to plant summer containers, replant the tulips out into the garden where they’ll bloom again next spring. The violas may also be moved to a lightly shaded area of the garden.


Four Easy Steps to Early Spring Containers

  1. Prep Containers. Fill containers three-quarters full with good, quality potting soil like Espoma’s Potting Mix and prepare to plant bulbs at the depth they were in the nursery pot.
  2. Add Nutrients. Add Bulb-tone fertilizer to the soil, following package directions.
  3. Get ready to plant. Gently remove the plants from their pots and loosen roots. Add plants.
  4. Finish it up. Backfill containers with more potting soil and water deeply.


Enjoy flowers for even longer by choosing tulips or daffodils that are not yet in full bloom. When finished blooming, just remove the flower stem. The leaves will still provide a vertical accent and the bulbs need the foliage to replenish themselves.

Taking time to deadhead the violas will extend their bloom time. If temperatures are cool, you may only need to water containers once a week.

Check out these videos from Garden Answer about tulips and early spring planting.


Plant Your Window Boxes Like Garden Answer


How to Care For Your Tulips After They’ve Bloomed


Featured Products:


Where to Buy

https://www.espoma.com/wp-content/uploads/2019/03/Thumbnail.jpg 1080 1920 espoma https://www.espoma.com/wp-content/uploads/2023/05/espoma-logo340w-1.png espoma2019-03-19 14:13:302024-03-13 15:58:00VIDEO: Spring Flowers Melt the Winter Blues with Garden Answer!

5 Ways to Give Your Summer Garden a Boost

July 13, 2017/in Summer Gardening

There’s no better way to enjoy your garden than by encouraging it to grow bigger and better. Before your summer veggies and flowers peak, take your garden to the next-level by refueling it.

Knock-out these 5 essential tasks and your garden will thank you. You’ll extend your summer season and ensure that your lawn and garden are in tip-top shape.


5 Ways to Give Your Summer Garden a Boost

1. Hydrate. When it’s hot, dry and muggy, the best thing is a nice cold drink. Your plants need some H2O, too. The trick to keeping your garden hydrated during the hottest days is not to water more. It’s to water smarter. Water plants deeply in the morning so they have the entire day to soak it up.

Image courtesy of Garden Answer

2. Keep plants fed. Your summer veggies and flowers are hungry. Feed hanging baskets, container gardens and annuals with liquid Bloom! plant food every 2 to 4 weeks. Vegetables such as tomatoes and peppers are heavy feeders. Continue to feed every 2 weeks with organic fertilizers Tomato-tone or Garden-tone.

3. Prune and deadhead. Extend the life of perennials by deadheading flowers as soon as they are spent. This will encourage plants to keep blooming as long as weather permits. Your roses will thank you. Prune tomato suckers and shrubs now, for fuller plants later.

4. Mow lawns strategically. When mowing, keep the mower blades high (3” or higher) to encourage healthy roots. Cut grass in the evening to give it time to recover and keep yourself cool.

5. Plant more! There are many quickly maturing plants that will thrive in summer gardens and be ready for harvest in the fall. Try planting radishes, cucumbers, beans and more.

Sit back and relax! Take a good look at your hard work and dream about the rewards and bountiful harvests you’ll enjoy in the months to come.

If you’re looking to get a better tomato harvest this summer, be sure to check out our complete tomato guide!

*****

Featured Products:


Where to Buy

https://www.espoma.com/wp-content/uploads/2017/07/June-1A.jpg 444 1200 espoma https://www.espoma.com/wp-content/uploads/2023/05/espoma-logo340w-1.png espoma2017-07-13 17:24:472024-07-23 15:37:025 Ways to Give Your Summer Garden a Boost

May Gardening Checklist: 5 Essential To-Dos for a Thriving Garden

May 2, 2017/in Blog, Spring Gardening

May is one of the busiest and most exciting months in the garden. Flowers are blooming, veggies are sprouting, and summer crops are ready to go in. But to keep your garden thriving naturally, it’s important to use the right organic products to nurture your soil, plants, and harvest.

Here’s your Espoma-approved May checklist to prep your garden for a healthy, productive summer season.

Garden Clean up

1: Tidy Up Your Garden Space

Start fresh by clearing out weeds, dead plants, and old debris — this keeps pests and diseases in check and opens up space for new growth. As you tidy up, top off your beds with Espoma Organic Land & Sea Gourmet Compost to enrich the soil with nutrients and improve texture.

Once your garden is clean, you can apply a layer of mulch to help conserve moisture and regulate soil temperature. This simple prep sets the stage for everything that comes next.

spring crops

2: Harvest Early Spring Crops

Your cool-weather crops like lettuce, spinach, radishes, and peas are likely ready to harvest. After picking, don’t leave that soil depleted! Replenish it by working in Espoma Organic Garden-tone or Plant-tone to restore nutrients before planting your summer vegetables.

For container gardens, refresh the mix with Espoma Organic Raised Bed Mix or Potting Mix so your new plants have a rich, organic base to grow in. Healthy soil = healthy crops.

People planning a project

3: Plan Your Garden Layout Thoughtfully

Before you rush to plant, take a little time to sketch out your garden plan. Group plants with similar needs together, and research what varieties perform best in your area. If you’re unsure, visit a local garden center and look for recommendations — and while you’re there, pick up organic fertilizers suited for what you’re planting (like Espoma Organic Tomato-tone for tomatoes, Berry-tone for berries, or Rose-tone for roses).

Planning ahead ensures you can match the right organic products to the right plants, maximizing growth and minimizing problems down the line.

planting with organic fertilizer

4: Get Planting — and Feed Organically

Once your area is frost-free, it’s time to plant! Whether you’re planting veggies, flowers, or herbs, give them the best start by enriching the planting hole with Espoma Organic Bio-tone Starter Plus. This starter fertilizer contains mycorrhizae, which help plants establish strong root systems and reduce transplant shock.

As the season goes on, continue feeding regularly with Espoma Organic Tone Fertilizers, depending on what you’re growing. These slow-release, organic fertilizers keep plants nourished naturally, without the risk of burning or chemical buildup.

planting

5: Transfer Indoor Seedlings Outdoors Carefully

If you started seeds indoors, harden them off gradually before moving them outside. Once ready, plant them in your garden or containers and mix Espoma Organic Bio-tone Starter Plus into the soil. This ensures young plants have access to the nutrients and beneficial microbes they need to get established and grow strong healthy roots.

For containers, fill pots with Espoma Organic Potting Mix, which provides excellent drainage and moisture retention while feeding plants with organic ingredients. Don’t forget to water thoroughly after transplanting to help roots settle in.

family in vegetable garden

🌸 Bonus Tip: Keep Feeding and Caring All Season Long

Throughout the summer, keep an eye on your plants. Feed every month or as needed with the appropriate Espoma Organic fertilizer for each plant type. Water deeply at the base, mulch to retain moisture, and enjoy the lush, organic garden you’ve worked so hard to create.

With the right products and a little care, you’ll be harvesting beautiful, homegrown food and flowers all summer long — the organic way!

Featured Products:

Espoma Organic Potting soil Mix Big bagEspoma Organic Land and SeaEspoma Raised Bed Mix bag  Espoma Organic Tomato-toneEspoma Organic Rose-tone bagEspoma Organic Plant-tone organic fertilizer

Where to Buy

https://www.espoma.com/wp-content/uploads/2018/05/Curb-appeal-hosta-black-eyed-susan.jpg 850 1280 espoma https://www.espoma.com/wp-content/uploads/2023/05/espoma-logo340w-1.png espoma2017-05-02 08:00:312025-05-06 14:10:27May Gardening Checklist: 5 Essential To-Dos for a Thriving Garden
Page 3 of 3123
Where to Buy

Get News & Updates

Recent Posts

  • VIDEO: Planting Tips 🌿 with Wyse Guide
  • VIDEO: Planting Trees and Perennials 🌳🌺 with Wyse Guide
  • VIDEO: Late Summer Plantings ☀️🌿 with Wyse Guide
  • VIDEO: Growing Veggies and Herbs 🍅🌿🥕 with Summer Rayne Oakes
  • VIDEO: August Garden Refresh ☀️🌿🌸 with Skye Hamilton

Tags

All-Purpose Potting Mix bio-tone Bio-tone Starter Bio-tone Starter Plus Cactus Mix caring for houseplants Container Gardening DIY project Espoma espoma grown espoma organic Espoma Organics Espoma Video fall gardening Family flower garden flowers garden Garden Answer Gardening gardening tips gardens grow holly-tone houseplants Indoor! indoor gardening indoor plants Kaleb Wyse organic organic fertilizer Organic Gardening organic plant food Organic Potting Mix Outdoor Gardening Planting plants Potting Mix potting soil Spring Gardening succulents summer rayne oakes vegetable garden Vegetable Gardening Wyse Guide

Espoma. A Family Tradition Since 1929.

Espoma Organic logo
  • Espoma Dealer
  • Espoma Pro
  • Garden Club
  • Privacy Policy

Scroll to top