Espoma Organic
  • Products
    • Close
    • Product Line Overview
    • Plant food finder
    • Garden Fertilizers
    • Potting Soils
    • Lawn Fertilizers
    • Liquid Fertilizers
    • Single Ingredients
    • Conventional Plant Foods
    • Animal Care Products
  • Where to Buy
  • Our Story
    • Close
    • Our Story
    • Locations
    • Historical Timeline
    • Our Commitment
    • Directions
    • Solar
    • Join our Team
    • Espoma Brand Partners
  • Learn
    • Close
    • Espoma Blog
    • FAQ’s
    • Pocket Guide
    • Espoma Guides
    • Garden Clubs
    • Safe Paws Lawn
    • PRODUCT FACT SHEETS
    • Fertilizer Fundamentals
      • Close
      • Understanding Plant Nutrition
      • Reading Labels
      • Choosing the Right Type of Fertilizer
      • Terms & Definitions
    • Gardening Projects
    • Resource Links
  • Contact Us
  • Menu Menu

Plants Only a Mother Would Love

May 10, 2018/in Indoor Gardening

From crayon stick figures to loud burps, Moms are notorious for thinking anything their kids do is cute.

This Mother’s Day, brighten mom’s day by giving her a plant that’s just as unique as you. And if you choose the right plant, it will last for years to come. From succulents and cacti to brilliant foliage plants, there is a plant that will bring some extra sunshine to her life every day. She knows you better than anyone else, so remind mom just how awkward and quirky you were as a child.

Baseball Plant

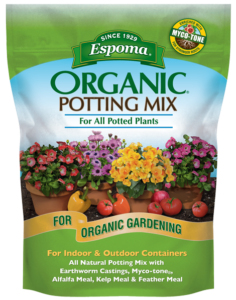
The low-maintenance, euphorbia obesa, comes in a baseball-like shape. Perhaps it’ll remind mom of your little league days. This is a cactus, so it simply needs a warm climate, light and a well-draining soil such as Espoma’s Cactus and Succulent mix.

‘Wine Cup’

Crassula umbella is perfect for the mom who loves taking trips to the vineyard, with her children of course. When it flowers, this plant can grow up to six inches tall. This succulent likes well-drained soil and dry roots, so don’t overwater.

Donkey tails

Remind mom of your playful nature with a donkey tail plant. These succulents drape over containers in a trailing way. With their grey-green tear-drop shaped leaves, the “donkey tails” can grow up to two feet long. Flowers with small blossoms in red, yellow or white will emerge in late summer. Place these sun-loving succulents near a sunny window and water weekly during spring and summer.

Nerve Plant

If mom’s always saying you’re getting on her nerves, try getting her an actual nerve plant! Also known as Fittonia, the name ‘nerve plant’ comes from the attractive pink, red or white veins that run throughout the plant’s rich green leaves. Their bright coloring and great patterns will surely ease mom’s nerves every time she looks at it. This plant also makes a great addition to a terrarium. Place it in a space where it’ll receive medium to low light. Too much sun can cause leaves to crisp. Water the plant weekly, when the soil starts to dry. Nerve plants need regular fertilizing, use Espoma’s Indoor! Liquid fertilizer to encourage new growth.

Yes, more traditional moms might prefer something like an exotic orchid or a lovely pink succulent, but the above are sure to make her smile. Visit your local garden center to find the right plant.

Want to do something different from mom? Try this hand print planter from Garden Answer.

https://www.espoma.com/wp-content/uploads/2018/05/donkey-tail-succulent.jpg 667 1000 espoma https://www.espoma.com/wp-content/uploads/2023/05/espoma-logo340w-1.png espoma2018-05-10 13:00:502024-08-21 05:06:36Plants Only a Mother Would Love

DIY Mother’s Day Planter

May 9, 2018/in Espoma Videos

Calling all moms out there! This Mother’s Day, create a gift any mom will love with the help of your little one. Yes – it is a bit messy, but it is worth every drop of paint. If you don’t have a little one to help, you can make your own classic piece that will go well anywhere you place it.

Laura from Garden Answer is a new mom this year, so she is diving right into this project for her mom – with the help of Benjamin. This project is perfect for any woman out there.

Espoma Products Needed:

Espoma Organic Potting Soil Mix


Where to Buy

Other Materials needed:

  • Terra Cotta Pots
  • Chalk Paint (Two Colors – One Light and One Dark)
  • Tempera Paint (Various Colors, Black)
  • Photo Paper or Stencils
  • Exacto Knife or Box Cutter for Photo Paper
  • Paint Sponges
  • Smaller Paint Brush
  • Q-Tips
  • Clear Acrylic Sealer
  • Two to Three Plants
  • Wet Ones (For Clean- Up)

Steps for Painting a Monogrammed Planter:

  1. Print off what border and monogram you want to use on photo paper and cut out the design. If you want to skip this step and use a stencil you found at the store instead, feel free to do so. Set this aside.
  2. Paint the outside of the pot with the lighter colored chalk paint so it is one even color. Continue painting the inside rim. This is to ensure uniformity when the plant is inside and the soil doesn’t hit the top. Let dry.
  3. Hold the stencil on the pot carefully, or tape it down where you want it. Using a clean sponge brush dab the inside of the stencil with the darker chalk paint. Let dry and repeat if you have multiple stencils.

*If you want to mute the paint a bit, dab it onto paper or cardboard to lessen the amount of paint on the brush.

  1. Once your pot is dry, spray a clear acrylic sealer the all around the outside and inside of your pot. Since terra cotta is porous and water will seep, you want to ensure your paint isn’t ruined.

Steps for Painting a Butterfly Mother’s Day Planter:

Note: This planter requires the use of small feet, best to ask your little one to help! Grab him or her and let’s get started!

  1. Paint the bottom of your little one’s foot and gently place it on the pot. Use the same color twice in a “V” shape to make the butterfly wings.
  2. Repeat with different colors around the pot.
  3. Take the smaller paint brush and paint black bodies for the butterflies.
  4. Use the Q-Tip to make the ends of the antennae. Repeat step for every butterfly around the pot.
  5. Let dry!
  6. Once your pot is dry, spray a clear acrylic sealer the all around the outside and inside of your pot. Since terra cotta is porous and water will seep, you want to ensure your paint isn’t ruined.

Time to fill both planters with Espoma Organic Potting Mix and plant them up! Laura puts a Peachberry Ice Heuchera in the monogrammed pot to give it the classic farmhouse feel. She plants a Superbells Yellow and a Superbells Grape Punch in the butterfly pot to keep the bright fun colors feel.

Every mom – or grandma – will love these custom made planters. Happy Mother’s Day! Watch the extended version here.

https://www.espoma.com/wp-content/uploads/2018/05/IMG_9751-thumbnail.jpg 1684 3000 espoma https://www.espoma.com/wp-content/uploads/2023/05/espoma-logo340w-1.png espoma2018-05-09 11:00:522019-05-07 09:58:08DIY Mother’s Day Planter

DIY Mother’s Day Planter (Extended Cut)

May 9, 2018/in Flowers

Calling all moms out there! This Mother’s Day, create a gift any mom will love with the help of your little one. Yes – it is a bit messy, but it is worth every drop of paint. If you don’t have a little one to help, you can make your own classic piece that will go well anywhere you place it.

Watch the quick version here with a complete list of materials and instructions.


https://www.espoma.com/wp-content/uploads/2018/05/IMG_9751-thumbnail.jpg 1684 3000 espoma https://www.espoma.com/wp-content/uploads/2023/05/espoma-logo340w-1.png espoma2018-05-09 11:00:192019-05-07 09:58:43DIY Mother’s Day Planter (Extended Cut)

Purple Please – Top Purple Plants for Your Garden

May 8, 2018/in Flowers

Every year gardeners want to expand their gardens to offer new colors and plants to make it fresh.

This year, Ultra Violet is the color on trend, so we looked for the best purple plants to include. We created this list of a variety of flowers, foliage and pollinators to fit any need. Plus they all smell divine.

When planning to plant, start your new plants off right with Espoma’s Organic Bio-Tone Starter Plus plant food plus mycorrhizae.

Top 5 Purple Plants

  1. Lavender

Not only is lavender a beautiful purple shade, but it has a strong fragrance that helps to alleviate stress. Lavender, with its attractive foliage, purple flowers and scent is the symbol of summer which is a must for every garden. Bloom time is from June to August.

  1. Verbena

Clusters of little purple flowers top the stems of this beautiful plant. Verbena is drought tolerant, so it fits into any climate. Bunched together this plant can pack a punch of color. Bloom time is from summer through fall.

  1. East Friesland Salvia

This plant shines purple through and through. This salvia plant is popular for the long spikes of purple flowers that bloom in the summer and fall. It is a pollinator plant, attracting everything from bees to hummingbirds.

  1. Heliotrope

Perfect for containers near your entryways, Heliotrope is known for its vanilla fragrant flowers. It is a wonderful treat for summer, especially when paired with lemongrass and lavender. These purple flowers are small and dense, but should not be overlooked. Bloom time is summer through fall.

  1. Purple Bee Balm

While the most popular varieties of bee balm is red, there are some beautiful selections that bring purple flowers. They are easy to grow and will bloom from summer through fall. It is a great pollinator plant, loved by hummingbirds and bees.

For even more options, head to your local garden center to see what plants work well for your area.

Once your new plants are established, feed regularly with Espoma’s Organic Grow! liquid fertilizer. It gives them the boost they need to have bright colors and vibrant blooms.

Espoma products in this blog:


Grow! Plant Food


Where to Buy
https://www.espoma.com/wp-content/uploads/2018/05/Purple-heliotrope.jpg 847 1280 espoma https://www.espoma.com/wp-content/uploads/2023/05/espoma-logo340w-1.png espoma2018-05-08 08:00:112024-08-16 15:15:37Purple Please – Top Purple Plants for Your Garden

How to Grow Your Own Topiary

May 4, 2018/in Trees & Shrubs

Topiaries are plants that have been pruned and trained to grow into distinct decorative shapes. They’re basically slow-growing artistic masterpieces. Whether you grow them geometrically or fanciful like spirals, spheres or even elephants, the options are endless.

Topiaries can be grown from vines or shrubs, and even some herbs. The amount of time it takes to grow a topiary will depend on the topiary’s size and the number of plants you use. Most gardeners use a topiary frame or form to get the look they desire. Visit your local garden center to find out more about the best plants for your topiary.

Topiaries with vining plants

When using vining plants, you’ll need to get a topiary form to encourage the vines to grow in the shape you’ve chosen. English ivy, Boston ivy and periwinkle are popular choices for vining topiaries. To start, fill the form with sphagnum moss to create a full look. Then, plant the vine around the form, allowing the vines to grow upward. You may need several plants to achieve a full look. As the vines grow, train them by wrapping and attaching them around the form with plant ties or wires and pruning regularly.

Topiaries with shrubs

Start small when making a shrub topiary. Choose a variety such as holly, boxwood or laurel. Look for dwarf varieties that will stay compact and won’t need much pruning. If you’re looking to create a pyramid or geometrical shape, select shrubs with tall growth habits such as yews or hollies. For statuesque spirals and cones, choose arborvitae. Beginners will want to use topiary frames to sculpt their designs, which will also help when deciding what needs to be pruned. To train and prune your topiary, you’ll need a clear vision of how you want the topiary to look. Pruning encourages new and bushier growth, but don’t cut off more than 3 inches in the areas you want to trim back.

Fertilizing topiaries

Help topiaries reach their full potential as quickly as they can by using Espoma’s Bio-tone Starter Plus when planting. Follow-up with Espoma’s Grow! liquid fertilizer. Grow! encourages root growth and deep green foliage that will surely delight. For acid-loving plants like hollies, use Holly-tone for best results.

Remember that topiaries take time and so be patient. Your time, maintenance and patience will pay off!

https://www.espoma.com/wp-content/uploads/2018/05/topiary-garden-bench.jpg 874 1280 espoma https://www.espoma.com/wp-content/uploads/2023/05/espoma-logo340w-1.png espoma2018-05-04 15:00:552024-08-16 13:50:39How to Grow Your Own Topiary

Nosey Rosy – Guide to a Rose Garden

May 1, 2018/in Flowers

Rose gardens are one of the most classic pieces you can add to your landscape. With some love and regular upkeep, they can last for years.

Roses bring beauty by either becoming the statement plant or a fine complement to focal point. You can use roses to cover up an unsightly area or introduce a new fragrance, they are incredibly diverse. Roses are offered in a large variety of colors and patterns to match anyone’s need.

When choosing the best rose for you garden, be sure to know how much sun the area gets. Check the tags on the rose plants to ensure you are picking up ones that will thrive in yard. If you aren’t sure what to choose, your local garden center can help choose for your space and your region!

Planting Tips for Rose Gardens:

  1. Plant Time. Wait until after the last frost to get your roses in the ground. Most roses want to establish roots in the spring before the weather gets too hot.
  2. Space is Key. When planting, dig a hole deep and wide enough to accommodate the roots. If you are planting more than one bush, keep at least 3 feet in between each plant. Add Bio-tone Starter Plus to promote bigger blooms.
  3. Feed Often. Give roses Espoma’s Organic Rose Tone to help keep roses vibrant and looking their best. Feed regularly as described.
  4. Watering Deep. Roses don’t do well in drought conditions as they need a good deep drink often. At least once per week water about an inch deep and evenly around the plant. It does better as the soil is even throughout. Try to get the water around the roots and not the leaves.
  5. As your roses start to bloom, be sure to keep up with the maintenance. If the blooms are looking dead, remove the spent flowers. This will give the bush extra energy to produce bigger and fuller blooms. Roses will continue to flower throughout summer, so don’t be afraid to deadhead into August.

Watch as Laura from Garden Answer plants her own roses!

https://www.espoma.com/wp-content/uploads/2018/05/Rose-garden-sunrise.jpg 847 1280 espoma https://www.espoma.com/wp-content/uploads/2023/05/espoma-logo340w-1.png espoma2018-05-01 17:15:532019-05-07 09:58:43Nosey Rosy – Guide to a Rose Garden

How to Repot a Bromeliad

April 27, 2018/in Espoma Videos

Summer Rayne Oaks of Homestead Brooklyn demonstrates the ins and outs of repotting bromeliads. Follow along as she explains the difference between the pup and mother plant and what happens when you remove the pup vs leaving it on to continue growing. Utilizing her expansive collection of plants, she shows us what both scenarios look like in the repotting process.

Three takeaways from this video:

Summer Rayne teaches you how to get a brand new bromeliad from a plant that is about to expire. With the right care, she was able to get new life from the plant.

The best soil to use for bromeliads is a barky airy mix, such as The Espoma Company’s Organic Orchid Mix, that’s full of nutrients.

Once the pup is either 1/3 to 1/2 the size of the mother plant, you can decide to remove the pup for the mother to grow another or keep it on and watch it grow from the mother until it expires.

5 Steps for Repotting a Bromeliad:

  1. Grab some gloves. Some of the leaves are going to be prickly, so you want to protect yourself.
  2. Grab scissors or sheers. If the mother plant is desiccated or if you want to remove the pup before repotting, you will need something sharp to remove them.
  3. Remove the bromeliad from the container and separate it from the mother plant, if possible.
  4. When placing the bromeliad into the new container, center it and fill with Espoma’s Orchid Mix. You don’t need to tuck it in too hard, as it likes having room to breathe.
  5. Water it in well to help it settle into its new home.

*Remember, if you have a healthy mother plant and a healthy pup, you can plant them together or separately. You won’t harm it either way.

*****

Learn more about Summer Rayne here:

Website: homesteadbrooklyn.com

Instagram – @homesteadbrooklyn

YouTube – Summer Rayne Oakes

Twitter – @sroakes

Facebook – Summer Rayne Oaks


Featured Products:

Where to Buy

https://www.espoma.com/wp-content/uploads/2018/04/Espoma-Bromeliad-Thumb-1.png 788 1404 espoma https://www.espoma.com/wp-content/uploads/2023/05/espoma-logo340w-1.png espoma2018-04-27 16:46:052023-02-21 11:33:09How to Repot a Bromeliad

When to Plant Strawberries (Hint: Think Spring)

April 23, 2018/in Fruits & Vegetables

Juicy, sweet strawberries picked from your own garden are simply the best. Plus, taking strawberries from your own garden to your plate is so rewarding. Create a berry garden by pairing with blueberries, blackberries and raspberries.

The key to growing berries, no matter where you garden, is good-quality organic soil.

Choosing your Strawberry Plant:

The first step is to pick the type of Strawberry plant you want to grow. Take the amount of growing time Think about where you’ll plant your berries to get the best results. Visit your local garden center to find the best type of strawberry for you.

June-bearing. This traditional berry will usually produce one large harvest in late spring or early summer depending on temperature. June-bearing strawberries are available in early, mid-season and late varieties.

Ever-bearing. These scrumptious strawberries produce two to three harvests intermittently during the spring, summer and fall. Because ever-bearing plants do not send out many runners, they make great choices for containers.

Day-Neutral. Grow these to keep producing fruit throughout the growing season. They continuously fruit if temperatures are between 35-85°F. Because they produce few runners, they are great when space is limited, but the fruits are usually somewhat smaller than June bearers.

Once you’ve picked your plants, it’s time to get them in the ground. Strawberries grow best in full sun and in soil with a pH of 5.5 to 7.  If your pH level is too high, add Espoma’s Soil Acidifier for ideal soil conditions.

4 Steps to Plant Strawberries

1. Plant strawberries as soon as the ground can be worked in the spring.

2. Space plants at least 20” apart. Dig holes deep and wide enough to accommodate the entire root system.

3. Plant the crown (the parts of the plant that are above ground) at soil level; firm soil around it.

4. Add compost to bed and encourage strawberries to grow by adding Espoma’s Holly-tone, an organic plant food perfect for these acid-loving plants.

Short on space or looking to grow strawberries vertically? Check out how Laura from Garden Answer grows.


See the Total Berry Guide Here

Espoma products to help you grow your best strawberries yet:


Where to Buy
https://www.espoma.com/wp-content/uploads/2018/04/strawberry-plants.jpg 847 1280 espoma https://www.espoma.com/wp-content/uploads/2023/05/espoma-logo340w-1.png espoma2018-04-23 15:30:492022-04-12 14:21:03When to Plant Strawberries (Hint: Think Spring)

Classic Houseplants for your Living Room

April 23, 2018/in Indoor Gardening

What is the most commonly used room in your home? It’s probably the living room. It’s where the whole family comes together, where visitors sit and enjoy conversations and where memories are made. We’ve already shared houseplants for your kitchen and bedroom; now let’s focus on the living room.

Houseplants differ in needs of light, space and water. So we are outlining the perfect houseplants to add to a medium or brightly lit living room.

Head to your local garden center to pick any of these beauties up. And don’t forget to grab some Indoor! liquid fertilizer to give your plants a boost.

Here are our top picks for plants in the living room:

String of Pearls

This easy to grow succulent adds dimension and design to any space. As the string of pearls gently cascade down the container, it resembles jewelry hanging off of a shelf. You can’t go wrong with this classic plant. It grows best in bright light. Make sure you feed regularly with Espoma Organic’s Cactus! liquid fertilizer.

Philodendron

This heart-leafed plant will inspire anyone who comes in contact with it. It has gained popularity due to it’s big, angular leaves. It is easy to grow and will tell you when it needs a little bit of love through it’s slightly dropping leaves. Philodendrons prefer bright, indirect light.

Umbrella Tree

Aptly named for foliage that look like miniature umbrellas, this tree is the perfect addition to your home. This tree needs bright, indirect light – if they do not receive enough light, they can get leggy, so be sure to keep an eye on it to ensure it is getting the light it needs. Learn more about dealing with leggy plants.

Rubber Tree

Don’t be intimidated by a tree this size. Get a young rubber tree and train it to any size you want. Caring for this tree is simple – put it in bright, indirect light so it doesn’t over heat. Enjoy the oversized foliage, and a few compliments from visitors.

Staghorn Fern

This antler-like foliage will be the conversation starter you were looking for. Mount this fern on any wall or place it in a basket to really show off it’s beauty. This fern does well in low-to-medium light, so it will be happy anywhere you place it.

Learn how to fertilize these houseplants from Homestead Brooklyn.


https://www.espoma.com/wp-content/uploads/2018/04/string-of-pearls.jpg 667 1000 espoma https://www.espoma.com/wp-content/uploads/2023/05/espoma-logo340w-1.png espoma2018-04-23 13:00:062019-05-07 09:58:43Classic Houseplants for your Living Room

Bulbs to Plant Now for Late Summer Color

April 20, 2018/in Flowers

Right about now, daffodils and tulips are in full bloom making even the simplest of streets beautiful.

People are snatching up the blooms and putting them in vases and arrangements. And some are even heading into garden centers to get those flowers for their garden.

But, in most regions, spring blooming bulbs are best planted in fall to be able to bloom in the spring.

Don’t worry! There are many varieties of spring-planted bulbs that are just as beautiful as your traditional favorites.

Keep your garden thriving and plant bulbs now to have amazing summer color. Wait until the last frost date has passed to plant to ensure your bulbs won’t freeze. Check the tags on your bulbs for planting information or head over to your local garden center for specific region information. Don’t forget to mix your soil with Bulb-Tone to create beautiful big blooms!

Our Favorite Bulbs to Plant this Spring

Dahlia

With a variety of sizes, colors and designs, dahlias have become one of the most popular flowers. Be sure to buy a bunch of bulbs though, it’s hard to plant just one. Bloom time is between mid-July and September. These dazzling beauties will showcase your garden anywhere you plant them. They are technically a tuber, but are planted the same way you would plant a bulb.

Lily

Stay on trend this year and plant a lily. With the option of Asiatic, Trumpet or Oriental, or a mixture of the three, your garden will be full of color lasting summer through fall. Look for lilies with the color and pattern to add texture and design. Bloom time is between June and September, depending on variety.

Begonia

Known as a grandmother’s flower, begonia’s are perfect for any garden. Most people don’t know that the begonia family is quite large, with lots of colors, shapes and sizes. Bloom time starts in mid-July. Since there are so many options with begonias, choose something in the double flower, ruffled double flower or the pendulous varieties.

Calla Lilies

This eye-catching flower will add wonder to your garden. Calla lilies are elegant and timeless and perfect for containers. They come in a large variety of colors and textures to match every style. Bloom time is between July and October. Grab varieties of calla lilies such as Flame, Captain Marrero or Ruby Sensation for the paintbrush affect.

Ranunculus

This exquisite flower is a display itself with its layer upon layer of silky petals. It is similar to a rose and is often considered high end delicacy. One thing to remember is to soak the bulb before planting to encourage growth. Bloom time is between June and August.

Watch below as Laura from Garden Answer shows how to plant bulbs!


https://www.espoma.com/wp-content/uploads/2018/04/Calla-Lillies-.jpg 667 1000 espoma https://www.espoma.com/wp-content/uploads/2023/05/espoma-logo340w-1.png espoma2018-04-20 13:10:222019-05-07 09:58:43Bulbs to Plant Now for Late Summer Color
Page 5 of 8«‹34567›»
Where to Buy

Get News & Updates

Recent Posts

  • VIDEO: Hydrangea Care Tips 🌿🌸 with Summer Rayne Oakes
  • VIDEO: Planting Boxwoods & Hydrangeas with Garden Answer
  • VIDEO: Edible Landscaping 🫑 🍓🌿 | Flock Finger Lakes
  • VIDEO: Planting Hydrangeas 🌸 with Wyse Guide
  • VIDEO: Planting Beautiful Rugosa Roses! 🌹🌿 with Garden Answer

Tags

All-Purpose Potting Mix bio-tone Bio-tone Starter Bio-tone Starter Plus Cactus Mix caring for houseplants Container Gardening DIY project Espoma espoma grown espoma organic Espoma Organics Espoma Video fall gardening Family fert flower garden flowers garden Garden Answer Gardening gardening tips gardens grow holly-tone houseplants Indoor! indoor gardening indoor plants Kaleb Wyse organic organic fertilizer Organic Gardening organic plant food Organic Potting Mix Outdoor Gardening Planting plants Potting Mix potting soil Spring Gardening summer rayne oakes vegetable garden Vegetable Gardening Wyse Guide

Espoma. A Family Tradition Since 1929.

Espoma Organic logo
  • Espoma Dealer
  • Espoma Pro
  • Garden Club
  • Privacy Policy

Scroll to top