5 Ways to Decorate Your Garden for the Holidays

It’s truly the most wonderful time of the year! Everyone seems to be in a better mood when they’re spending time with the people they love.

Going all out with décor is easy and fun. Putting up a big Christmas tree with lights and ornaments, draping garland around the house really makes it feel cozy and welcoming. Draping lights around the home and statues on your front lawn, is a fun way to make the whole neighborhood light up.

This year, incorporate some living décor for your holidays. Here are 5 ways to decorate your garden:

1. Decorate Containers

Containers are a perfect way to liven up a home. Finding a festive container or painting a plain one with festive colors or patterns will bring it to life for the holidays. Fill your container with winter hardy plants that are right for your zone, just be sure to use Espoma Organic Potting Soil to give it the nutrients they need.

2. Design the Grounds

With colorful winter shrubs, vegetables and flowers, planting in a design can bring cheer in ways that are unique and cheerful. With the colors and options your plants provide can make an image come through. Utilize the dead space in between your winter hardy plants to create a holiday design.

3. Plant an Evergreen

While everyone brings their trees indoors, plant one outside. You can decorate it the same way you decorate the one indoors. Plus you can enjoy your Christmas morning outside, depending on the weather. Use natural materials, such as pine cones, berries and flowers collected from your garden to decorate. Be sure to use Espoma Organic’s Holly-tone to keep the foliage green.

4. Train Your Plants

Adding a toy train to show off your garden is a great way to mix fun and childlike spirit to your garden. Utilize the plants you already have planted that will survive the winter. Have the toy train go around what you want to showcase. Add some twinkling lights and everyone who stops by will want a garden like yours.

5. Green Your Mailboxes

Draping an evergreen garland over a mailbox is a simple way to incorporate living décor to your holidays. Creating a garland requires few materials and can look festive within a few minutes. Be sure to add a nice large bow to tie it all together.

Want to keep making decorations for your home? Check out this Succulent Snow Globe from Garden Answer.


Products Used:

Espoma Holly-tone


Earth-Friendly Ways to Repurpose Your Christmas Tree

The holidays are over and now it’s time to decide what to do with your Christmas tree. Fortunately, there are several, earth-friendly ways to dispose of, or repurpose your tree.

If you simply want to have it removed, start by contacting your waste provider. Many will pick up trees in the weeks that follow Christmas. If you have a compost container and a pruner, you can cut up the branches and loosely pile them inside your bin to be hauled away with your other compost. Most counties have drop-off sites as well.


4 Ways to Upcycle Your Tree

Tree recycling and mulching programs are springing up all over the country. A quick Google search will help you find out if there is one in your area. Some communities use your old trees for sand and soil erosion barriers. They are especially welcome for lake, river and delta stabilization.

Turning your old Christmas tree into a birdfeeder is a great way to repurpose your tree. First of all, make sure all the decorations, hooks and tinsel are removed. Then put it outside, stand and all, in a place where you’ll be able to see it from indoors. Decorate it with orange slices, strung popcorn, little bunches of millet and suet balls. The birds will love the treat and you can enjoy watching them from the warmth of your home. It will also provide shelter from the cold winter winds for all of your birds

Another idea to repurpose your tree, is to start a compost pile. Cut the branches so they’ll fit inside the bin. Layer them inside in a crisscross pattern about 6 or 8 inches high. This will ensure good airflow around the bottom of your new compost pile. Then add your vegetable scraps and leaf litter as you normally would. In time, the branches will breakdown and turn to compost as well.

If you live in a mild climate, your best option might be to purchase a living tree, either balled and burlaped or in a pot. Do yourself a favor and dig the planting hole in the fall when the ground is easy to work. Plant it right after Christmas, water it once thoroughly and then mulch with a thick layer of wood chips or leaves.

Plastic Christmas trees can’t be recycled of course, and neither can flocked trees. They need to be cut op in small pieces and disposed of in the regular trash.

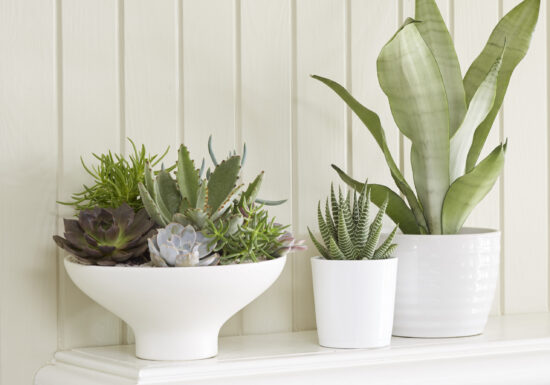
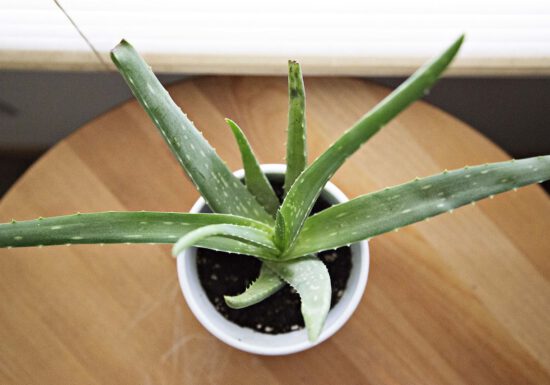
Dress up Your Desk with Succulents

Everyone likes to dress up their desks and it is fun to bring a little of the outdoors inside. Succulent arrangements can be chic or playful. Jurassic Park dish garden anyone? You may want to make one with a holiday theme by mixing in tiny holiday ornaments. Go hunting for unique containers.

Succulents are simple to grow with a little care and knowhow. They only need a small amount of water about every 10 days or so. . Good drainage is a must. Always use Cactus Mix, Cactus! soil.

A trick to find out if your plant needs water is stick a dry toothpick into the drainage hole at the bottom of the pot. If it comes out dry, it’s time to water. If there are bits of soil stuck to it, wait a few more days. It’s exactly like testing to see if a cake is done.

Always put them in the sunniest place possible. That can be tough in an office situation, unless you have that spacious, corner office. Happily, they’ll respond to that florescent light above your desk. LED light is fine too.

Photo courtesy of Costa Fams

Aloe

Plant several is one container to create a contemporary design. They would also be easy to combine with other succulents in a dish garden. Fertilize a few times in spring and summer to keep them happy. They grow 6 to 12 inches tall and wide.

Albuca

Albuca has a unique growing habit. It produces a thick bulb above ground. Thin grassy foliage rises from the bulb and blooms with green and white flowers. Try growing them with small succulents like Echeveria elegans. They grow 8 inches tall and wide.

Perle von Nurnberg Echeveria

Echeveria is a small succulent, just a few inches high. The overlapping leaves of this echeveria species are beautiful in color. A greyish brown base with light pink and purple highlights creates contrast between the leaves.  In the summer, the flowers can become coral to red with a yellow interior.

Kalanchoe

Kalanchoe is a beautiful succulent that can have colors of red, cream, and even yellow in its large, round leaves. No wonder they call them flapjack plants. One plant is all you’d need to create a show stopping display. It grows 1 to 2 feet tall.


Photo courtesy of Costa Farms

Haworthia

A big name for a small plant but the deep green leaves with white stripes really is a stand out. They look brilliant on small containers top dressed with a layer of five white gravel. They don’t like direct light so they work especially well in an office setting. They grow 2 to 8 inches tall and wide.

Products to Buy:


Poinsettia Care Guide from Garden Answer

Showcasing poinsettias at Christmas time has long been an American tradition, even though the plants are native to Mexico. What we think of as the large petaled, red flowers are actually modified leaves called bracts.  The true flowers are the tiny ones in the middle. Today they come in a wide array of colors from shades of red, orange, pink, yellow and white. Some varieties even have cream and green variegated leaves.

Choose Healthy Plants from the Start

When you shop for a poinsettia plant, make sure they aren’t situated too close to the door of the store, where they are repeatedly exposed to warm and cold air. Cold temperatures can easily harm these tropical plants. Check the foliage to see that it looks healthy and the inner bracts are a solid color, not showing any green. That would mean that they are nearly finished flowering. Lastly, before leaving the store make sure it’s in a sleeve or put another bag over the top of it so that it won’t freeze on the way to the car.

Give Poinsettias Proper Care at Home

As you can imagine, these tropical plants like lots of sunshine. Put them in your brightest window but not touching the glass, as it can be quite cold.  Keep them away from drafts both warm and cold. Water your poinsettia when the soil feels dry on the surface. Check the soil regularly, as the indoor air can be warm and dry in the winter. Natives of a humid climate, they will definitely appreciate being misted now and then. Like most house plants, they don’t like to be in standing water. Check to see if the foil liner allows water to drain freely and cut it open if not.

Stay Safe Around Poinsettias

Poinsettias are known for being toxic to pets and humans. However, in reality you would have to ingest a very, large amount to become ill. The white sap can be a skin irritant. Wash your hand well if you get any sap on them. It’s always best to set them up high away from kids and pets and that’s probably where you’d put them anyway so, they don’t get knocked over.

Buy A New One For Next Year

One last thought, think of your poinsettia as an annual plant and plan on buying a new one next year. It’s a tricky business to get them to bloom again that involves a strict light and dark regime. Even very short periods of light at night for instance, from a street lamp can prevent them from blooming.


Can’t get enough holiday plants? Check out this video on caring for your Christmas Cactus.


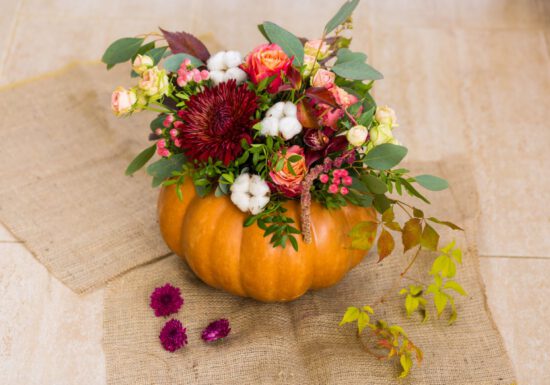
Create the Perfect Centerpiece for Fall Gatherings

Between the excitement of Halloween and the wonder of winter, fall can sometimes be pushed to the wayside. Not anymore.


While your fall decorating usually may be limited to a few gourds, this season, deck out your tablescape and call on family, friends and neighbors to come to your place. The table will make any meal special, especially when created with items from your home and garden.


Ways to build your centerpiece:

  1. Use your harvest. Build your own kind of cornucopia full of your hard work of the summer. Take a look at the items you grew in your garden and bring them to the table.

  1. Bring in the pumpkins. Whether you grew them in your garden or brought them in from the pumpkin patch, pumpkins aren’t finished after Halloween. Since they come in different shapes and sizes, you can have fun making a beautiful tablescape. Don’t like orange? Paint them in any color you desire!
  2. Make a flower arrangement. Your fall cutting garden is finally ready to shine. Make a wild flower centerpiece by mixing dahlias, golden rod, sneezeweed, coneflowers and more. Add branches and berries, too.
  3. Fall foliage. The trees in and around your home are putting on a show. Why not bring that inside? Grab colorful leaves, branches with leaves or even boughs of an evergreen shrub and bring inside to add texture.

    Photo courtesy of Costa Farms

  4. Don’t forget houseplants. Used on their own or with a mixture of other items, houseplants can steal the show. Take a houseplant you already own and repot it in a festive container. Refresh the soil with potting mix, first! Find a houseplant with fall colors, such as croton or aglaonema. Give them a bit of Indoor! liquid plant food a few days before the gathering to help perk them up.


Need some inspiration? Laura from Garden Answer creates a succulent arrangement that would be perfect for any table.


Create a Spa in Your Bathroom

Every room in your house looks cozier and more beautiful filled with houseplants. It’s especially true of your bathroom. Who wouldn’t want a lush, tropical, spa feel at home? In fact, your bathroom is perfect for tropical plants because they love a humid environment.

Research shows that having plants around makes people feel calm, happy, and relaxed. Making them perfect for some spa time. And some houseplants actually purify the air. Ivy can remove 75% of mold spores in a room, which is important if you have allergies. Plants can pull dust from the air to help you breathe easier.

Not sure about the bathroom spa? Find out which plants thrive in your bedroom, living room and kitchen.

Here are our plant picks for your bathroom –

Photo courtesy of Costa Farms

Nerve Plants – Small Plant for Low Light

Nerve plants have colorful foliage that’s so attractive they don’t need flowers. Try adding one to a shelf, the corner of the counter or even hanging from a hook. Nerve plants grow best in medium to low light. If you have sheer curtains you could even grow them in full sun. Water when the surface of the soil is just starting to dry out. They like moist soil but not too wet. Feed them on a monthly basis with Indoor! liquid plant food to keep them healthy.

Photo courtesy of Costa Farms

Peace Lily – Medium-Large Plant for Low Light

If you are lucky enough to have a lot of space in your bathroom but not a lot of light, you can go large and tropical. Try this easy to grow Jungle Queen. The more it grows, the more spectacular it becomes. It tolerates low light but will grow faster and larger with more direct sunlight. Water regularly to keep the soil evenly moist and feed once a month with Indoor! liquid plant food.

Moth Orchid – Small Plant for Bright Light

Moth orchids have long, thin stems and large flowers that create a big impact in small places. They flower for an incredibly long time.  If you have the room, arrange a small group of them for a sophisticated look. These are the easiest orchids to grow, even if you are a beginner. Water well once a week, then let them drain completely. Feed regularly with Orchid! liquid plant food.

Photo courtesy of Costa Farms

Majesty Palm– Big Plants for Bright Light

Majesty palms are the quintessential tropical plant.  If you have room for one of these, it will transform your bathroom into an oasis.  They thrive in the humidity and like to be kept evenly moist.  Fertilize regularly with Indoor! Liquid plant food for faster growth. These are easy palms to grow and don’t require any pruning except for an occasional old frond.


Is there low light in your home? Laura from Garden Answer tells us about low light houseplants that you need to bring home.

How to Care and Propagate Pilea Peperomiodies

Pilea peperomiodies is becoming a more popular plant by the day. With the unique shape of its leaves, waxy stems and ease of propagation, it’s no surprise this houseplant is popping up everywhere.

Before they were popular in the U.S., Summer Rayne from Homestead Brooklyn brought home a pilea peperomiodies plant back from the Netherlands. She has been caring for hers for a few years and it is as happy as can be. If you aren’t sure what plant we are talking about, the more common names are Chinese money plant, UFO plant or friendship plant.

Here are a few tips to keeping your plant happy, healthy and ready to be shared.

Water and Sun Care:

Natively grown in a forest, the pilea peperomiodies doesn’t need a lot of water. It is best to let it dry out in between waterings. The waxy sheen on the leaves indicates that it actually holds its water well and prevents the water from transpiring too much. Summer usually checks to see if it needs water every 3-4 days so it doesn’t go too long without water.

It likes to be in indirect, bright light and will climb towards it. Summer has had success growing it in Northeast facing windows and a few feet from a southwest facing window. To even out your plant within the container, be sure to rotate the container evenly to allow the light to reach all parts of the plant.

Fertilizing Care:

Summer fertilizes her houseplants about once a month with Indoor! liquid plant food. But, now that autumn has arrived, she will stop for the colder months. Now is the time to feed your houseplants once last time to set them up for success for the upcoming months. Mix Indoor! with water in your watering can and use normally.

Soil Care:

Since the pilea peperomiodies likes to dry out in between waterings, the right kind of soil is important to keep it healthy. A typical potting mix, such as Espoma Organic Potting Mix would work well. Summer also includes perlite, which is a puffed volcanic stone, which is lightweight and helps regulate the water in the soil.

Propagation Tips:

Pilea peperomiodies are self- propagating plants, so you can cut off a small piece of the plant and grow another. They are rhizomatous, which means they will have little offshoots that grow under the soil. It basically clones itself in case it cannot find a partner.

You can take the little pups at the base of the stem and replant them elsewhere to create a new pilea peperomiodies. To do so without harming the plant, take a sharp blade and slice off the pup from the mother plant. Try to do it when they are still little, so you aren’t disrupting a fully grown pup. Then add Espoma’s Organic Potting Mix and Bio-tone Starter Plus fertilizer to a small pot. Put a little hole in the middle, insert your cutting and water well.


Where to Buy

Products Used:

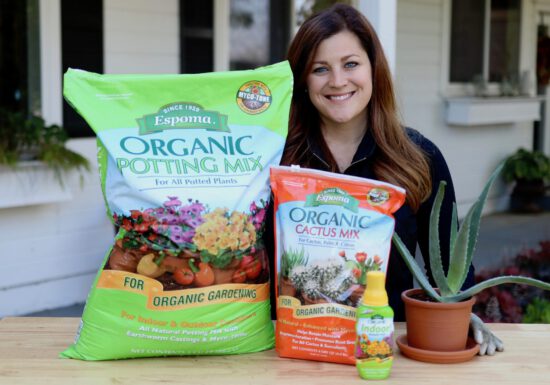
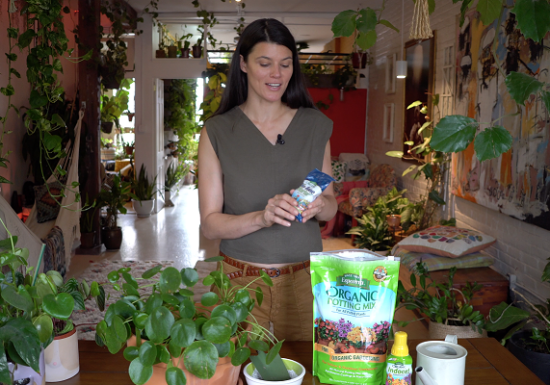
Bringing Plants Indoors for the Winter

How to Overwinter Your Plants

Laura with Garden Answer is answering some commonly asked questions on how to get your plants and containers prepared to bring inside for the winter. She lays out her step-by-step instructions on how to keep your plants happy and healthy, even when they are inside.

Step 1 – Figure Out What You Want to Bring Inside

Walk around your garden and gather what you want to save. Think about your succulents, perennials and herbs out in the garden. Even, window boxes, displays and smaller containers can survive indoors with a little bit of help.

Once you have gathered everything you want to bring inside, think about the containers they are currently in. Will they work for inside your home? Will you dig something out of your garden that needs a new container? These questions will lead you to gather the right supplies.

Step 2 – Gather All Your Supplies in One Place

It’s easier to have one designated area to work. It will keep you from moving your supplies all over your garden and keep the mess contained.

Tools you might need are a trowel, a shovel, snips, pruners, gloves and containers. If the containers were previously used, be sure to sanitize them with 1-part bleach to 10-parts water to rid of any insects or diseases that may be hiding. The last thing you will need is the right kind of soil.  Succulents and cactus, African violet and orchids and regular everyday plants all have different soil needs to thrive.

Step 3 – Groom and Trim Plants

Trim off any leggy branches or make any aesthetic cuts. Also, trim dead leaves and spent blooms as those are what diseases and insects use to find their way indoors.

Step 4 – Check for Insects

It’s best not to bring insects inside your home. Be sure to check the top of the soil, the top of leaves and the underside of leaves. Anything that is crawling around in there should stay outside. This will guarantee other houseplants will not be infected later on.

Step 5 – Refresh Your Soil

If you aren’t repotting, evenly scrape off the top inch or two, whatever will come up easily, and replace it with fresh soil. This will help ensure all insect eggs are out of the soil.

Step 6 – Repot If Necessary

Now is the time to repot any containers if they need to go up a size or you want to match your interiors. This is also when you should pot anything that you have dug up from the garden. Remember, use the right kind of soil for your plants. Espoma has soil for every kind of plant.

Step 7 – Water with a Deep Soak

While this isn’t required to do before moving your plants into the house, it is highly recommended. While they can still drain outdoors, give your plants a big drink of water. It will help get them established in their new containers and release the nutrients in the fresh top soil.

Step 8 – Bring Your Plants Inside

Think about how much light each of these plants need and find the appropriate place to put them. If they like full light, find a window with bright light they will enjoy living in for a few months. It’s best to place a saucer underneath each of the pots to catch anything that may find its way out.

Espoma Organic Potting Soil Mix

Espoma Organic Orchid Mix


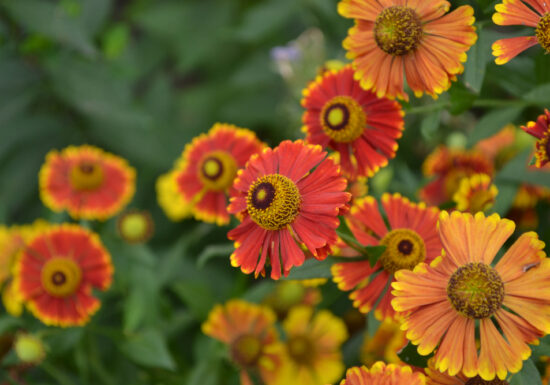
5 Flowers for Halloween

With Halloween just around the corner, it’s time to start decorating. While some enjoy   spooky and scary décor, others delight in the whimsical side of Halloween. Planting orange plants will provide some living décor for a Happy, and not so scary, Halloween!

These plants provide an instant festive flare and grow well in containers on your porch, deck or patio. Place them alongside pumpkins and other décor. You can bring some of these inside, to add to your own haunted house! Try a few of these for a fun, floral twist this Halloween:

5 Orange Plants for Halloween

Photo courtesy of Proven Winners

Bracteantha

These beautiful flowers will elevate your space with their pumpkin orange petals and bright yellow centers. While they are an annual, they work well for the fall season without having to commit all year long. Plant them in full sun to watch these foot-tall stems steal the show. Use Espoma’s Organic Flower-tone when planting to keep the vibrancy of these flowers through the Halloween holiday.

Marigolds

The bold color and wonderful scent set marigolds apart. Known for sparking strong emotions in people, this flower works well for the occasion. Since they are easy-to-grow and require full sun, you will see marigolds all season long. Plus, they start to bloom in the spring and will continue through the end of autumn – they are worth the work. They are hardy and will grow in zones 2-11.

Goldenrod

While this is not exactly the bright orange Halloween suggests, goldenrod is still one of the most visually stunning plants to put in your yard. It is debated often whether it is a weed or a wildflower, so if you are on the fence about it, plant it in a container or a garden bed to contain where it will go. It grows well in full sun and just about anywhere.

Dahlias

As a fan favorite, your neighbors will be checking out your garden every chance they get! This might be the easiest bloom to grow on the list. They are technically a ‘tuber’, and are best fed with  Espoma Organic Bulb-tone in the spring (once the ground is no longer frozen). They are available in all shapes and sizes. Be sure to pick out your favorite orange varieties to make a stunning fall appeal. In zones 8-10 simply plant and forget them (though you won’t forget the flowers!).  In cooler zones grow them as annuals or dig them up in the fall and store dry indoors.  You can divide them and replant the following spring.  Be sure to use some Bio-tone Starter Plus when planting!

Helenium

Sometimes known as sneezeweed, this vibrant orange bloom will not affect allergy sufferers. It will however, brighten up your space and attract all kinds of pollinators. They come in shades of orange, yellow, dark red and golden brown with a prominent center and stiff skirt-like petals. Plant them in full sun with a well-draining soil. Helenium grows well in zones 3-9.

Want to add more fall flair to your yard? Laura from Garden Answer shows us how to create a fall container. https://www.youtube.com/watch?v=xRLpppMogWk

Products mentioned:

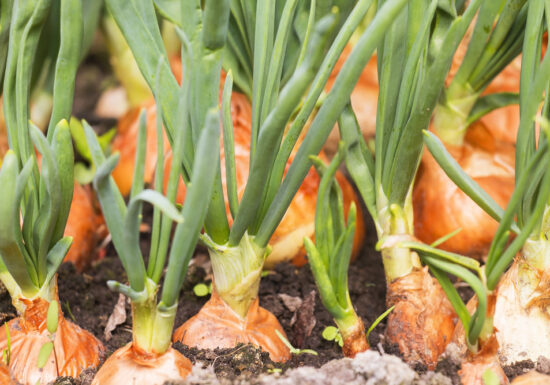
Plant Now, Harvest Early

Crisp fall days are perfect for planting garlic, onions and shallots. Fall planting gives them a big jump-start. The rule of thumb is to plant the sets (individual bulbs) after the fall equinox. They’ll thrive in a sunny location with well-drained soil, rich in organic matter.  Apply Espoma’s Bio-tone Starter Plus, an organic fertilizer that contains beneficial bacteria and mycorrhizae to encourage strong root development. Your plants will put on roots in the fall but little or no top growth to survive the winter. Mulch the beds with a 4-6” layer of seedless straw, or leaves for winter protection and weed control. Plant additional bulbs in the spring for a double harvest.

Garlic

Garlic grows best in full sun with loose, fertile soil that is moist but well-drained. Mix Espoma Organic Potting Soil  into the planting bed to promote soil health. Plant your garlic cloves root side down, about 2” deep and 4-6” apart. Space the rows about 12” apart.  Apply Espoma’s Bio-tone Starter Plus and water deeply before applying a thick layer of mulch. Young garlic shoots will appear in early spring and be ready for harvest by mid-summer. Garlic comes in all shapes and sizes. Their flower stems can also be picked and used in cooking.

Onions

Onions prefer the same sort of soil as garlic, loose and fertile. It’s easiest to dig a trench 2-4” deep and set bulbs pointy side up, every 6” or so. Apply Espoma’s Organic Garden-tone to promote rooting and over all good health for the plants and soil. Water well if there is no rain in the forecast and apply a thick layer of mulch. Mulch will help keep the weeds down and the moisture in. The shoots will pop up in early spring. They are remarkably tolerant of frost.

Shallots

Plant shallots in full sun in loose, rich soil that is moist but well-drained. Plant the bulbs 1-2” deep and spaced about 6-8” apart. Like garlic, each shallot bulb will yield a cluster of new bulbs. Use Espoma’s Bio-tone Starter Plus, an organic fertilizer to feed the soil and the bulbs. Shallots are shallow rooted. Mulching will help maintain an evenly moist soil.

Products to Buy: