How to Repot a Bromeliad
Summer Rayne Oaks of Homestead Brooklyn demonstrates the ins and outs of repotting bromeliads. Follow along as she explains the difference between the pup and mother plant and what happens when you remove the pup vs leaving it on to continue growing. Utilizing her expansive collection of plants, she shows us what both scenarios look like in the repotting process.
Three takeaways from this video:
Summer Rayne teaches you how to get a brand new bromeliad from a plant that is about to expire. With the right care, she was able to get new life from the plant.
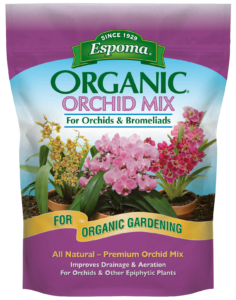
The best soil to use for bromeliads is a barky airy mix, such as The Espoma Company’s Organic Orchid Mix, that’s full of nutrients.
Once the pup is either 1/3 to 1/2 the size of the mother plant, you can decide to remove the pup for the mother to grow another or keep it on and watch it grow from the mother until it expires.
5 Steps for Repotting a Bromeliad:
- Grab some gloves. Some of the leaves are going to be prickly, so you want to protect yourself.
- Grab scissors or sheers. If the mother plant is desiccated or if you want to remove the pup before repotting, you will need something sharp to remove them.
- Remove the bromeliad from the container and separate it from the mother plant, if possible.
- When placing the bromeliad into the new container, center it and fill with Espoma’s Orchid Mix. You don’t need to tuck it in too hard, as it likes having room to breathe.
- Water it in well to help it settle into its new home.
*Remember, if you have a healthy mother plant and a healthy pup, you can plant them together or separately. You won’t harm it either way.
*****
Learn more about Summer Rayne here:
Website: homesteadbrooklyn.com
Instagram – @homesteadbrooklyn
YouTube – Summer Rayne Oakes
Twitter – @sroakes
Facebook – Summer Rayne Oaks
Featured Products:

