
DIY Mother’s Day Planter
Calling all moms out there! This Mother’s Day, create a gift any mom will love with the help of your little one. Yes – it is a bit messy, but it is worth every drop of paint. If you don’t have a little one to help, you can make your own classic piece that will go well anywhere you place it.
Laura from Garden Answer is a new mom this year, so she is diving right into this project for her mom – with the help of Benjamin. This project is perfect for any woman out there.
Espoma Products Needed:
Other Materials needed:
- Terra Cotta Pots
- Chalk Paint (Two Colors – One Light and One Dark)
- Tempera Paint (Various Colors, Black)
- Photo Paper or Stencils
- Exacto Knife or Box Cutter for Photo Paper
- Paint Sponges
- Smaller Paint Brush
- Q-Tips
- Clear Acrylic Sealer
- Two to Three Plants
- Wet Ones (For Clean- Up)
Steps for Painting a Monogrammed Planter:
- Print off what border and monogram you want to use on photo paper and cut out the design. If you want to skip this step and use a stencil you found at the store instead, feel free to do so. Set this aside.
- Paint the outside of the pot with the lighter colored chalk paint so it is one even color. Continue painting the inside rim. This is to ensure uniformity when the plant is inside and the soil doesn’t hit the top. Let dry.
- Hold the stencil on the pot carefully, or tape it down where you want it. Using a clean sponge brush dab the inside of the stencil with the darker chalk paint. Let dry and repeat if you have multiple stencils.
*If you want to mute the paint a bit, dab it onto paper or cardboard to lessen the amount of paint on the brush.
- Once your pot is dry, spray a clear acrylic sealer the all around the outside and inside of your pot. Since terra cotta is porous and water will seep, you want to ensure your paint isn’t ruined.
Steps for Painting a Butterfly Mother’s Day Planter:
Note: This planter requires the use of small feet, best to ask your little one to help! Grab him or her and let’s get started!
- Paint the bottom of your little one’s foot and gently place it on the pot. Use the same color twice in a “V” shape to make the butterfly wings.
- Repeat with different colors around the pot.
- Take the smaller paint brush and paint black bodies for the butterflies.
- Use the Q-Tip to make the ends of the antennae. Repeat step for every butterfly around the pot.
- Let dry!
- Once your pot is dry, spray a clear acrylic sealer the all around the outside and inside of your pot. Since terra cotta is porous and water will seep, you want to ensure your paint isn’t ruined.
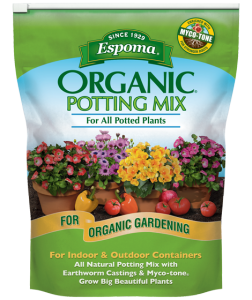
Time to fill both planters with Espoma Organic Potting Mix and plant them up! Laura puts a Peachberry Ice Heuchera in the monogrammed pot to give it the classic farmhouse feel. She plants a Superbells Yellow and a Superbells Grape Punch in the butterfly pot to keep the bright fun colors feel.
Every mom – or grandma – will love these custom made planters. Happy Mother’s Day! Watch the extended version here.


")

Trackbacks & Pingbacks
[…] Watch the quick version here with a complete list of materials and instructions. […]
Comments are closed.