Espoma Organic
  • Products
    • Close
    • Product Line Overview
    • Plant food finder
    • Garden Fertilizers
    • Potting Soils
    • Lawn Fertilizers
    • Liquid Fertilizers
    • Single Ingredients
    • Conventional Plant Foods
    • Animal Care Products
  • Where to Buy
  • Our Story
    • Close
    • Our Story
    • Locations
    • Historical Timeline
    • Our Commitment
    • Directions
    • Solar
    • Join our Team
    • Espoma Brand Partners
  • Learn
    • Close
    • Espoma Blog
    • FAQ’s
    • Pocket Guide
    • Espoma Guides
    • Garden Clubs
    • Safe Paws Lawn
    • PRODUCT FACT SHEETS
    • Fertilizer Fundamentals
      • Close
      • Understanding Plant Nutrition
      • Reading Labels
      • Choosing the Right Type of Fertilizer
      • Terms & Definitions
    • Gardening Projects
    • Resource Links
  • Contact Us
  • Menu Menu

Tag Archive for: plants

Growing Joy with Maria Podcast Episode 30 Blog: Orchid Care Basics

July 25, 2023/in Blog, Bloom and Grow Radio, Fruits & Vegetables - None

Orchids have long captivated plant parents with their beautiful flowers and unique growth habits. Despite what others commonly think, taking care of them is not as difficult as their reputation implies. With the right knowledge and approach, you can bring the beauty of orchids right into your home.

This blog is inspired by Episode 30 of Growing Joy with Maria Podcast, where host Maria Failla talks about orchid care with Chris Satch, the NYC Plant Doctor and educator for the New York Botanical Garden.

What is an Orchid?

Botanically, orchids are plants that have a unified column, which is a unique reproductive structure that unites the orchid family. They can adapt to different environments, but most of them do love the tropics—which is why you can find them on every continent except Antarctica.

Orchid Care Basics

Let’s get into the basics of taking care of them:

  • Light requirements: Orchids love bright, indirect light. Placing them near an east or west-facing window where they receive filtered sunlight is ideal.


  • Temperature & humidity: Orchids thrive in moderate temperatures, so it’s ideal to maintain them within the range of 60°F to 80°F during the day, with slightly cooler temperatures at night. They also love higher humidity levels!


  • Watering: Orchids have different moisture requirements, depending on the species and growing conditions. As a general rule, water your orchids when the soil is almost dry but not completely dried out.


  • Potting mix: Avoid planting orchids in regular potting soil. They need a well-draining mix that mimics their natural environment. Sphagnum moss, orchid bark mix, or a combination of the two are typically used to provide moisture control for orchid roots. Use Espoma Organics Orchid Mix, which is a blend of organic materials that ensures proper drainage while retaining essential moisture.


Common Orchid Types

  • Phalaenopsis: A popular choice for beginners, with elegant and long-lasting flowers.

Pink Orchid

  • Cattleya: If you’re a collector, you’ll love these orchids. They have vibrant and fragrant blooms but prefer brighter light and slightly cooler temperatures.

Pink and orange Cattleya flower, orchidaceae family

  • Vanda: Known for their striking, colorful flowers and aerial root growth. They like high humidity and bright, indirect light.

Pink, red and yellow flowers

  • Encyclia: These charming, unique flower forms are known for their toughness and ability to adapt to different conditions. 


Fertilizer: To Use or Not to Use?

Fertilizing orchids during their active growth periods is beneficial for the beautiful blooms associated with them. A balanced orchid fertilizer like Espoma Organic Orchid! A bloom booster that will do wonders—just make sure not to overdo it! Too much can build up salts and harm the roots.

Myth Busting: Ice Cubes & Level of Difficulty

Myth 1: Ice Cubes are Good for Orchids 

Myth! Putting ice cubes on the soil can actually harm your orchid. It’s best to water them thoroughly and let any excess water drain out of the pot. You want to avoid letting the roots sit in standing water.

Myth 2: Orchids are Difficult to Care For

Partially a myth. Here’s the truth: some can be tricky, but most of the orchids you’ll find in stores are specifically selected to be tough and adaptable to indoor conditions. In fact, orchids are often described as plants that like “benign neglect.” You can leave them alone for a while, and they’ll still thrive!

Troubleshooting Orchid Problems

Q: Why is my orchid not blooming?

A: If your orchid isn’t blooming, it might need more light or consistent temperatures. 

Q: Why are my orchid leaves turning yellow?

A: If the leaves are turning yellow, you could be overwatering or underwatering. And if you notice mushy or black roots, that might indicate root rot, which can be caused by too much water or poor drainage.

*****

It takes patience, attention, and a willingness to learn to take care of orchids. But it’s totally worth it! Add these plants to your collection, and enjoy their stunning flowers and captivating growth patterns for years to come. 

Featured Products:


Where to Buy


https://www.espoma.com/wp-content/uploads/2023/07/Copy-of-Espoma-Orchid-Care.png 1080 1080 Matt Dauphinais https://www.espoma.com/wp-content/uploads/2023/05/espoma-logo340w-1.png Matt Dauphinais2023-07-25 11:19:432024-09-27 17:00:28Growing Joy with Maria Podcast Episode 30 Blog: Orchid Care Basics

Growing Joy with Maria Blog: Windowsill Gardening 101

July 11, 2023/in Blog, Bloom and Grow Radio

Are you interested in starting your own windowsill herb garden but have no outdoor space? In this blog, we’ll cover everything you need to know to create a thriving herb garden right on your windowsill.

This blog is inspired by Episode 22 of Growing Joy with Maria Podcast, where host Maria Failla interviewed Marianne Garceau, the Associate Director of the Garden Shop at the New York Botanical Garden, to share her expertise on best practices for setting up and maintaining a windowsill herb garden.


How to Grow Herbs Indoors

Choosing the Right Window

The most important thing to consider when starting a windowsill herb garden is finding a window that receives at least six hours of sunlight per day. A southeast or southwest-facing window would be perfect for this.

If you don’t have a sunny window, you can always use artificial lighting (grow lights) to grow your herbs. This is a wonderful option for year-round growth.

Finding the Right Container

In order to grow successful herbs, you’ll need to choose the right container size. A 6-inch pot is recommended, but you’ll need to make sure your windowsill is wide enough to accommodate it. Check to see if your pot has a hole in the bottom to allow water to drain out; this is important since herbs don’t like “wet feet,” meaning they don’t like excess water sitting at the bottom of the pot.

Potting Mix

Optimal potting mix is crucial for your herb garden’s success. It’s best to use Espoma Organic Potting Mix to grow healthy herbs, as garden soil is too heavy for indoor planting. Its all-natural, organic composition promotes excellent drainage, ensuring your herbs won’t sit in excess water.

Caring for Your Herbs

Once you set your herbs up for success with high-quality potting mix and pots with drainage, it’s time to nurture them as they grow. Water them thoroughly, but not frequently. Avoid overwatering by allowing the top centimeter of the soil to dry out. The remaining soil should stay relatively moist without drying out fully.

Plant Pruning

Pruning is essential to achieving a bountiful harvest of herbs throughout the season. When you prune a plant, it triggers growth hormones that allow the plant to grow bushier and more full in shape. Make sure to only prune up to a third of the plant at one time. When snipping, cut right above the leaves to encourage new growth.

Harvesting Herbs

Herbs are best when fresh, so cut them right before you’re ready to use them, and apply the guidelines stated above. Never harvest more than one-third of the plant at a time.

Common Mistakes

The biggest mistake people make when caring for indoor herbs is overwatering or not allowing enough sunlight to reach the plants. Overwatering can lead to fungus gnats and yellow leaves, while lack of sunlight can cause the plant to stop growing or get leggy.

Recommended Herbs

An ideal choice for budding indoor gardeners is Mint. You can enjoy the delightful taste and scent of peppermint, spearmint, orange mint, pineapple mint, and even mojito mint. Mint is a fast grower and can be used in cocktails, salad dressings, and so many other recipes.

Newbie growers might also find joy in nurturing basil, the queen of the herb garden. As long as it has the light it needs, basil can flourish on a windowsill, and the scent is incredible!

Oregano is another great herb to grow indoors and can even serve as a cute trailing houseplant, adding a touch of green and dimension to your living space.

*****

Starting a windowsill herb garden is both an easy and enjoyable activity. Before long, your windowsills could become tiny farms, rich with nutritious greenery, personality, and—most importantly—future caprese salads! With sunlight, appropriate pots, regular maintenance, and the helpful addition of Espoma products, you’ll be harvesting fresh herbs in no time.


Featured Products:


Where to Buy

https://www.espoma.com/wp-content/uploads/2023/07/Espoma-Windowsill-Herb-Gardening.png 1080 1080 Matt Dauphinais https://www.espoma.com/wp-content/uploads/2023/05/espoma-logo340w-1.png Matt Dauphinais2023-07-11 13:06:442024-10-01 13:28:40Growing Joy with Maria Blog: Windowsill Gardening 101

VIDEO: The Perfect Flower Pot for Grandma || Wyse Guide ??

June 23, 2023/in Blog, Kaleb Wyse

There’s nothing better than the gift of greenery, and Kaleb of @Wyse Guide knows his grandma deserves the best! That’s why he uses Espoma Organic Potting Soil Mix and Plant-tone to give these container plants a strong head-start to last for seasons to come. Follow along for all his tips and tricks for a beautiful addition to any home.

Bonus tip: We also recommend using Espoma Organic Bio-tone Starter Plus at the time of planting to help produce large root systems very quickly.  This will help ensure that new plantings get maximum water and nutrients from the soil to minimize transplant loss.


*****

Learn more about Wyse Guide here:

YouTube: https://www.youtube.com/WyseGuide

Facebook: https://www.facebook.com/WyseGuide/

Instagram: https://www.instagram.com/WyseGuide/

Website: https://www.wyseguide.com/


 Featured Products:


Where to Buy


https://www.espoma.com/wp-content/uploads/2023/06/WG-Flower-pot-for-grandma.jpg 1080 1920 Matt Dauphinais https://www.espoma.com/wp-content/uploads/2023/05/espoma-logo340w-1.png Matt Dauphinais2023-06-23 16:17:502023-06-23 16:46:33VIDEO: The Perfect Flower Pot for Grandma || Wyse Guide ??

VIDEO: Planting Hanging Pots with Mom?? || Wyse Guide

May 10, 2023/in Blog, Espoma Videos, Kaleb Wyse

Want a Mother’s Day gift that keeps on giving? Consider planting for Mom or anyone special in your life. Or maybe you just like to decorate with hanging plants? Watch Kaleb from @WyseGuide demonstrate how to properly plant your own hanging potted plants.

Kaleb uses Espoma Organic Potting Soil Mix and adds some extra nutrients to the soil with Espoma Organic Plant-tone.


*****

Want some other ideas for Mom? Check out these other ideas:

Grow A Garden Spa for Mother’s Day

DIY Mother’s Day Planter with Garden Answer

Mother’s Day Container Garden


Featured Products:

Where to Buy


https://www.espoma.com/wp-content/uploads/2023/05/WG-Hanging-Potted-Plants-YT-short.png 1920 1080 Matt Dauphinais https://www.espoma.com/wp-content/uploads/2023/05/espoma-logo340w-1.png Matt Dauphinais2023-05-10 15:41:512023-05-10 16:03:26VIDEO: Planting Hanging Pots with Mom?? || Wyse Guide

BAGR 118 Blog: Understanding Hardiness Zones, Frost Dates and Microclimates in the Garden

May 1, 2023/in Blog, Bloom and Grow Radio

As a beginner gardener, it can be overwhelming to navigate the various factors that can affect the success of your plants. One of the most important aspects to consider is your garden’s hardiness zone, frost dates, and microclimates.

This blog is inspired by Episode 118 of Growing Joy with Maria Podcast, where host Maria Failla interviewed Rochelle Greayer of the renowned garden design website Pith & Vigor.


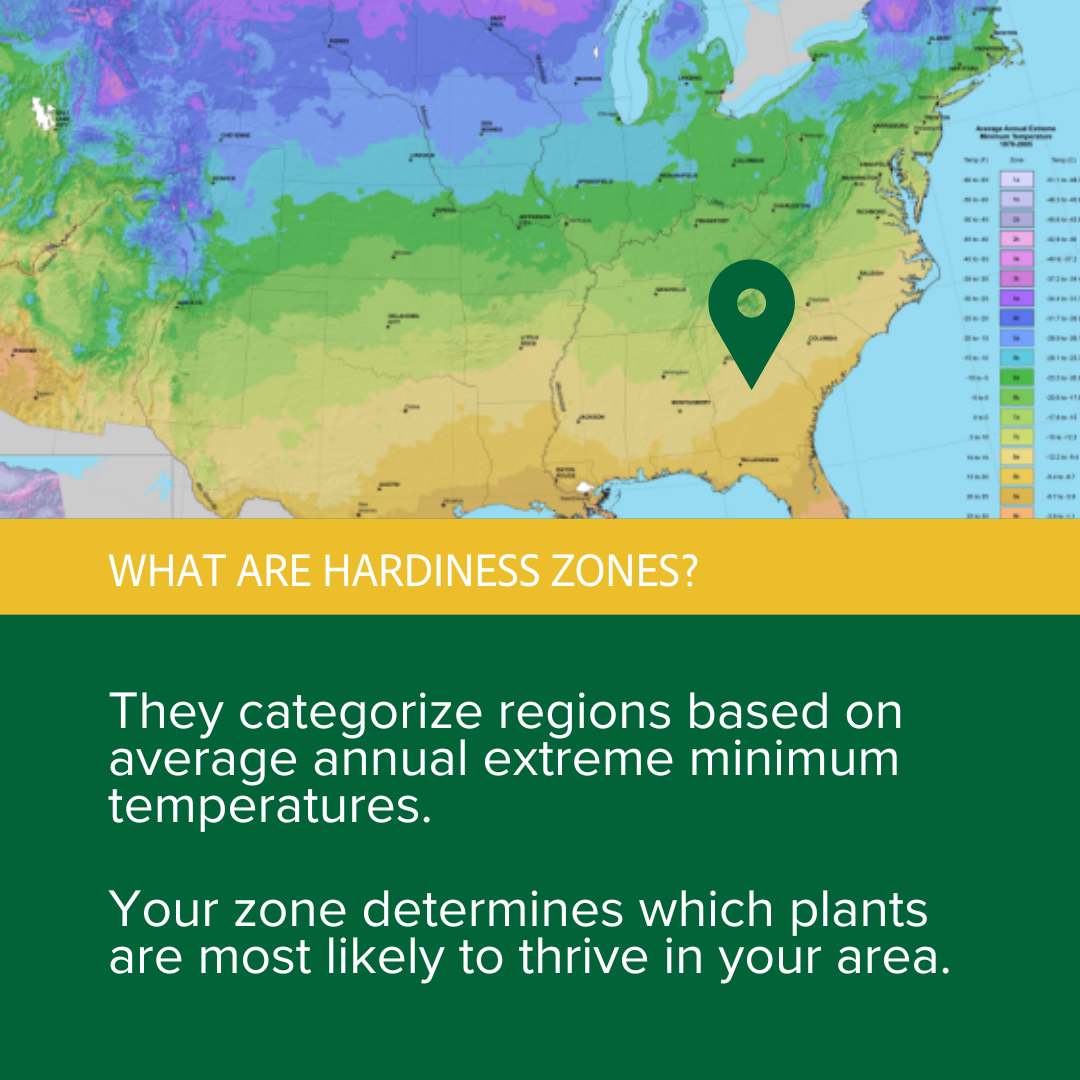
What are Hardiness Zones?

Hardiness zones are a way to categorize regions based on average annual extreme minimum temperatures. The United States Department of Agriculture (USDA) has divided the country into 13 zones, with each zone representing a range of temperatures. The lower the zone number, the colder the region.

Knowing your hardiness zone is crucial because it determines which plants are most likely to thrive in your area.

When selecting plants, make sure to choose the ones that are recommended for your zone. Plant tags or online descriptions will often indicate the plant’s hardiness zone.

It’s important to note that while hardiness zones provide a general guide, they are not foolproof. Other factors, such as soil type, rainfall, and elevation, can also affect a plant’s success. However, knowing your hardiness zone is a good starting point for selecting plants that are well-suited to your area.

What are Frost Dates?

Frost dates refer to the average dates of the first and last frost in your area. These dates are important because frost can damage or kill tender plants, so it’s best to avoid planting them until after the last frost in the spring.

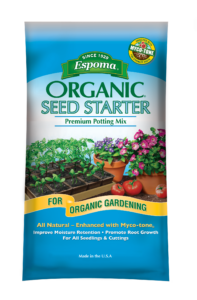
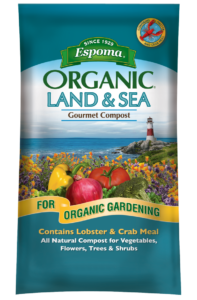
To ensure good germination rates and healthy seedlings, consider using a soil mix specifically designed for starting seeds, such as Espoma Organic Seed Starter.

To determine your area’s frost dates, you can consult a gardening book or website, or contact your local extension office. Another great tip is to go to your local nursery and ask the workers when they plant their gardens, they are the true experts in your region!

Keep in mind that frost dates are just averages, so it’s always a good idea to stay vigilant and protect your plants during particularly cold spells. One way to protect your plants from frost is to cover them with a frost blanket or other protective covering. You can also plant tender plants in containers that can be moved indoors during cold spells.


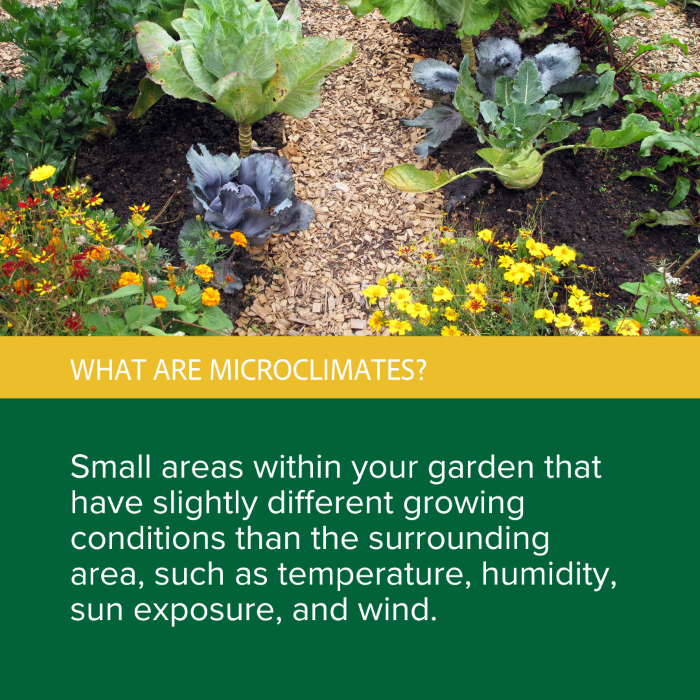
What are Microclimates?

Microclimates are small areas within a garden that have slightly different growing conditions than the surrounding area. These differences can be caused by variations in temperature, humidity, sun exposure, and wind.

For example, a south-facing wall may be warmer and sunnier than the rest of the garden, making it an ideal spot for heat-loving plants. A low-lying area may be more prone to frost and moisture, making it a good spot for plants that prefer cooler and wetter conditions.

By paying attention to microclimates in your garden, you can make the most of the varying conditions and create a more diverse and successful garden.

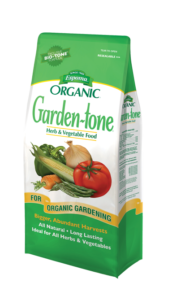
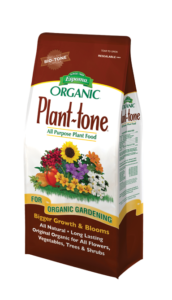
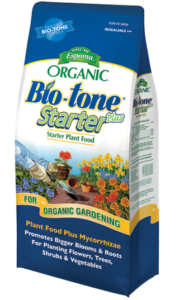
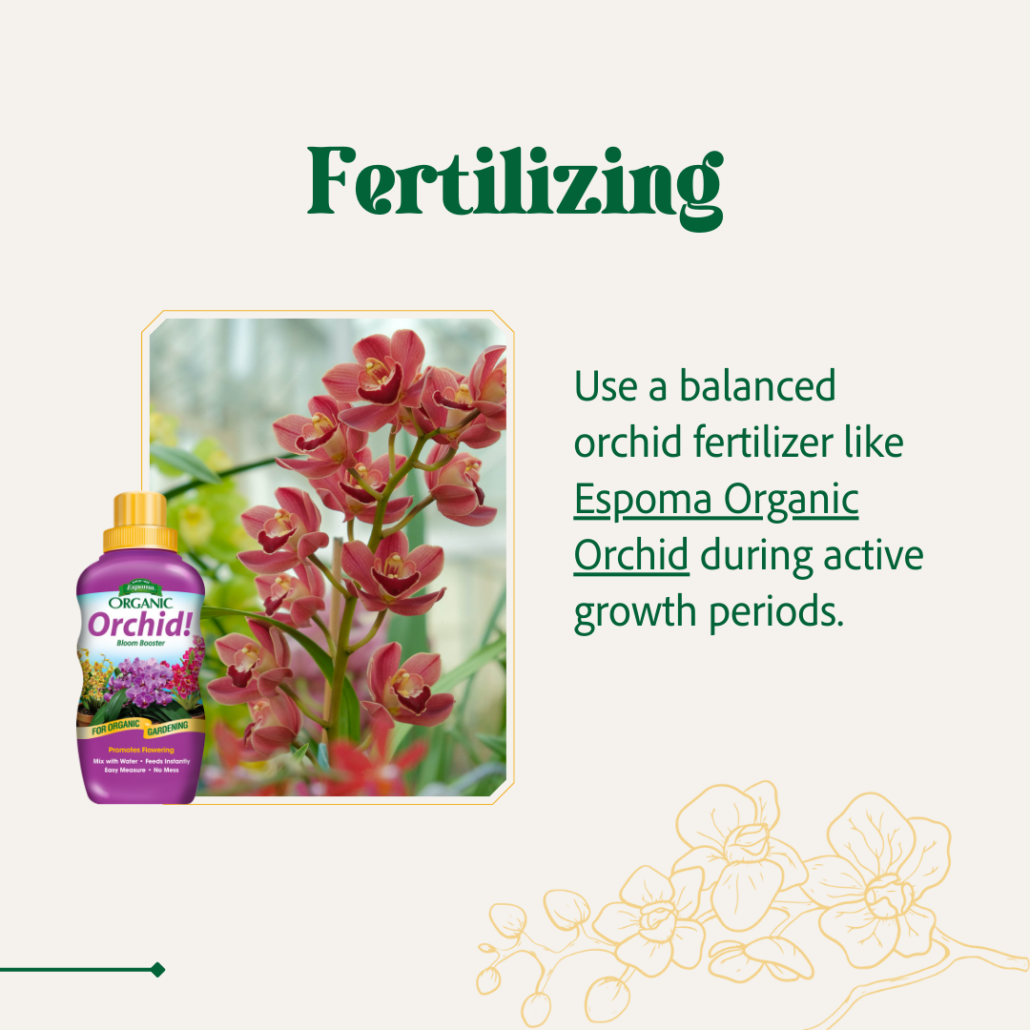
To help improve soil health and promote plant growth, you may want to consider using a plant food like Espoma Garden-tone or Plant-tone. These products contain a blend of natural ingredients that provide essential nutrients to a wide variety of plants.


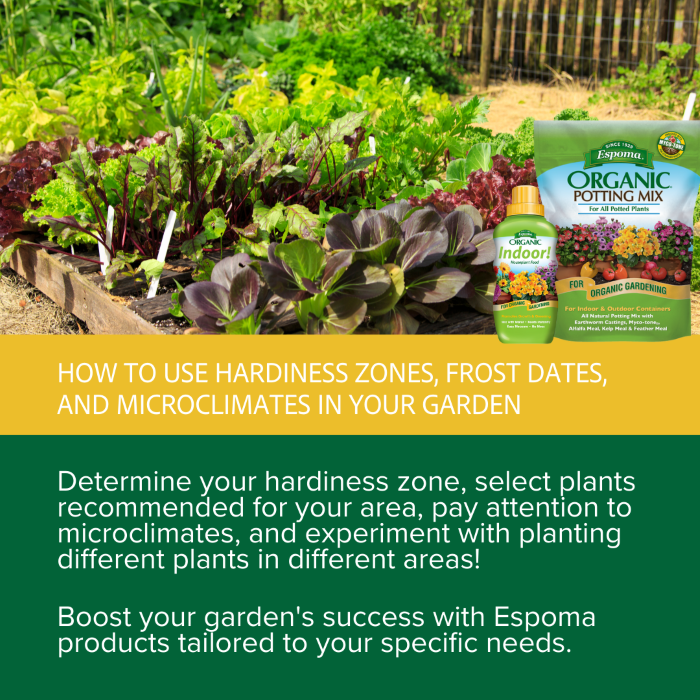
How to Use Hardiness Zones, Frost Dates, and Microclimates in Your Garden.

Now that you understand the basics of hardiness zones, frost dates, and microclimates, you can use this information to plan your garden more effectively.

Start by determining your hardiness zone and selecting plants that are recommended for your area. Make sure to also take into account your area’s frost dates and avoid planting tender plants until after the last frost in the spring.

Next, pay attention to the microclimates in your garden and use them to your advantage. Experiment with planting different plants in different areas to see which ones thrive best in each microclimate.

Finally, don’t be afraid to reach out to local gardening experts for more specific advice on your area’s growing conditions. With a little bit of research and planning, you can create a beautiful and successful garden that thrives in your unique environment.


*****

Additional Tips

 Here are some additional tips to help you make the most of your garden’s hardiness zone, frost dates, and microclimates:

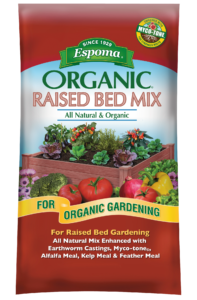
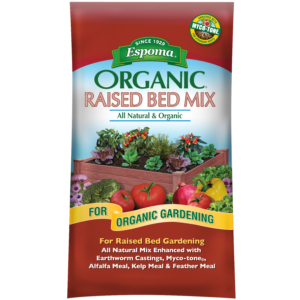
1.  Consider using raised beds or containers to create microclimates within your garden. You can fill these containers with soil that is specifically tailored to the plants you want to grow. Espoma Organic Raised Bed Mix is perfect for filling raised beds.

2. Use mulch to help regulate soil temperature and moisture levels. It can also help prevent weeds from growing.

 3. Keep a gardening journal to track your successes and failures. This can help you refine your gardening techniques and learn from your mistakes.

4. Consider joining a local Garden Club or attending gardening workshops in your area. This can be a great way to learn from experienced gardeners and get advice on specific challenges you may be facing.

5. Don’t be afraid to experiment! Gardening is a constantly evolving process, and it’s okay to try new things and see what works best for you and your garden.

Understanding your garden’s hardiness zone, frost dates, and microclimates is important for successful gardening. By selecting plants that are recommended for your zone, planting after the last frost, and taking advantage of microclimates, you can create a beautiful and thriving garden!


Featured Products: 

Where to Buy


https://www.espoma.com/wp-content/uploads/2023/05/Espoma-Hardiness-Zones.png 1080 1080 Matt Dauphinais https://www.espoma.com/wp-content/uploads/2023/05/espoma-logo340w-1.png Matt Dauphinais2023-05-01 12:12:152023-05-01 12:17:15BAGR 118 Blog: Understanding Hardiness Zones, Frost Dates and Microclimates in the Garden

Video: Indoor Plant Care with Garden Answer!

January 17, 2023/in Blog, Espoma Videos, Garden Answer, Indoor Gardening

Hang out with Laura @Gardenanswer as she gives her plants some TLC and provides some essential indoor plant care tips!

Laura feeds her indoor plants with Indoor! Espoma Organic liquid plant food.


Learn more about Garden Answer here:

https://www.youtube.com/c/gardenanswer 

https://www.gardenanswer.com/

https://www.facebook.com/gardenanswer

https://www.instagram.com/gardenanswer/


Featured Product:

Where to Buy


https://www.espoma.com/wp-content/uploads/2023/01/Indoor-Plants.jpg 1080 1920 Matt Dauphinais https://www.espoma.com/wp-content/uploads/2023/05/espoma-logo340w-1.png Matt Dauphinais2023-01-17 19:55:472023-01-17 19:57:05Video: Indoor Plant Care with Garden Answer!

The Gift That Keeps on Growing: Why Green Gifting is the Way to Go

December 6, 2022/in Fruits & Vegetables - None

The holidays are right around the corner, and gift shopping is in full swing. Not sure what to get the gardener in your life? We’ve got you covered. Even for those less horticulturally inclined, a low-maintenance plant can be a welcome addition to their home or office. Plant presents are going to be all the rage this year, and when you pair them with a bottle of Espoma Organic Liquid Fertilizer, they’ll only continue to grow for holiday seasons to come. Here’s our guide to meaningful plant presents and why green giving is a great option for the holidays!


5 Recommendations for a Meaningful Plant Present

     1. Aloe Vera

Health is wealth, and just one aloe vera plant can bring significant medicinal benefits! Aloe can be used to treat burns, improve digestion, nourish skin, and more. These super air-purifying succulents are also easy to care for, and they only need bright natural light and infrequent watering (typically every 3 weeks, but longer in the winter). Gift aloe vera with good wishes for your recipient’s health, and pair your present with Espoma Organic Cactus! Liquid Fertilizer to keep the love growing. 


     2. Christmas Cactus

If the name isn’t enough of an indicator, Christmas cactus plants make great holiday gifts! They’re low-maintenance like aloe vera, thriving in bright sunlight and with spaced-out watering. Christmas cacti are known to bloom red, pink, orange, or cream flowers right around the end of December, year after year. With a bottle of Espoma Organic Cactus! Liquid Fertilizer and care instructions, a Christmas cactus is a living, reblooming reminder of love. That’s a gift that truly keeps on giving!


3. Peace Lily

The peace lily is an oh-so aesthetically pleasing present to put on your shopping list. With dark green foliage and elegant white flowers, the peace lily is a visually striking addition to any space. It symbolizes purity, rebirth, and tranquility and is a great way to express your genuine support for someone. The peace lily is also easy to care for because the flowers will droop as a signal that the plant needs more water. With visual beauty and simple maintenance, the air-purifying peace lily is a lovely gift that will last beyond the holiday season.


 4. Philodendron

Looking for something with more of an artsy touch? Philodendrons are a frequent feature in modern art, making them perfect for a creative plant lover. The plant symbolizes health, growth, and beauty, so they make ideal gifts for someone entering a new phase in life. Philodendrons vary in appearance, but their low-maintenance nature makes them a common pick for plant parents. Amp up the love by gifting a heart-leaf philodendron variation and include a bottle of Espoma Organic Indoor! Liquid Fertilizer to keep the plant thriving for years to come! 

Tropical, philodendron Hederaceum Micans' Houseplant With Heart Shaped Leaves


5. Poinsettia

This wouldn’t be a proper plant-centric gift guide without mentioning the poinsettia. More than 100 varieties of poinsettias are available today in a wide range of colors, but you can’t go wrong with classic red and green. Poinsettias are easy to find around the holidays and not too difficult to care for—just be sure to limit their exposure to the cold, as cool temperatures can cause the leaves to drop prematurely. To make this festive plant present extra special, repot it in a decorative container!


Why Gift a Plant Present?

Sustainable gifts have been on the rise for years now, and what better way to go green than by supporting a local gardening store and gifting a thoughtfully picked plant? Plants make beautiful decor items, functional air purifiers, and unique reminders of love. With a symbolic selection, care instructions, decorative repotting, and a boost from an Espoma Organic Liquid Fertilizer, a plant present will leave a lasting impact on your recipient’s health and happiness… even if they are a bit difficult to wrap.

*****

We hope this plant-centric gift guide helps you incorporate a little fun and foliage into your holiday shopping this season. Have a plant present idea we missed? 

Share it with us on our Facebook page

Or on our YouTube Page

Tag us on Instagram!


Featured Products:


Where to Buy


https://www.espoma.com/wp-content/uploads/2022/12/Image-1-scaled.jpg 1704 2560 Matt Dauphinais https://www.espoma.com/wp-content/uploads/2023/05/espoma-logo340w-1.png Matt Dauphinais2022-12-06 19:08:312024-10-17 13:13:02The Gift That Keeps on Growing: Why Green Gifting is the Way to Go

VIDEO: Houseplant Heaven with Garden Answer

October 26, 2022/in Blog, Espoma Videos, Garden Answer, Greenhouse Gardening, Indoor Gardening

Is it even possible to have too many houseplants? Not if you’re an expert like Garden Answer! With the help of Espoma’s Organic Potting Mix, walk through a whole haul of exciting, unique, and beautiful houseplants from the research phase all the way to repotting. 


Learn more about Garden Answer here:

https://www.youtube.com/c/gardenanswer 

https://www.gardenanswer.com/

https://www.facebook.com/gardenanswer

https://www.instagram.com/gardenanswer/


Featured Products:


Where to Buy

https://www.espoma.com/wp-content/uploads/2022/10/thumbnail.jpg 1080 1920 Matt Dauphinais https://www.espoma.com/wp-content/uploads/2023/05/espoma-logo340w-1.png Matt Dauphinais2022-10-26 18:45:572023-12-04 12:39:03VIDEO: Houseplant Heaven with Garden Answer

Seed Starting 101: How to Start Seeds Successfully

April 5, 2022/in Blog, Bloom and Grow Radio

Seed starting setup

Seed starting is upon us in the gardening world! There is no better way to connect with the food we eat than by growing it ourselves. Starting edible plants from seed can be intimidating, but we’re here to break it down and answer all your burning questions. 

This blog is inspired by Episode 114 of Bloom and Grow Radio–where host Maria Failla interviewed Joe Lamp’l–the Joe behind The joe gardener Show.

Before we dive into the how of seed starting, let’s understand the why. 

Why Start Your Garden from Seed? 

In our world of instant gratification, what’s better than starting your gardening season way sooner than most gardeners?! When you start seeds indoors, you get your hands in the dirt and get a jump on the growing season. And what a rewarding feeling it is to start your plants from seed, and enjoy the journey of bringing them from seed to plate. 

If you love your edibles, decide what you want to eat and which varieties you want. Don’t leave it up to what’s available at the garden center. Think about how much you can choose when you start from seed: flavor, varieties, and the stories behind different heirlooms. You can really expand your food choices when you get to pick exactly what you grow. 

Another great reason to start your own seeds is to make sure you’re growing the right kind of plant for your needs. Do you absolutely love tomatoes, but only have a small balcony to grow them? Look for microdwarf tomato varieties that only grow about 1-2 feet tall! If you have a short growing season, you’d also want to make sure you choose “early” or “short season” plant varieties. 

Starting from seed offers us the ability to be in control of the varieties we grow, plan in advance, and save lots of money in the long run. Speaking of starting seeds on a budget…

How to Get Your Seed Starting Setup for Under $100

Your seed starting setup can be super budget-friendly if you take the time to look at the components. For under a hundred dollars, you can put together everything you need! Let’s break down the materials, costs, alternatives, and conditions you need for seed starting. 

Seed Starting Mix

To start, you need a good seed starting mix. It’s called a “mix,” because there’s really no soil in it. It’s made of natural ingredients like peat moss, vermiculite, and perlite. A bag of seed starting mix is going to cost between $5-$10.

Espoma Organics takes the guesswork out of your selection by providing their high quality seed starting mix. 

Seed Starting Trays

With one bag of seed starting mix, you can fill about two seed starting trays, which is your next material needed. Seed starting trays can give you anywhere between 18 to 72 cells to sow your seeds. You can get two trays for about $10. 

Look for seed starting trays with cells about 3.5 inches or smaller. In a traditional seed starting tray, cells are deep so seedling roots have more room to grow down. About 4 weeks from germination you’ll have to transplant your seedlings into a larger individual pot, AKA “potting up”.

Best Grow Lights for Seed Starting

Next is a grow light. Grow lights are where you could spend a lot of money in your seed starting setup, but if you’re on a budget, there is nothing wrong with buying an LED or fluorescent shop light for $20. You can get your seeds sprouted and ready for planting outside in good condition with a very inexpensive shop light. Will it be as good as a seedling that’s under a more expensive light? Maybe not, but all you’re really trying to do is rear those seedlings to the point that they are ready to go outside. Once they get outside, Mother Nature knows what to do and so does that seedling.

What are Heat Mats for Seed Starting important?

Heat mats are seed starting game changers. Heat mats raise the soil temperature, which helps your seeds sprout faster. Seeds have an ideal range of soil temperature in which they sprout the best, and can be anywhere from 65 to 85 degrees Fahrenheit. Seed mats will cost you between $15 and $35, depending on whether you get a thermostat attached.

Once most of your seeds have germinated, remove them from the heat mats. If you leave your seedlings on heat too long, they can start to become leggy. 

Humidity Dome for Germination

You’ll also want a humidity dome. It’s a clear plastic top that you put over the seed tray to hold the moisture in the soil until the seed germinates. If you don’t have a cover on your tray, the moisture won’t stay in the soil and the seed is not as likely to germinate. For two humidity domes, you’ll probably pay about $6. You can also use plastic wrap and lay it over the top to hold in moisture for your seedlings. 

A key point to remember with humidity domes: once your seeds germinate, remove the humidity dome so seedlings get enough oxygen. Airflow brings us to the next material needed. 

Small Fan for Seed Starting

Last but not least, a fan. You can get a cheap clip-on fan for $15. Fans are important because once the seed germinates, you need air movement across that soil surface. Air movement reduces the chance of a fungal disease called damping off, which can kill your seedlings. Fans also simulate wind, making the stems sturdier and ready for outdoor conditions.

Total Seed Starting Materials Cost

Here’s the cost breakdown to get your seed starting setup for less than $100:

Bag of seed starting mix: $10

2 seed starting trays: $10

Shop light: $20

Heat mat: $15 – $35

Humidity dome: $6

Clip-on fan: $15

TOTAL: $81 – $96

All about Seeds: Where to Buy Them, Expiration Dates, & Non-GMOs

It’s important to find a good seed company. Here are some tips when you’re searching: 

  • Look for companies that have been around for a while with a good reputation. 
    • Do they have good customer service? 
    • Are their staff knowledgeable about their seeds? 
  • Find local or regional seed companies that grow their seeds close to home. Some seed companies can outsource their seeds from overseas from a huge commercial supplier. It’s important to know where your seeds are grown. 
  • When you grow seeds adapted to your area, plants have a much better success rate. The more you grow those seeds and save them, the more adapted they’ll become to your specific microclimate too! 

Seed Expiration Dates 

Seed packets will show the day that the seed was packed. Assuming you have leftover seeds and you keep them in a cool, dark, dry place, they will last anywhere from as little as one year to many years, depending on the seed. 

How do you know when a seed is still good or if it’s gone bad? Do a germination test! Before you plant your seeds, put about 10 seeds in a damp paper towel in a plastic bag. Check the moisture daily and after about 10-14 days, your seeds will either have sprouted or not. If 7 out of 10 sprouted, your viability is about 70%. Depending on your viability you can either plant extra or compost unusable seeds.

What are Non-GMO Seeds?

GMO stands for Genetically Modified Organism. Many seed companies have jumped on the bandwagon saying all of their seeds are “certified non-GMO.” There actually aren’t any GMO gardening seeds available for home gardeners. None of the seeds you purchase will ever be GMO seeds. GMO seeds are present in the commercial agriculture industry, but it’s expensive to produce a GMO seed and it’s not anything that we’re going to even be able to buy. So if a company is touting non-GMO seeds, that’s true, they are. But so are everyone else’s.

The Best Time to Start Your Seeds

The most important date you need to know is the last day that you are potentially going to have frost. This is called your frost-free date in Spring. You can find yours by Googling “last frost date” in your area. Once you have that date, then you work backward to about 6-8 weeks. That’s when you’ll be sowing most of your seeds.

You want to time your seed starting so you give your seeds about 6-8 weeks of growing time indoors. By the end of the 6-8 weeks, seedlings will have grown to a sturdy size and are then ready to grow outdoors. If you choose a good seed company, there should be lots of information about this on the back of the seed packet.

If you start your seeds too early, you risk your plants getting too big and outgrowing their space. They’re going to be looking for resources that you probably can’t provide indoors, like more light, nutrition in the soil, and space to grow. The longer your seedlings are confined indoors without the right environment, the more stressed they become. Timing when you plant your seeds is crucial to the seed starting process. 

Let’s Get Planting! 

Now that you’ve got your seed starting setup and timing down, how do you get your seeds in the soil? 

First, look at the information on your seed packet. It will typically have all that important seed starting information you need, including how many weeks to start indoors, days to maturity, and growth patterns. 

Make sure your seed starting mix is pre-moistened, like a damp sponge. Most seeds don’t need light to germinate, but they don’t need to be planted very deeply either. Once you have your seeds in, sprinkle a little bit of extra seed starting mix on top. Spray the tops of the soil gently with water so you don’t move the seeds around too much.

When your seeds are planted, place your humidity dome on top, put your tray on your heat mat, and turn your lights on. Your seedlings are going to sprout in a matter of days to a week, maybe two weeks at most. Once your seeds germinate, remove your humidity dome and turn on your fan. From there, you’re just ensuring that the soil stays moist.

The first leaves that come up are called seed leaves, or cotyledons. In a few weeks, your plants will grow new “true” leaves. Once those new true leaves emerge, you can start to add small amounts of supplemental fertilizer.

Your job over the next 4-5 weeks will be monitoring plant growth and making sure everything looks good. Keeping the lights at the proper distance above the tops of the seedlings is also key–not too close, not too far away.

The Final Step: How to Harden Off Your Plants

Hardening off is about 7 to 10 days of transitioning your seedlings slowly to outdoor conditions. You slowly increase the tender, new leaves’ exposure to sun and wind over about two weeks. Make sure outdoor temperatures are above 45 degrees Fahrenheit with no inclement weather during this period, and bring plants indoors every evening.

Here is a rough schedule to follow: 

  • Days 1-2: 1-3 hours outdoors in shade
  • Days 3-4: 3-5 hours outdoors in shade
  • Days 5-6: 3-5 hours outdoors in morning sun
  • Days 7-8: 7-12 hours outdoors in sun
  • Days 9-10: Leave plants outdoors overnight 

Once you’ve gotten your plants used to the outdoor elements, they’re all ready to be planted in their new homes outdoors! 

*****

Featured Products:


Where to Buy

https://www.espoma.com/wp-content/uploads/2022/04/Seed-starting.png 500 500 espoma https://www.espoma.com/wp-content/uploads/2023/05/espoma-logo340w-1.png espoma2022-04-05 08:25:302023-12-06 13:46:36Seed Starting 101: How to Start Seeds Successfully

Video: 7 Indoor Succulents for Beginners with Garden Answer!

February 17, 2021/in Blog, Espoma Videos, Garden Answer, Indoor Gardening, Succulents

Are you ready to bring succulents into your home but not sure where to start?  Laura from Garden Answer has you covered! In this video, she shares her top seven beginner-friendly indoor succulents and simple care tips to help them thrive. Laura recommends starting with a high-quality organic potting soil like Espoma Organic Cactus Mix and feeding with an organic fertilizer like Espoma Organic Cactus! Liquid Plant Food.

Learn more about Garden Answer here:

https://www.youtube.com/c/gardenanswer

https://www.gardenanswer.com/

https://www.facebook.com/gardenanswer

https://www.instagram.com/gardenanswer/

Featured Products:

Espoma Organic Cactus! - Organic liquid fertilizer - organic fertilizer Espoma Organic Cactus Mix - Organic potting soil


Where to Buy
https://www.espoma.com/wp-content/uploads/2021/02/Screen-Shot-2021-02-17-at-5.11.44-PM.png 403 791 Danielle Kirschner https://www.espoma.com/wp-content/uploads/2023/05/espoma-logo340w-1.png Danielle Kirschner2021-02-17 17:25:102024-12-12 16:55:59Video: 7 Indoor Succulents for Beginners with Garden Answer!
Page 15 of 17«‹1314151617›»
Where to Buy

Get News & Updates

Recent Posts

  • VIDEO: One Last Autumn Stroll 🍁🍂 with Summer Rayne Oakes
  • VIDEO: How to Plant Spring Bulbs in Containers 🌱🌷 with Garden Answer
  • VIDEO: Bringing In Your Plants for Winter 🪴❄️ with Summer Rayne Oakes
  • Final Fall Plantings & Tips for Bringing Plants Inside for Winter 🍁🪴 with Wyse Guide
  • Simple Fall Plantings 🪴🌻🍁 with Garden Answer

Tags

All-Purpose Potting Mix bio-tone Bio-tone Starter Bio-tone Starter Plus Cactus Mix caring for houseplants Container Gardening DIY project Espoma espoma grown espoma organic Espoma Organics Espoma Video fall gardening Family fert flower garden flowers garden Garden Answer Gardening gardening tips gardens grow holly-tone houseplants Indoor! indoor gardening indoor plants Kaleb Wyse organic organic fertilizer Organic Gardening organic plant food Organic Potting Mix Outdoor Gardening Planting plants Potting Mix potting soil Spring Gardening summer rayne oakes vegetable garden Vegetable Gardening Wyse Guide

Espoma. A Family Tradition Since 1929.

Espoma Organic logo
  • Espoma Dealer
  • Espoma Pro
  • Garden Club
  • Privacy Policy

Scroll to top