Espoma Organic
  • Products
    • Close
    • Product Line Overview
    • Plant food finder
    • Garden Fertilizers
    • Potting Soils
    • Liquid Fertilizers
    • Lawn Fertilizers
    • Single Ingredients
    • Conventional Plant Foods
    • Animal Care Products
  • Where to Buy
  • Our Story
    • Close
    • Our Story
    • Locations
    • Historical Timeline
    • Our Commitment
    • Directions
    • Solar
    • Join our Team
    • Espoma Brand Partners
  • Learn
    • Close
    • Espoma Blog
    • FAQ’s
    • Pocket Guide
    • Espoma Guides
    • Garden Clubs
    • Safe Paws Lawn
    • PRODUCT FACT SHEETS
    • Fertilizer Fundamentals
      • Close
      • Understanding Plant Nutrition
      • Reading Labels
      • Choosing the Right Type of Fertilizer
      • Terms & Definitions
    • Gardening Projects
    • Resource Links
  • Contact Us
  • Menu Menu

Tag Archive for: Vegetable Gardening

One, Two, Three – What Soil Tests Numbers Really Mean

September 15, 2015/in Fall Gardening

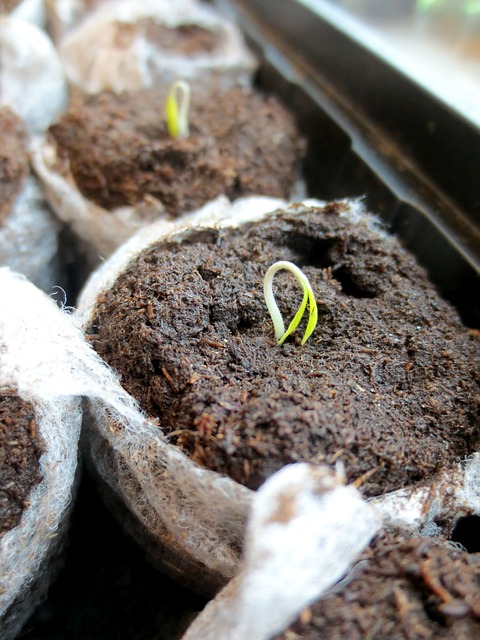
With just a tiny bit of water, a handful of seeds and some sunshine, your garden makes its own magic.

Well, almost! Your plants get all their food from the soil, too. After a busy summer, it’s time for your soil’s checkup, so your soil can keep growing its best.

Perform a soil test to see what your soil needs. And, we’ll help you understand what those numbers mean!

Scoop, Snoop and Score Soil.

Your soil’s health is a mystery waiting to be solved. All you need to do is grab a handful of soil and examine it. Send it off to your local extension service. Or, get down and dirty, and DIY it. Here’s how to perform a soil test.

Soil tests measure the nutrients available to plants along with their pH level. Garden soil should be between 6.0-7.0 pH, while the ideal pH for grass is 6.5-7.0.

  1. Low pH? Power the Sour. You’ve got sour, also called acidic, soil with a pH level under 7. Before remedying, remember some plants like this! Raise soil pH levels by adding Espoma’s Organic Garden Lime.
  2. High pH? Treat the Sweet. Soil with a pH level over 7 is known as sweet, or alkaline, soil. To fix, add Espoma Organic Soil Acidifier.

Conclusion Confusion. Understanding Soil Test Numbers

Looking at your soil test, your head may start spinning. What do all those numbers mean? Stick with us, your teacher at Espoma’s Garden School, to learn!

  1. When to N. The “N” on your soil test stands for nitrogen, which helps leaf growth. To raise nitrogen levels, add an organic fertilizer with a higher nitrogen level. Or, use blood meal or fish meal. To lower nitrogen levels, choose a fertilizer with less nitrogen.
  2. Be the P. “P” represents phosphorus, which helps plants flower and grow fruit. Need more phosphorous? Use an organic fertilizer with a higher percentage of P. Or, add bone meal. To lower phosphorous numbers, cut back on the P on the fertilizer bag.
  3. Way of the K. “K” stands for potassium, which helps plants resist diseases and grow healthy roots. If you have too much K, use an organic fertilizer with less potassium. Likewise, if you need more, opt for an organic fertilizer with a higher number K. Or, add sulfate of potash or greensand.

Strong, healthy soil gives way to stronger, bigger and better plants. Talk about a productive day in the garden!

https://www.espoma.com/wp-content/uploads/2015/09/soil-766281_640.jpg 425 640 espoma https://www.espoma.com/wp-content/uploads/2023/05/espoma-logo340w-1.png espoma2015-09-15 13:09:472019-05-07 10:08:09One, Two, Three – What Soil Tests Numbers Really Mean

Don’t Stall! Start Veggie Seeds for Fall

July 21, 2015/in Fruits & Vegetables, Vegetable Gardening

Today’s garden is bursting full of fresh fruits and veggies! There is nothing better than picking and eating a tomato, bean or pepper fresh off the plant.

Yet – we aren’t always so lucky. With fall around the corner, we are already thinking about how to prolong that never-ending supply of delicious, homegrown produce.

Now is the time to start cool-season seeds indoors.

Reap What You Sow: Starting Cool-Season Seeds Indoors for Fall

organic gardening

  1. Get the Goodies. For fall crops, pick the hardiest and most frost tolerant seeds, so they can survive the first frost. Some of our favorites include broccoli, cabbage, kale, cauliflower, beets, carrots and spinach.
  2. Time to Prime. Find your first fall frost date. Look at the number of days to harvest on each seed packet. Use that number to count back from the first frost date, so the seeds have time to mature. Play it safe and add two weeks since plants can grow slower during short fall days.
  3. Awaken the Seeds. Fill seed starting trays within ¼” of the top with a high-quality organic seed starter, like Espoma’s Organic Seed Starter. Read each seed packet to learn how deep and far apart to plant seeds. Cover with soil, press down, label and lightly water.
  4. Store and Cover. Lightly cover the tray with plastic wrap. Keep in a sunny spot near a south-facing window.
  5. Smart Watering. Keep seeds moist by placing the tray in a pan of shallow water until the water seeps up from the bottom. Refill when empty.
  6. Break Out Sprouts. When leaves start to poke from the soil, remove plastic wrap. Feed with an organic fertilizer, like Espoma’s Plant-tone.
  7. A Home Away from Home. Two weeks before planting outside, begin hardening off seeds. Move outside for a few hours a day, increasing time outdoors daily. Also, reduce watering without letting the soil dry out.
  8. All Grown Up! Gently remove plants from see starting tray, and plant in a prepared bed. Mix-in organic starter plant food to help them adjust and grow strong, such as Espoma’s Bio-tone Starter Plus.

Crunch! You’ll be munching on homegrown produce well into fall. How amazing (and tasty!) is that?

https://www.espoma.com/wp-content/uploads/2015/07/leaf-430419_640.jpg 480 640 espoma https://www.espoma.com/wp-content/uploads/2023/05/espoma-logo340w-1.png espoma2015-07-21 11:26:432024-09-06 11:19:27Don’t Stall! Start Veggie Seeds for Fall

Oh Snap! Pick and Serve Fresh Green Beans

June 23, 2015/in Vegetable Gardening

The best time of the year is here! Harvest season!

And our green beans have never looked, well, greener. They’re ready to be picked and cooked for a yummy side dish. The best part is you’ll be picking and cooking beans now through late July.

Learning when and how to harvest green beans does take a bit of practice. Hang with us and in a few days, you’ll be a green bean pickin’ pro!

Give Beans the Green Light

  1. Pinch the Pod.  Harvest green beans when they’re 4-7” in length and the width of a pencil. Most importantly, they should be firm to the touch and have no visible bulges.
  2. They’re About to Snap!  With one hand, hold the bean where it connects to the vine. With the other hand, hold the vine. Now pinch off with your thumb.
  3. Cool (Green) Beans. Refrigerate in an airtight container. They’ll keep for about 4 days.

Put the Beans to the Test! Taste Test Green Beans with this Delicious Recipe  

As soon as beans leave the vine, you want to taste them! So, we always have a recipe ready to go ahead of time. Try one of our favorite recipes below.

Green Bean Salad with Mustard Vinaigrette

Ingredientsgreen bean recipe

  • 1 ½ lb. freshly picked green beans, trimmed
  • 3 tablespoons EVOO (Extra-Virgin Olive Oil)
  • kosher salt and pepper
  • 1 tablespoon Dijon mustard
  • 2 tablespoons sherry vinegar
  • ½ cup sliced almonds, toasted

Instructions

  1. Boil Water.  Boil a pot of water over high-heat.
  2. Rinse and Trim.  Meanwhile, rinse and cut the stems off your fresh green beans.
  3. Cook. Add 1 tablespoon salt and boil the beans until tender, usually 4-5 minutes. Then drain and run under cool water.
  4. Whisk. Combine mustard, vinegar, oil, salt, and pepper.
  5. Drizzle. Place in serving dish and evenly coat with mixture.
  6. Sprinkle. Scatter almonds over beans.
  7. …and Serve!  

Picking green beans is easy – and delicious. Get ready to enjoy fresh green beans all summer.  Yum!

https://www.espoma.com/wp-content/uploads/2015/06/beans-598185_640.jpg 478 640 espoma https://www.espoma.com/wp-content/uploads/2023/05/espoma-logo340w-1.png espoma2015-06-23 12:07:482019-05-07 10:08:44Oh Snap! Pick and Serve Fresh Green Beans

Repurpose on Purpose: Trash Transforms into Beautiful Containers

June 23, 2015/in Flowers, Landscaping, Spring Gardening

Container gardening adds a whole new element of style and flair to your outdoor space. Not only do you get to showcase DIY container
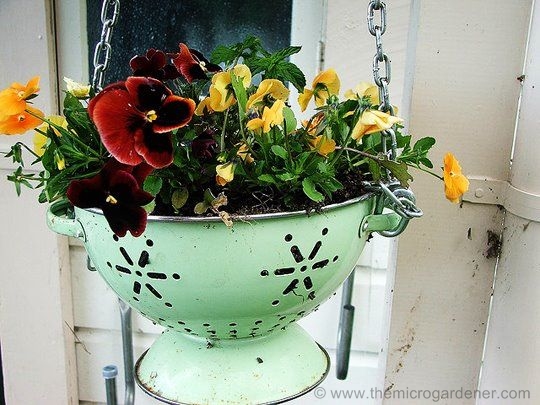
your style through plants, but also in the unique pots you choose. It’s twice the fun!

And you can do it for the planet, too. Growing herbs, veggies and flowers already makes the world a greener place. Now reuse and repurpose a forgotten item into an invigorated planter. Upcycling creates less waste and saves money, too.

Create a repurposed container for a beautiful (and thrifty!) container garden.

Your soon-to-be favorite container may already be in your house. Almost any vessel can be repurposed into a garden container! You’ll be amazed by what you discover (and by what containers you didn’t even know were hiding in your cupboards).

Up for Grabs: Upcycled Containers

  1. Pin Your Style. Create a look that is truly all your own. Decide if you want a rustic, modern, country or bold look. Then browse Pinterest for inspiration.
  2. Start the Search. Browse your kitchen, closet, garage and cupboards for items you no longer use. Any size works! Branch out to yard sales, thrift stores and flea markets for more unique looks.
  3. Add a Special Touch. Personalize your container by painting it, covering it in old wallpaper, or even turning it into a mosaic. Get crafty!
  4. Show Them the Drill. Then Fill. Drill holes in the bottom of your repurposed container to provide drainage. Without drainage holes, soil becomes too wet and causes roots to rot. When ready, fill with the ideal potting soil, Espoma’s Organic Potting Mix, and your favorite plants.
60bc838855263aa8a8875fd58e171bca

These upcycled tires are stacked and painted- as seen by Ellen Wells at Syngenta

Colander-planter_wm

A colorful, retro colander makes a great hanging container

Toy-truck-planter

Think outside of the (toy)box

bra-planter

And, of course, the bigger the better for this container…

Other Types of Repurposed Containers:

Get inspired by some of our favorite items to turn into garden planters below.

  • Teacups and teapots
  • Pitchers
  • Tires
  • Boots and shoes
  • Colanders
  • Desk drawers
  • Buckets
  • Wine crates and whiskey barrels
  • Wheelbarrows and wagons
  • Clothes and lingerie
  • Toolboxes
  • Suitcases
  • Watering cans

Creating repurposed containers is a quick, affordable and fun way to expand container gardens. Once you start, the possibilities are endless!

*thank you MicroGardener for the photos!


https://www.espoma.com/wp-content/uploads/2015/06/Capture2.jpg 261 527 espoma https://www.espoma.com/wp-content/uploads/2023/05/espoma-logo340w-1.png espoma2015-06-23 08:07:142019-05-07 10:08:44Repurpose on Purpose: Trash Transforms into Beautiful Containers

Feed Tomato and Pepper Plants Now

June 10, 2015/in Fruits & Vegetables, Spring Gardening, Vegetable Gardening

By now you’ve planted your organic tomatoes and peppers! These homegrown veggies should be starting to flower — which means fruit isn’t far behind.

Now, it’s time to sprinkle a little magic.

The trick is to feed veggies monthly with an organic fertilizer. Tomatoes and peppers have big appetites, so they need plenty of organic food. Since plants get all their nutrients from the soil, their all-you-can-eat buffet runs out quick. Feed them right, and they’ll burst full of fresh produce.

how to grow tomatoes

Create a Balanced Diet:

  1. Go Organic. Since you’re eating this food and feeding it to your friends and family, you’ll want to ensure it’s the cleanest and healthiest possible. Choose an organic fertilizer.
  2. Take it slow. Chose a slow-release organic fertilizer. Artificial, rapid growth results in tall, lanky plants. Slow-release, organic fertilizers actually improve the soil as they break down.
  3. Plants need vitamins, too. Find a balanced food with calcium to help prevent blossom rot. Espoma Tomato-tone has 8% calcium! Be careful that you do not use too much nitrogen which will result in a lush, green plant with very little fruit.
  4. More Magic. Tomato-tone also includes Bio-tone®, a blend containing more than 3 million beneficial microbes. Sounds cool, right?

Don’t take it from us — Veggie Gardener had this to say:

“Bio-tone works magic with this fertilizer. These beneficial microbes do the dirty work of creating big and healthy plants which in turn grow large, plump, and juicy tomatoes. Beneficial microbes support good root growth by helping the roots absorb nutrients from the soil. Well producing tomatoes, or any plant for that matter, starts with a healthy and strong root system. Since I started using Tomato-tone, my tomato plants have grown faster, stronger, and produced more tomatoes.”

Ok, you get it. Fertilizing tomatoes and peppers is like sprinkling them with magic dust that makes them grow bigger, better produce. Now get growing.

how to grow peppers

Tips for Feeding Tomatoes and Peppers:

  1. Measure out the fertilizer according to instructions on bag.
  2. Feed single plants with 3 tablespoons of Tomato-tone. For rows of plants, apply 1 cup on each side per 5 feet. Feed potted plants 1.5 teaspoons per 4” pot diameter. More details here.
  3. Sprinkle Tomato-tone starting approximately 6” from the base of the plant.
  4. After feeding, water well.
  5. Feed tomatoes and peppers every month during the growing season.

Feeding tomatoes and peppers takes just a couple of minutes and drastically increases your harvest.

To feed your family lots of organic, homegrown veggies this summer, you’ll need to first keep your veggies well-fed! Get ready for the biggest, yummiest tomatoes and peppers you’ve ever grown.


Where to Buy

While you’re at it, take a selfie with your Tomato-tone! Tag us in the picture with @Espoma.

https://www.espoma.com/wp-content/uploads/2015/06/tomatoes-19577_640.jpg 360 640 espoma https://www.espoma.com/wp-content/uploads/2023/05/espoma-logo340w-1.png espoma2015-06-10 09:51:582019-05-07 10:08:45Feed Tomato and Pepper Plants Now

Nothing tastes better than Produce you Grow at Home!

May 27, 2015/in Flowers, Fruits & Vegetables, Vegetable Gardening

Forget farm-to-table. Back-yard-to-table is the next big thing.

While it’s easy to buy strawberries at the grocery store anytime of the year, if you’ve tasted a freshly picked berry, you 61aa2f93fb6601e0a9691958de00e1d3know fresh is best. In a single bite, you can instantly taste the difference.

Through the rise of farmers markets, we’ve been able to get back in touch with our food and our farmers. These markets not only help us to know where our food comes from, but to also to learn more about nutrition, cooking and agriculture.

Growing your own, organic vegetable garden is easier than you think. And, you’ll save hundreds of dollars on groceries. Plus, it’s so rewarding to taste the food you nurtured and know exactly how it was grown.

If you’re just starting out, try growing organic herbs. They grow like crazy and don’t require much work.

If you’ve got kids, plant tomatoes. Eating them fresh off the vine teaches your children where their food comes from and encourages healthy eating habits. Besides, even the pickiest eaters will be much more likely to eat what they grow.

And, if you just want to get into organics, follow these tips for getting started. It’s the healthiest thing you can do for yourself and your family.

Soon, your family will be eating more organic food. Follow our Pinterest board for easy, fresh and organic recipes, too!

At Espoma Organic, we’ve spent decades sharing the benefits of natural, organic gardening. Believe us, taking care of yourself and the planet is well worth it. After all, food should come from the ground, not from a bag.

Share below why you think organic produce and gardening is important.

https://www.espoma.com/wp-content/uploads/2015/05/vegetables-742095_1920.jpg 1285 1920 espoma https://www.espoma.com/wp-content/uploads/2023/05/espoma-logo340w-1.png espoma2015-05-27 16:14:512024-08-21 08:09:02Nothing tastes better than Produce you Grow at Home!

Guide to Growing Organic Tomatoes

May 18, 2015/in Fruits & Vegetables, Spring Gardening, Vegetable Gardening

If there’s one vegetable that needs to be in your organic garden, it’s tomatoes! Juicy, red tomatoes are the taste of summer.

In a salad, drizzled with olive oil, sliced with fresh mozzarella or even eaten like an apple, homegrown tomatoes make every summer meal taste better.

Like all homegrown food, they’re picked when they’re the juiciest and most flavorful. And since you care for tomatoes all season, you appreciate theorganic tomato 
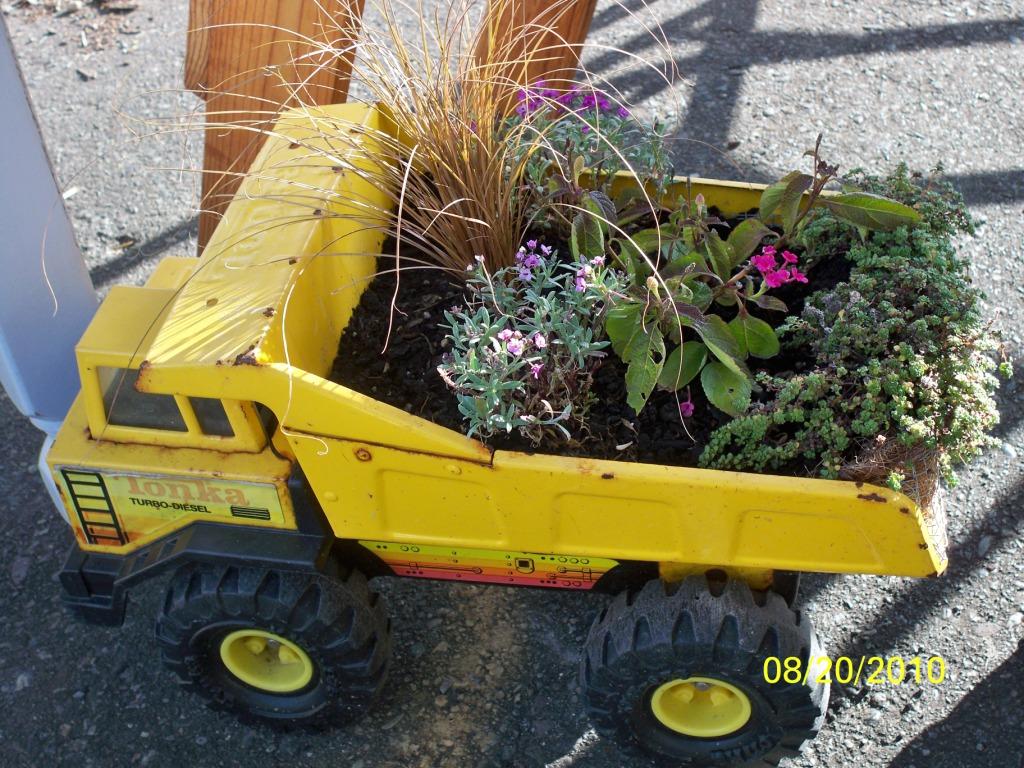
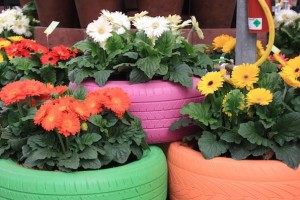
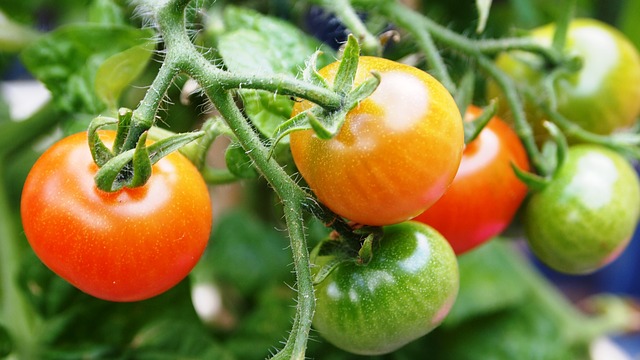
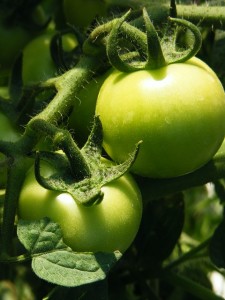
care and work it takes to ethically raise them. You know without an inkling of doubt that these tomatoes are organic, packed with nutrients and 100% free of harmful pesticides.

Plus when growing your own tomatoes, you get to pick exactly the kind you want! There are over 10,000 different types of tomatoes, in nearly every size and color.

To pick the tomatoes best for you, decide if you’d like to snack on tomatoes throughout summer. These are known as Indeterminate. Or if you’d like your crop to ripen at once at the end of summer, select determinate.

Also, think about how you’d like to use your tomatoes. Will you use them in lots of fresh recipes or can and preserve and save them for winter? See our favorite tomatoes below to pick the one right for you!

Best Tomatoes to Eat All Summer (Indeterminate)

  • Best Tomatoes for Sandwiches: Brandywine– The original scrumptious beefsteak, and all other beefsteaks
  • Best Tomatoes for Early Harvest: Early Girl– Bright red in color and flavor
  • Best Tomatoes for Sun-Drying: Any Cherry tomatoes

Best Tomatoes for Canning and Sauces (Determinate)

  • Best Tomatoes for Sauces – Full-flavored Roma
  • Best Tomatoes for Canning –Viva Italia which are virtually seedless
  • Best Overall Tomatoes: Rutgers– Abundant, uniform tomatoes that are perfectly tasty

tomato successPick one (or a couple) tomato varieties and get planting! Follow along below or check out how not to be a couch tomato with these tips.

Since tomatoes love the sun, they need a spot that gets at least 6 hours of sunlight a day.

Then, boost your soil. Mix in 3” of homemade compost or organic Garden Soil into the top 6” of your soil.

While you’re at it, mix in 9 cups of Espoma’s Tomato-tone per 50 square feet. For single plants, use 3 tablespoons of Tomato-tone per plant.

An organic plant food like Tomato-tone provides tomatoes the nutrients they need to grow big and plump. Since this is a slow-release, organic fertilizer, Tomato-tone never forces rapid growth, which reduces tomato yield.

Now dig a hole larger than the tomatoes’ original container. Look at the plant tag to see how far apart each tomato plant should be.

Situate the plant in the hole so its lowest leaves are below the soil level. Go ahead and pinch those lower leaves off.

Then fill the hole with amended soil or Espoma’s Organic Garden Soil.

To set your tomatoes up for success, stake them now to increase air circulation and sunlight exposure.

You can support them with a tomato cage, trellis or container. Or hammer 6-8” stakes 1’ into the ground about 3-6” away from the plant. When tomatoes begin blooming, tie them to the stake.

Right now though, all they need is some water! For the next few days, water tomatoes generously. Then, give tomatoes about 2” of water around their base each week.

In addition to watering, feed your tomatoes an organic tomato food each month. Organically fertilizing tomatoes with Tomato-tone produces larger, plumper tomatoes all season.

In 3-5 weeks, add 2-3” of mulch to reduce water consumption.

It won’t be long now until you’re biting into the first, fresh tomato of the season!

Share this post if you LOVE growing tomatoes!

https://www.espoma.com/wp-content/uploads/2015/05/tomato-409404_1280.jpg 853 1280 espoma https://www.espoma.com/wp-content/uploads/2023/05/espoma-logo340w-1.png espoma2015-05-18 13:46:512019-05-07 10:08:45Guide to Growing Organic Tomatoes

Grow Fresh Herbs at Your Fingertips

May 14, 2015/in Fruits & Vegetables, Spring Gardening, Vegetable Gardening

Forget dried, stale or store-bought herbs. There’s a cheaper, closer and fresher alternative.

Plant an herb container garden near your kitchen or next to the grill.

Having fresh, organic herbs right where you cook makes them easier to incorporate into any meal.

With just a few snips, fresh herbs will invigorate your cooking. With just one bite, you’ll instantly taste the difference. Plus, you can use fresh herbs in unexpected ways, like flavoring olive oil, tea or water

Whether you garden in a large space or a small apartment, an herb container garden is convenient and delicious!

All you need to cook up your next great dish is a sunny spot, a roomy container, the best organic potting mix and your favorite herbs.

First decide which (and how many) herbs to grow. Check old grocery lists or recipes to see which herbs you buy the most but especially spend the most money on. Choose those and grow some just for fun like relaxing lavender and lemon balm!

Herb
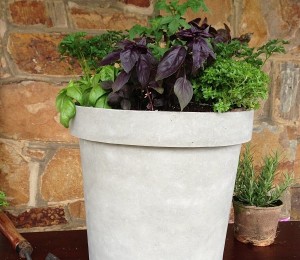
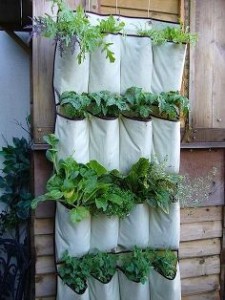
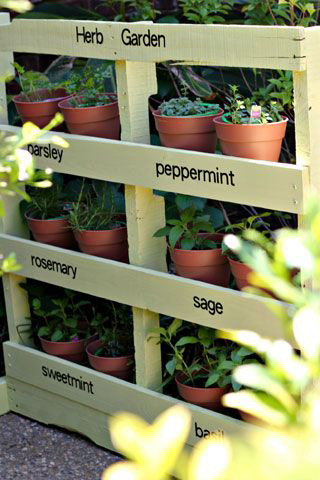
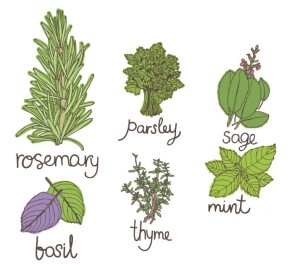
Most herbs will work in a container but the best herbs to plant in containers are: Basil, Mint, Rosemary, Thyme, Oregano, Cilantro, Parsley, Sage, Chives, Lavender, Tarragon, Lemon Verbena

Now pick a container with drainage holes. With container gardens, you can buy a modern or traditional container or get creative and use found objects.

Grouping herbs together that like the same amount of water, light and soil in the same container.

How many herbs you should plant in one container? There’s no hard and fast rule. Use your judgment and read the plant tags.

Go ahead and arrange containers on your deck, patio or any place that’s easy to access when you’re cooking. The area should get between 6-8 hours of sunlight a day.

Once your containers placed, fill half-way with a high-quality, organic potting mix such as Espoma’s Organic Potting Mix. Since you’ll be eating and serving them, organic potting soil is a must!

Now arrange the herbs to your liking! Try 3 or 4 different placements before planting. Read the plant tags to see how big the plants will get, too. And just like those class photos, the tallest go in the back!Container Garden

Once you’re happy with where the herbs are, fill the rest of the container with Espoma’s Organic Potting Mix. For a two gallon container, add 1 cup of Espoma’s Organic Bio-Tone Starter Plus to the top 4-6” of soil. For a five gallon container, add two cups.

Pat the soil to firm and remove air bubbles.

Feeding herbs with an organic fertilizer regularly promotes bigger plants, so you’ll have a bigger harvest. Bio-Tone Starter Plus is a microbe enhanced all natural plant food that will help your herbs to establish quickly.

Give your herb containers 1” of water a week.

Harvest herbs often! The more you pick, the more they’ll grow. Don’t you just love plants like that?

What herbs are you planting this year? Share your favorites by commenting below!

https://www.espoma.com/wp-content/uploads/2015/05/mint-521401_640.jpg 460 640 espoma https://www.espoma.com/wp-content/uploads/2023/05/espoma-logo340w-1.png espoma2015-05-14 08:35:362019-05-07 10:08:45Grow Fresh Herbs at Your Fingertips

Start Seeds Indoors in 10 Easy Steps:

February 11, 2015/in Vegetable Gardening

Planting seeds inside is the first step toward Spring! Starting now means you’ll be planting seedlings outside in just 4 to 6 short weeks.

Plus, planting seeds is as easy and fun as can be. Gather your kids, family or friends to plant seeds with you for a “think Spring” get-together.

There’s nothing more refreshing or rewarding than crunching down on produce you’ve grown from seed.

How to Plant Seeds Inside:

1. Dream big

Choose your favorite high-quality seeds from a huge selection. Starting hard-to-find or expensive plants from seed will give you the biggest bang for your buck.

2. Stock up

Get plastic trays with holes in the bottom or a seed-starting kit as well as an organic soil starter, such as Espoma’s Organic Seed Starter. An organic soil like this is made specifically to help your seedlings grow strong, sturdy roots in a healthy, safe environment.

3. Get plantin’

Fill seed trays to within ¼” of the top and lightly water. Then, follow seed packet instructions to see how deep and far apart to plant. Cover with soil, press down and label.

4. Water wisely

Water perfectly by placing tray in a larger pan of shallow water for a few seconds or up to a couple of minutes so the water seeps up from the bottom.

5. Find the right spot

Place seeds in a warm, safe place. To warm up a spot, place a space heater nearby or place trays on top of the refrigerator.

6. Take cover and wait

Loosely cover the tray with plastic wrap, or use the cover in your seed-starting kit. Check seeds daily for moisture.

7. Spot a sprout

Once you see sprouts, remove the cover and move seeds to a sunny, south-facing window that is 65-75°F. Then, turn the container a little each day to prevent leaning seeds.

8. Boost plants

When leaves grow, add a bit of fertilizer such as Espoma’s Plant-tone. Plant-tone is an organic fertilizer, so it’s safe to use on edibles and helps plants grow bigger than ever before.

9. Strengthen seeds

Check seed packets to see when to plant after the last frost. Before planting you’ll want to harden off seedlings. Hardening off is a process that gets seeds used to the outdoors. Simply place your tray outside for a few hours a day for 7-10 days. Each day, increase their time outdoors and reduce watering.

10. Plant permanently

Once the last frost date has passed, you’re ready to plant! Gently remove plants from containers without damaging the roots. Plant in a prepared bed and mix in organic starter plant food to keep them strong, such as Bio-tone Starter Plus.

You did it! Spring is just a step away – and so are your crisp, garden-fresh veggies and fruits!

Tell us, what seeds are you starting this year?

Featured Products:


Where to Buy
https://www.espoma.com/wp-content/uploads/2016/01/arugula-762557_1920.jpg 1280 1920 espoma https://www.espoma.com/wp-content/uploads/2023/05/espoma-logo340w-1.png espoma2015-02-11 22:22:472021-02-16 11:35:31Start Seeds Indoors in 10 Easy Steps:
Page 8 of 8«‹678
Where to Buy

Get News & Updates

Recent Posts

  • VIDEO: Planting Potatoes & Ranunculus 🥔🌱🌸 with Garden Answer
  • VIDEO: Spring Garden Awakening with Summer Rayne Oakes 🌿
  • VIDEO: Planting Raised Beds 🌿 with Wyse Guide
  • VIDEO: How to 🌱 Grow a Whole Salad 🥗 in One Pot! 🪴 | Growing Joy with Maria
  • VIDEO: Prune & Feed Trees Like a Pro with Wyse Guide 🌳

Tags

All-Purpose Potting Mix bio-tone Bio-tone Starter Bio-tone Starter Plus cactus and succulents Cactus Mix caring for houseplants Container Gardening DIY project Espoma espoma grown espoma organic Espoma Organics Espoma Video fall gardening flower garden flowers garden Garden Answer Gardening gardening tips gardens grow holly-tone houseplants Indoor! indoor gardening indoor plants Kaleb Wyse organic organic fertilizer Organic Gardening organic plant food Organic Potting Mix Outdoor Gardening Planting plants Potting Mix potting soil Spring Gardening succulents summer rayne oakes vegetable garden Vegetable Gardening Wyse Guide

Espoma. A Family Tradition Since 1929.

Espoma Organic logo
  • Espoma Dealer
  • Espoma Pro
  • Garden Club
  • Privacy Policy

Scroll to top