Espoma Organic
  • Products
    • Close
    • Product Line Overview
    • Plant food finder
    • Garden Fertilizers
    • Potting Soils
    • Lawn Fertilizers
    • Liquid Fertilizers
    • Single Ingredients
    • Conventional Plant Foods
    • Animal Care Products
  • Where to Buy
  • Our Story
    • Close
    • Our Story
    • Locations
    • Historical Timeline
    • Our Commitment
    • Directions
    • Solar
    • Join our Team
    • Espoma Brand Partners
  • Learn
    • Close
    • Espoma Blog
    • FAQ’s
    • Pocket Guide
    • Espoma Guides
    • Garden Clubs
    • Safe Paws Lawn
    • PRODUCT FACT SHEETS
    • Fertilizer Fundamentals
      • Close
      • Understanding Plant Nutrition
      • Reading Labels
      • Choosing the Right Type of Fertilizer
      • Terms & Definitions
    • Gardening Projects
    • Resource Links
  • Contact Us
  • Menu Menu

Tag Archive for: Potting Mix

When to Plant Strawberries (Hint: Think Spring)

April 23, 2018/in Fruits & Vegetables

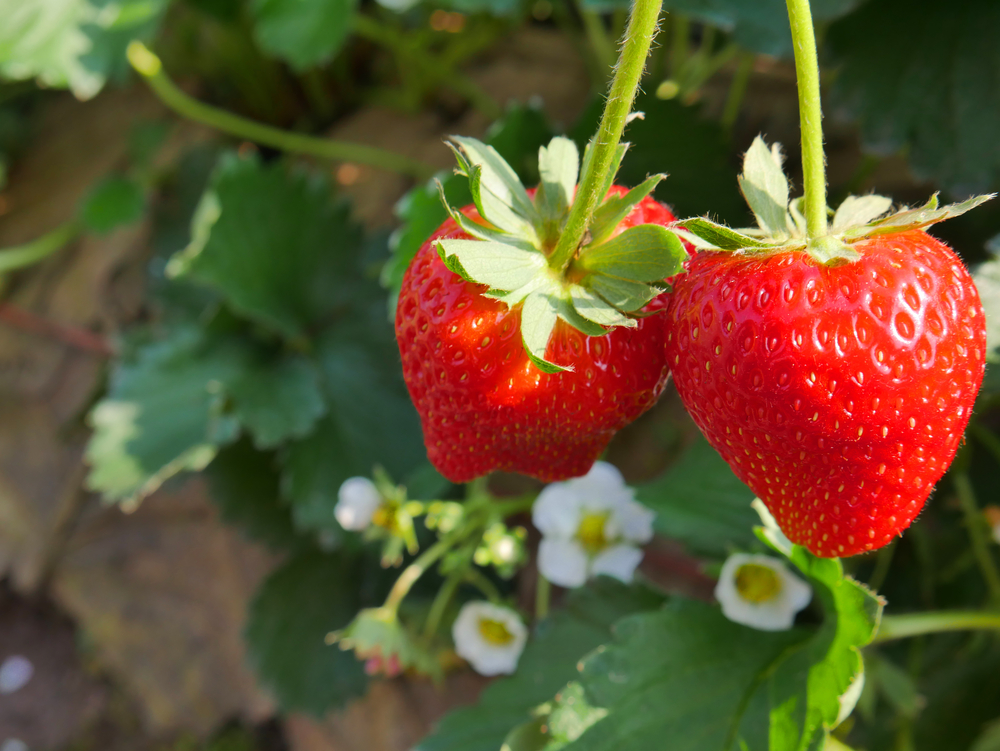
Juicy, sweet strawberries picked from your own garden are simply the best. Plus, taking strawberries from your own garden to your plate is so rewarding. Create a berry garden by pairing with blueberries, blackberries and raspberries.

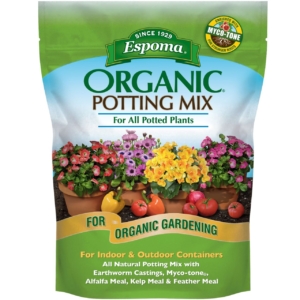
The key to growing berries, no matter where you garden, is good-quality organic soil.

Choosing your Strawberry Plant:

The first step is to pick the type of Strawberry plant you want to grow. Take the amount of growing time Think about where you’ll plant your berries to get the best results. Visit your local garden center to find the best type of strawberry for you.

June-bearing. This traditional berry will usually produce one large harvest in late spring or early summer depending on temperature. June-bearing strawberries are available in early, mid-season and late varieties.

Ever-bearing. These scrumptious strawberries produce two to three harvests intermittently during the spring, summer and fall. Because ever-bearing plants do not send out many runners, they make great choices for containers.

Day-Neutral. Grow these to keep producing fruit throughout the growing season. They continuously fruit if temperatures are between 35-85°F. Because they produce few runners, they are great when space is limited, but the fruits are usually somewhat smaller than June bearers.

Once you’ve picked your plants, it’s time to get them in the ground. Strawberries grow best in full sun and in soil with a pH of 5.5 to 7.  If your pH level is too high, add Espoma’s Soil Acidifier for ideal soil conditions.

4 Steps to Plant Strawberries

1. Plant strawberries as soon as the ground can be worked in the spring.

2. Space plants at least 20” apart. Dig holes deep and wide enough to accommodate the entire root system.

3. Plant the crown (the parts of the plant that are above ground) at soil level; firm soil around it.

4. Add compost to bed and encourage strawberries to grow by adding Espoma’s Holly-tone, an organic plant food perfect for these acid-loving plants.

Short on space or looking to grow strawberries vertically? Check out how Laura from Garden Answer grows.


See the Total Berry Guide Here

Espoma products to help you grow your best strawberries yet:


Where to Buy
https://www.espoma.com/wp-content/uploads/2018/04/strawberry-plants.jpg 847 1280 espoma https://www.espoma.com/wp-content/uploads/2023/05/espoma-logo340w-1.png espoma2018-04-23 15:30:492022-04-12 14:21:03When to Plant Strawberries (Hint: Think Spring)

Build Your Own Vertical Strawberry Planter (Quick Version)

April 18, 2018/in Espoma Videos

Have a minute? Laura from Garden Answer shows us how to make vertical strawberry planters. She walks you through step by step, showing what materials to use, what potting soil and fertilizer is needed and how to hang the finished product.

This wind chime inspired planter will add life to your garden while adding an element of design to your home.

But, be sure to keep the materials in mind – even Laura almost used toxic tubing for the project.

Pro Tip: Mixing Espoma Organic Potting Mix with the Organic Bio-Tone Fertilizer allows the strawberries to get a boost in their new container while releasing nutrients slowly to ensure the edibles are being fed for a long time.

Want to watch the extended version? View it here!

Materials she used includes:

  • Galvanized Duct Work and Cap
  • Self-Tapping Sheet Metal Screws
  • Drill, Bits and 2.5″ Bi-Metal Saw
  • 1/8 inch Quick Links (x6 pieces)
  • Chain (x3 pieces)
  • 1.5 inch Ring
  • Espoma Organic Potting Mix
  • Espoma Organic Bio-Tone
  • Strawberries of your choice
  • Moss
  • Hook

Step-By-Step Instructions:

Construction

  1. Connect your galvanized tubing. There is a rivet on where they should connect – be sure to work from one end to the other to make sure it is secure.
  2. Drill a drainage hole in the bottom of the cap with a metal drill bit. Place the cap on the corrugated end and use 5 self-tapping screws to secure.
  3. Measure your planting holes. Start an inch away from the seam to keep the integrity of the tubing. Each hole should be 7.5″ away from each other. Use a pencil to mark where to drill. This will be your starting place.
  4. Drill your holes with a 2.5″ bi-metal hole saw. Ask one person to hold the tubing while the other saws. You will end up with about 15-16 holes. Safety tip: Wear long sleeves, gloves and eye protection to protect yourself from the metal.
  5. Keep your gloves on while handling the tube as it is sharp.
  6. Drill 3 holes in the top to get it ready to hang.
  7. Attach 1/8″ quick links to each of the holes. Connect your chain to the quick links. Add one more quick link to the end of each chain and each of those will go into one 1.5″ ring.

Planting:

  1. Starting from the bottom hole, add in Espoma Organic Potting Mix and Bio-Tone Fertilizer. Pro Tip: Mixing Espoma Organic Potting Mix with the Organic Bio-Tone Fertilizer allows the strawberries to get a boost in their new container while releasing nutrients slowly to ensure the edibles are being fed for a long time.
  2. Plant each hole with a strawberry and move your way up! You can also add a plant at the very top!
  3. Take little pieces of moss and add them around the strawberry plant. This will help keep the plant inside of the planter and help clean up your project.
  4. Hang your planter with a hook (Laura uses an S-hook).
  5. Slowly water in your new planter – watering too fast can make the plants fall out since their roots haven’t been established yet.

Enjoy!

See the Total Berry Guide Here

Espoma products to help you grow your best strawberries yet:


Where to Buy
https://www.espoma.com/wp-content/uploads/2018/04/IMG_9208.jpg 3368 6000 espoma https://www.espoma.com/wp-content/uploads/2023/05/espoma-logo340w-1.png espoma2018-04-18 10:56:322024-05-20 14:29:38Build Your Own Vertical Strawberry Planter (Quick Version)

Build Your Own Vertical Strawberry Planter (Extended Version)

April 13, 2018/in Espoma Videos

Need a new and updated way to grow your strawberries? Try growing them vertically!

This windchime inspired planter will add life to your garden while adding an element of design to your home. Watch as Laura from Garden Answer shows us how to make vertical strawberry planters.

Be sure to keep the materials in mind – even Laura almost used toxic tubing for the project.

Materials she used includes:

  • Galvanized Duct Work and Cap
  • Self-Tapping Sheet Metal Screws
  • Drill, Bits and 2.5″ Bi-Metal Saw
  • 1/8 inch Quick Links (x6 pieces)
  • Chain (x3 pieces)
  • 1.5 inch Ring
  • Espoma Organic Potting Mix
  • Espoma Organic Bio-Tone
  • Strawberries of your choice
  • Moss
  • Hook

Step-By-Step Instructions:

Construction

  1. Connect your galvanized tubing. There is a rivet on where they should connect – be sure to work from one end to the other to make sure it is secure.
  2. Drill a drainage hole in the bottom of the cap with a metal drill bit. Place the cap on the corrugated end and use 5 self-tapping screws to secure.
  3. Measure your planting holes. Start an inch away from the seam to keep the integrity of the tubing. Each hole should be 7.5″ away from each other. Use a pencil to mark where to drill. This will be your starting place.
  4. Drill your holes with a 2.5″ bi-metal hole saw. Ask one person to hold the tubing while the other saws. You will end up with about 15-16 holes. Safety tip: Wear long sleeves, gloves and eye protection to protect yourself from the metal.
  5. Keep your gloves on while handling the tube as it is sharp.
  6. Drill 3 holes in the top to get it ready to hang.
  7. Attach 1/8″ quick links to each of the holes. Connect your chain to the quick links. Add one more quick link to the end of each chain and each of those will go into one 1.5″ ring.

Planting:

  1. Starting from the bottom hole, add in Espoma Organic Potting Mix and Bio-Tone Fertilizer. Pro Tip: Mixing Espoma Organic Potting Mix with the Organic Bio-Tone Fertilizer allows the strawberries to get a boost in their new container while releasing nutrients slowly to ensure the edibles are being fed for a long time.
  2. Plant each hole with a strawberry and move your way up! You can also add a plant at the very top!
  3. Take little pieces of moss and add them around the strawberry plant. This will help keep the plant inside of the planter and help clean up your project.
  4. Hang your planter with a hook (Laura uses an S-hook).
  5. Slowly water in your new planter – watering too fast can make the plants fall out since their roots haven’t been established yet.

Enjoy!


See the Total Berry Guide Here

Espoma products to help you grow your best strawberries yet:


Where to Buy
https://www.espoma.com/wp-content/uploads/2018/04/Espoma-Thumbnail.jpg 1080 1920 espoma https://www.espoma.com/wp-content/uploads/2023/05/espoma-logo340w-1.png espoma2018-04-13 08:00:282022-04-12 14:23:18Build Your Own Vertical Strawberry Planter (Extended Version)

DIY Easter Rabbit Garden

March 23, 2018/in Espoma Videos


Laura from Garden Answer shows you how to make a spring Easter basket! It’s the perfect decor to add to any spring festivities. In just a few minutes, you can create your own Easter rabbit garden to use as a centerpiece for your holiday dinner or decor accent.

For this project, you’ll need:

  • Spring basket
  • Removable basket liner
  • Espoma’s Organic Potting Mix
  • French lavender
  • Celosia
  • Branches
  • Spray paint
  • Reindeer moss
  • Seasonal fairy gardening elements
Mini Gnome Garden
More Fairy Garden Inspiration
https://www.espoma.com/wp-content/uploads/2018/03/IMG_8724.jpg 3368 6000 espoma https://www.espoma.com/wp-content/uploads/2023/05/espoma-logo340w-1.png espoma2018-03-23 11:32:562019-05-07 09:58:44DIY Easter Rabbit Garden

Hellebore Care Guide

February 28, 2018/in Flowers

These long-blooming, low-maintenance flowers really brighten up winter landscapes. Laura from Garden Answer shows how to care for winter hellebores using Espoma’s liquid fertilizers.


https://www.espoma.com/wp-content/uploads/2018/02/IMG_8556.jpg 3368 6000 espoma https://www.espoma.com/wp-content/uploads/2023/05/espoma-logo340w-1.png espoma2018-02-28 12:36:152024-10-01 17:26:55Hellebore Care Guide

DIY Indoor Cat Tower Garden with Instructions

February 26, 2018/in Espoma Videos

Even cats need a garden! Watch as Laura from Garden Answer explains how she selected the materials for and built her cat tower garden. Watch as she uses The Espoma Company’s organic seed starting mix to grow a quick batch of cat grass.

https://www.espoma.com/wp-content/uploads/2018/02/Screen-Shot-2018-02-20-at-10.39.40-PM-1.png 648 1151 espoma https://www.espoma.com/wp-content/uploads/2023/05/espoma-logo340w-1.png espoma2018-02-26 02:00:032019-05-07 10:00:26DIY Indoor Cat Tower Garden with Instructions

Spice Up Your Life – Start an Indoor Herb Garden

February 14, 2018/in Indoor Gardening

Add an extra special kick to homemade dishes by incorporating fresh herbs from your kitchen garden. It’s especially easy when flavorful herbs just need to be snipped from your kitchen windowsill.

Grow a winter herb garden in your kitchen with easy herbs like rosemary, chives, oregano, thyme, lemongrass and mint in just a few steps.

Herbs are perfect for growing in the kitchen. Be sure to feed with Indoor! plant fertilizer to give them a boost.

How to Grow Herbs Indoors in 5 Steps:

  1. Pick a container. Visit your local garden center to purchase herbs and pots. Choose 6” containers that have drainage holes and saucers. Herbs don’t like wet feet.
  2. Pot up your herbs. Fill containers halfway with Espoma’s Organic Potting Mix. Remove herbs from containers by pushing from the bottom. Gently loosen roots and place plant in the pot. Fill with soil to the depth the plants were growing in the original pots. Water well.
  3. Choose a Spot. Place plants in a sunny window that receives at least 6 hours of strong sunlight each day.
  4. Refresh plants. Water as needed to keep the soil lightly moist, but don’t overwater.
  5. Give herbs a boost. Feed with Espoma’s Indoor! liquid plant fertilizer as needed to give plants the nutrients they need.

Once warm weather does arrive, get ready to plant more veggie crops!


https://www.espoma.com/wp-content/uploads/2018/02/shutterstock_468372902.jpg 854 1280 espoma https://www.espoma.com/wp-content/uploads/2023/05/espoma-logo340w-1.png espoma2018-02-14 10:45:352024-08-21 05:28:33Spice Up Your Life – Start an Indoor Herb Garden

5 Romantic Red Houseplants

February 7, 2018/in Blog, Indoor Gardening

On Valentine’s Day, there’s always a lot of pressure to find the perfect gift, so we made it simple.

Give something that will live long past the special day, continue to grow, and offer a daily reminder of your love.

Cultivate Love with These 5 Romantic Red Houseplants

  1. Anthurium
    This lovely houseplant has heart-shaped blooms called spades. Be sure to buy one in bloom to ensure your significant other sees the heart on your sleeve plant. Anthuriums love light, so be sure to place them in a bright area, but not directly in the sunshine.

  1. Bromeliad
    This easy-to-grow houseplant is the perfect gift. It provides an exotic touch of red to any home. Even with the thick foliage and wide leaves, it gives off a radiance that anyone will fall in love with. Be sure to use Espoma’s Orchid Potting Mix to allow proper drainage and vitality.

    Feed regularly with Indoor! liquid fertilizer to keep your plants happy and healthy.

  1. Kalanchoe
    Succulent love! This succulent produces clusters of tiny red flowers which will last for several seasons. The scalloped greenery is just as gorgeous as the flowers, so you will have a showstopper year round. Use Espoma’s Cactus Potting Mix and Cactus! liquid fertilizer to be sure your Kalanchoe is happy and hearty.

  1. Croton
    Red can be too much for some lovers, so crotons offer the perfect balance of greenery with a subtlety of red. But don’t let it fool you, this houseplant is a bold contender. It offers texture and design to any household that needs extra energy. Crotons also help purify the air, which in turn keeps you calm and relaxed.

  1. Red Aglaonema
    Another more subtle red houseplant, the Red Aglaonema is a standout in home décor. The bold foliage adds height and eye-drawing texture. Your significant other will love this easy-care plant.


Trust us, gifting any of these romantically red houseplants will show your love for years to come. Feeding plants with Espoma’s Indoor! liquid fertilizer helps keep their red vibrant.

*****

Check out this Anthurium care video by Summer Rayne Oaks:


Featured Products:


Where to Buy


https://www.espoma.com/wp-content/uploads/2018/02/stephanie-harvey-nGLw_HBasuU-unsplash-scaled.jpg 2560 1920 espoma https://www.espoma.com/wp-content/uploads/2023/05/espoma-logo340w-1.png espoma2018-02-07 09:00:132024-10-22 14:01:555 Romantic Red Houseplants

Best Houseplants for the Kitchen

January 17, 2018/in Blog, Indoor Gardening

Sometimes we find a beautiful houseplant and have no idea where to put it. Other times we have a space that needs filling and no idea what to put there.

The way we see it, you can never go wrong with more plants!

There’s no better place to start adding plants than the kitchen. If you haven’t thought of adding plants there before, you’re missing out!

Houseplants in the kitchen aid in decreasing cooking scents that consume your home – while it might smell amazing when you bake cookies, cauliflower can really bring you down. Or, you can grow edibles in your kitchen to have easy access while cooking.

Here are our top picks for plants in the kitchen:


  1. Assorted Herbs
    Herbs are perfect to grow in the kitchen. Place your herb garden on your windowsill or in a hanging basket for ease. Luckily, a lot of herbs grow well indoors with adequate light. They need to be rotated if they start to become leggy. Read more about growing herbs in your kitchen.
  1. Aloe Vera
    Aloe Vera is one of the easiest plants to grow, so keeping it in your kitchen will bring life there all year long. It’s especially great to have in the kitchen to use its natural coolant in case of a burn. It will do well anywhere in the kitchen, although next to the stove is probably best. Read more about growing aloe and other succulents.

  1. White Jasmine
    The soft jasmine scent that is released from the blooms of this plant will help keep your kitchen smelling nice and fresh. The scent is subtle enough that it won’t overwhelm the kitchen yet can still help your space feel clean and refreshed. Read more about growing jasmine.

  1. English Ivy
    Ivy is a diverse plant that can thrive in many rooms. Putting it in the kitchen will add dramatic lines and textures while purifying the air. If your cabinets don’t hit the ceilings, this ivy will gladly take up space. It will add wonderful shades of green with accents of whites or yellows. Read more about growing ivy in unusual spaces.

  1. Spider Plant
    Another great air purifier, the spider plant will help keep cooking more enjoyable. Place it somewhere you need to add height and texture to an area. It is an easy-care houseplant that will continue to love you in every season. Read more about the benefits of houseplants.

Don’t forget, all of these plants need to be fed as directed with Espoma’s Indoor! liquid fertilizer to grow strong and highlight their colors.


Featured Products:


Where to Buy

https://www.espoma.com/wp-content/uploads/2018/01/shutterstock_673534633.jpg 667 1000 espoma https://www.espoma.com/wp-content/uploads/2023/05/espoma-logo340w-1.png espoma2018-01-17 16:42:102024-01-24 16:24:35Best Houseplants for the Kitchen

How To Make An Easy Terrarium

January 10, 2018/in Indoor Gardening

Terrariums make great additions to any room. There are endless options for variety, decorations and plants. They can be assembled in minutes and will continue to be enjoyed for months.

They can even match this season, like these adorable winter snow globes!

Whether you’re a terrarium expert or just making your first one, here are six easy steps to follow again and again.

Six Steps to Create a Terrarium

Step 1: Assemble materials

First, envision the terrarium you want. Where will you place it? What kind of plants are in it? What type of container will you use? Does it have a lid? Once you’ve got an idea, visit your local garden center to find many of the materials needed to make a terrarium.

You will need:

  • Glass jar or bowl
  • Sand
  • Activated charcoal
  • Espoma’s organic potting soil or cactus mix, depending on plants
  • Ornamental moss
  • Decorative elements such as fairies, rocks, shells, or stones
  • Small plants or succulents
  • Watering can
  • Espoma’s Indoor! or Cactus! liquid fertilizer depending on plant needs
  • Optional: Tweezers
  • Optional: Small sticks or bark

Step 2: Sand Layer

The first layer in your terrarium will be for drainage. Add about a 1-inch layer of sand, rocks or pebbles at the bottom. This ensures that water will not linger in the soil and will help to prevent root rot.

Step 3: Activated Charcoal Layer

Add about ¼ cup of activated charcoal to the terrarium to help keep it healthy. The charcoal helps the water stay clear of buildup and microorganisms that can grow on any living thing.

Step 4: Add Soil and plants

Add an adequate amount of soil for your plants. Dig a small hole to place the plant in. Choose a few standout succulents or add as many plants as you’d like. Make sure each plant has room to grow. Remember to leave some space to add in creative elements.

Step 5: Get Creative

Once your terrarium has plants, it’s time to add the finishing touches. Layer different types of ornamental mosses or decorative stones to enhance the look. If you’ve got fairy garden elements, add them in now. If you’re adding any pieces that you may have brought in from outside, make sure to rinse them off well first. You might find it’s easier to use a set of tweezers to place these pieces in smaller terrariums.

Step 6: Fertilize

Help your terrarium plants stay healthy and strong by feeding with the proper Espoma liquid fertilizer.

Enjoy! Switch up your terrarium whenever you feel like you need a change or new plants!

https://www.espoma.com/wp-content/uploads/2018/01/shutterstock_478365961.jpg 3534 4712 espoma https://www.espoma.com/wp-content/uploads/2023/05/espoma-logo340w-1.png espoma2018-01-10 09:00:012024-08-21 05:04:59How To Make An Easy Terrarium
Page 16 of 19«‹1415161718›»
Where to Buy

Get News & Updates

Recent Posts

  • VIDEO: A Formal Garden Tour with Summer Rayne Oakes
  • VIDEO: Repotting in the Greenhouse with Garden Answer
  • VIDEO: How to Winterize Your Chicken Coop with Summer Rayne Oakes
  • VIDEO: Planting Spring Bulbs in Containers 🪴🌷 with Summer Rayne Oakes
  • VIDEO: Planting the Last Bulbs of the Season with Garden Answer

Tags

All-Purpose Potting Mix bio-tone Bio-tone Starter Bio-tone Starter Plus Cactus Mix caring for houseplants Container Gardening DIY project Espoma espoma grown espoma organic Espoma Organics Espoma Video fall gardening Family fert flower garden flowers garden Garden Answer Gardening gardening tips gardens grow holly-tone houseplants Indoor! indoor gardening indoor plants Kaleb Wyse organic organic fertilizer Organic Gardening organic plant food Organic Potting Mix Outdoor Gardening Planting plants Potting Mix potting soil Spring Gardening summer rayne oakes vegetable garden Vegetable Gardening Wyse Guide

Espoma. A Family Tradition Since 1929.

Espoma Organic logo
  • Espoma Dealer
  • Espoma Pro
  • Garden Club
  • Privacy Policy

Scroll to top