Espoma Organic
  • Products
    • Close
    • Product Line Overview
    • Plant food finder
    • Garden Fertilizers
    • Potting Soils
    • Lawn Fertilizers
    • Liquid Fertilizers
    • Single Ingredients
    • Conventional Plant Foods
    • Animal Care Products
  • Where to Buy
  • Our Story
    • Close
    • Our Story
    • Locations
    • Historical Timeline
    • Our Commitment
    • Directions
    • Solar
    • Join our Team
    • Espoma Brand Partners
  • Learn
    • Close
    • Espoma Blog
    • FAQ’s
    • Pocket Guide
    • Espoma Guides
    • Garden Clubs
    • Safe Paws Lawn
    • PRODUCT FACT SHEETS
    • Fertilizer Fundamentals
      • Close
      • Understanding Plant Nutrition
      • Reading Labels
      • Choosing the Right Type of Fertilizer
      • Terms & Definitions
    • Gardening Projects
    • Resource Links
  • Contact Us
  • Menu Menu

Tag Archive for: leaves

VIDEO: How to Winterize Your Chicken Coop with Summer Rayne Oakes

January 14, 2026/in Blog, Espoma Videos, Summer Rayne Oakes

On a snowy, wintry day, Summer Rayne Oakes of Flock Finger Lakes takes us inside her newly built chicken coop to share what she’s doing to get it ready for winter. From smart coop orientation and ventilation tips to insulation strategies and warm-water routines, Summer walks through the small details that help her birds stay comfortable in cold weather. She also shows how she uses Espoma Organic Sani-Care® Premium Hardwood Bedding to create a deep, cozy floor layer that’s easy to clean and helps keep the coop environment drier and more comfortable all season long.

8 Winter Coop Tips Summer Swears By


1) Start with the right coop orientation

If you’re building a coop from scratch (or choosing where to place one), Summer recommends thinking about prevailing winter winds first. In her location, cold winds typically come from the north, so she designed the coop with no open windows on the north side to help block drafts.

Takeaway: Positioning and window placement can make winter management easier before you even add insulation.

2) Use windows for ventilation, not warmth

It’s tempting to button everything up tight, but Summer reminds us that humidity control matters just as much as temperature. She aims to keep coop humidity under about 70%, since damp air in freezing weather can contribute to frostbite risk on combs and wattles.

Takeaway: In winter, crack windows strategically to keep air moving without creating harsh drafts.

3) Insulate to reduce temperature swings (but don’t heat the coop)

Summer insulated the coop walls and ceiling to help limit dramatic hot-to-cold shifts. The goal isn’t to create a tropical coop, it’s to keep conditions steadier.

She also notes an important point: heating the coop can backfire if birds step outside into much colder air, creating stress and condensation issues.

Takeaway: Insulation can help stabilize the space; birds are built for winter, but they do best in a dry, well-ventilated environment.

4) Build a warmer, softer floor with deep bedding

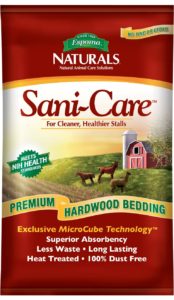
Because concrete floors get cold fast, Summer builds up a generous layer of bedding. She uses Espoma Organic Sani-Care and piles it 6–10 inches deep so the birds have a warmer, softer place to settle in.

Why Sani-Care?

  • Easy to clean: makes daily and weekly maintenance simpler

  • Comfort-focused: helps create a more cushioned, cozy floor layer

  • Supports a drier coop: deep, fresh bedding helps manage moisture so the coop feels more comfortable

5) Add extra “snuggle zones” with raised beds

Summer repurposed pet beds as raised sleeping areas and added bedding on top, giving chickens and ducks the option to get up off the cold floor. Some birds choose corners, others prefer the beds. The point is: let them decide.

Takeaway: Variety in roosting/sleeping spots helps the flock settle where they’re most comfortable.

6) Use safe lighting and avoid risky heat sources

Summer uses a standard LED light and avoids heat lamps, noting that heat lamps can be a cause of coop fires. If she ever wants a small bump in warmth, she considers a safer alternative that gently raises the temperature without intense heat.

Takeaway: Prioritize fire safety in winter setups. Warmth is never worth the risk.

7) Block wind in the run with panels (without sealing it airtight)

To cut wind where birds spend their time, Summer adds poly panels to the run. She intentionally leaves small gaps so there’s still some airflow.

Takeaway: Wind protection + ventilation is the balance. You’re aiming for calm air, not stale air.

8) Keep water available and flowing

Summer shares her setup for keeping water accessible in freezing weather, including insulated lines and a system designed to reduce freezing. She also brings warm water as a treat, especially on extra-cold days.

Takeaway: Winter hydration takes planning, but it’s one of the biggest quality-of-life upgrades you can make for your flock.

Learn more about other Espoma Organic Products at Espoma.com

Learn more about Flock Finger Lakes here:

Website: flockfingerlakes.com

Instagram – @flockfingerlakes

YouTube –Flock Finger Lakes

X – @flockny

Facebook –Flock Finger Lakes


Featured Products:

Espoma Organic Sani- Care


Where to Buy

https://www.espoma.com/wp-content/uploads/2026/01/Winterize-Chicken-Coop-frame-000000.jpg 1080 1920 Matt Dauphinais https://www.espoma.com/wp-content/uploads/2023/05/espoma-logo340w-1.png Matt Dauphinais2026-01-14 12:20:492026-01-14 12:47:43VIDEO: How to Winterize Your Chicken Coop with Summer Rayne Oakes

How to Care for Ferns 🌿 | Growing Joy with Maria

December 22, 2025/in Blog, Growing Joy with Maria

Many plant lovers have killed Boston ferns and sworn off ferns as houseplants, but little do they know that the secret is adding the right ferns to your collection and not the wrong ones.

This blog is inspired by Episode 243 of Growing Joy with Plants Podcast, where Maria talks about fern care, varieties that grow indoors, and simple ways to keep them looking their best.

Why Ferns Are Worth Another Try

Ferns have been around for millions of years, and they date back to prehistoric times. For a plant to survive decade after decade, it needs to be resilient, so it has adapted to changing environments and climates.

In fact, there’s a funny meme where the top picture is a fern growing out of a crack in a rock on the sidewalk, completely neglected, and is thriving, and the bottom photo is a fern indoors, in a pot, completely brown and shriveled. 

How to Care for Your Ferns

Best Light for Ferns: A great thing about ferns is that they’re a low-light-tolerant plant. They grow on the floor and in the shade. This makes ferns the perfect houseplant because we only have so much valuable real estate in our window sills, and most of our homes tend to be low-light.

How to Water Ferns: Your ferns do not want to dry out. Evenly moist soil is what is going to make ferns happy and avoid those crispy brown edges. Use glazed ceramic, plastic pots, or self-watering planters to ensure evenly moist soil. To extend your soil moisture by a few days, add a layer of sphagnum moss on top of the soil to slow down evaporation.

Choosing the Right Potting Mix for Ferns:
Soil plays a major role in fern success. Ferns need a potting mix that holds moisture while still allowing excess water to drain away. Starting with a high-quality mix like Espoma Organic Potting Mix helps maintain evenly moist soil and supports healthy root systems. Pairing the right soil with containers that have drainage holes makes watering more consistent and stress-free.

When planting or repotting ferns, mixing in Espoma Organic Bio-tone Starter Plus into the soil can help roots establish more quickly and reduce transplant stress, giving ferns a strong start in their new container.

Ferns need humidity: Any of the ferns that have super delicate, thin fronds (maidenhair ferns, heart leaf ferns, and some Boston ferns) are going to need high humidity (60% to 80%). ​​Put them in a terrarium or under a glass cloche, or keep them near a humidifier.

How to fertilize ferns: Ferns don’t need a ton of fertilizer, which makes Espoma Organic Indoor! Liquid Fertilizer the perfect liquid plant food for it. It’s super gentle and should be used when you see new growth on your plants.

Don’t be afraid to prune ferns: Ferns are like a pet that needs to be groomed occasionally. No matter how humid your home is, you’ll have fronds that turn brown, and you should feel free to remove them. 

Which Ferns Are Difficult to Grow?

Maidenhair ferns and Heart Leaf ferns are challenging to grow. They need so much humidity to grow and such evenly moist soil. They don’t leave a lot of room for error.

Which Ferns Are Best for Beginners?

Bird’s Nest Fern – The leaves are thicker, more succulent, more hearty. The leaves stick out horizontally and cover the soil, so it’s harder for the soil to dry out.

Rabbit’s Foot Fern – This is a super fun fern that has fuzzy rhizomes that grow on top of the soil that look like little rabbit’s feet.

Boston or Lemon Button Fern – This is one of the hardier ferns. It’s very resilient, so if it does get dried out and turns brown, just cut the entire top off, and it’ll just grow back.

Staghorn Fern – Because they’re “epiphytic” and grow on trees, they are a little bit more tolerant of drying out than other ferns. These are commonly mounted on wooden boards, but you can grow them in potting mix.

Troubleshooting Common Fern Problems

Browning on every frond – likely a humidity issue (or underwatering). 

Yellow leaves – usually a sign of overwatering. Make sure your pots have drainage holes, and the soil isn’t staying super wet.

Brown spots – could indicate low humidity or sensitivity to water minerals (use filtered water or distilled water). Fern spores also look like small brown spots, so they could be an indicator of a happy plant!

Balding (patchy, thinning appearance) – likely means the fern needs more light.

Are You Ready to Try Growing Ferns?

Moist soil and humidity are the name of the game. Keep ferns where you’ll see them every day. Use the right pots. Remember, these plants have survived for millions of years. They’re tougher than they look!

Recommended Espoma Organic Products for Fern Success

Choosing the right products can make fern care much easier. These Espoma Organic essentials support healthy roots, consistent moisture, and gentle feeding so your ferns can thrive indoors or out.

Espoma Organic Indoor! Liquid Fertilizer
A gentle liquid plant food ideal for houseplants like ferns. Use during active growth to provide nutrients without the risk of burning.

Espoma Organic Potting Mix
Designed to retain moisture while still draining well, this mix helps create the evenly moist soil conditions ferns need.

Espoma Organic Bio-tone Starter Plus
Best used when planting or repotting, this microbial-rich formula supports root development and helps reduce transplant stress.

Espoma Organic Holly-tone (for Outdoor Ferns)
For in-ground or outdoor ferns that prefer slightly acidic soil, Holly-tone provides slow-release nutrition and supports long-term soil health when used according to label directions.

*****

Featured Products:

Espoma Organic Holly-toneEspoma Organic Bio-tone Starter Plus Bag Image Espoma Organic Potting Mix Espoma Organic Indoor! liquid fertilizer


Where to Buy


https://www.espoma.com/wp-content/uploads/2025/12/ahmed-xHSzP8XlHkk-unsplash.jpg 960 640 Matt Dauphinais https://www.espoma.com/wp-content/uploads/2023/05/espoma-logo340w-1.png Matt Dauphinais2025-12-22 15:41:322025-12-22 15:41:35How to Care for Ferns 🌿 | Growing Joy with Maria

VIDEO: Bringing In Your Plants for Winter 🪴❄️ with Summer Rayne Oakes

November 20, 2025/in Blog, Container Gardening, Espoma Videos, Indoor Gardening, Succulents, Summer Rayne Oakes

When the mornings turn chilly and frost threatens, it’s time to bring your non-cold-hardy plants indoors. In this video, Summer Rayne Oakes demonstrates how she gathers her Aloes, Pelargoniums, Euphorbias, air plants, and more, refreshing containers with Espoma Organic Cactus Mix, and Espoma Organic Perlite to help them settle in for the winter months.

Here are six quick tips to help you do the same.

1. Bring Plants In Before the First Freeze

Any tender plant—succulents, tropicals, Pelargoniums, air plants—needs to move indoors once nighttime temperatures dip into the 30s and low 40s °F. Cold snaps can damage foliage fast.

2. Check for Pests and Outdoor Debris

Before carrying your plants inside, give them a quick inspection:

  • Look for ants or insects in the soil
  • Remove spent leaves
  • Trim away any mushy or damaged growth

This keeps your indoor environment clean and your plants stress-free.

3. Give Overgrown Plants a Gentle Trim

A light haircut helps plants transition into winter dormancy. Summer trims her Pelargoniums to remove dead growth and tidy the shape, making them easier to overwinter.

4. Refresh Soil With a Fresh Organic Potting Mix

After a full season outdoors, potting soil can become compacted, washed out by rain, or depleted of nutrients. Refreshing the top few inches—or fully repotting—gives plants the clean, breathable foundation they need to stay healthy indoors.

For most houseplants, reach for Espoma Organic All-Purpose Potting Mix. It’s rich, airy, and packed with organic ingredients that support strong roots through winter.

Summer uses Espoma Organic Cactus Mix for her succulents because they need faster drainage and extra airflow around their roots. This helps prevent rot during the cooler months when succulents naturally take up less water.

Adding a scoop of Espoma Organic Perlite boosts drainage even more—great for Aloes, Agaves, and Euphorbias heading into low-light, low-growth winter conditions.

5. Repot or Divide Crowded Succulents

Aloes and other succulents often outgrow their pots by fall. Take a cue from Summer and divide offsets or repot into fresh soil so each plant has room to breathe indoors.

6. Feed Indoor Plants Through Winter

Even during slower growth, indoor plants still appreciate gentle nourishment. Use a high-quality organic liquid fertilizer—like Espoma Organic Indoor! —to keep roots strong and foliage healthy all winter long.

A little effort goes a long way!

A little trimming, a pest check, and a refresh with Espoma Organic potting soils and a little liquid fertilizer is all it takes to help your plants thrive indoors this winter.

Let’s get growing—indoors! 🌿

*****

Featured Products:

Espoma Organic Potting MixOrganic Potting soil -Espoma Organic Cactus MixEspoma Organic PerliteEspoma Organic Indoor! liquid fertilizer


Where to Buy


https://www.espoma.com/wp-content/uploads/2025/11/Ep-431-Primp-Prune-collect-B.jpg 1080 1920 Matt Dauphinais https://www.espoma.com/wp-content/uploads/2023/05/espoma-logo340w-1.png Matt Dauphinais2025-11-20 12:28:022025-11-20 12:28:02VIDEO: Bringing In Your Plants for Winter 🪴❄️ with Summer Rayne Oakes

10 Time-Saving Tactics for a More Efficient Garden | Growing Joy with Maria

September 11, 2025/in Blog, Gardening, Growing Joy with Maria

Has your garden started to feel like a tedious task on your never-ending to-do list? Here are 10 ways to avoid garden burnout by making gardening more efficient and simple, so you can enjoy it without feeling weighed down.

This blog is inspired by Episode 266 of the Growing Joy with Plants Podcast, where Maria chats with CaliKim, YouTube gardening educator and author of The 10 Minute Gardener. Together, they share time-saving hacks to help you enjoy gardening again—without the stress.

Start Small, Stay Consistent

One of Kim’s foundational philosophies is to break down large tasks into smaller, manageable ones (3-, 5-, 8-, 10-, or 30-minute jobs), which is the basis of her book. The 10 Minute Gardener also organizes these by season (early, mid, late, dormant), so you can adapt them no matter where you garden.

Practical Time-Saving Tactics You Can Try Today

3 minute tasks

3-Minute Gardening Tasks

  • Fertilizer Fridays – Every Friday, while your tea kettle is boiling or you’re sipping coffee, take 3 minutes to fertilize your plants with an organic liquid fertilizer like Espoma Organic Indoor! Houseplant Food. You can also water them or pick off brown leaves.

  • Swift Growth Seed Sowing – Keep a small basket of seeds handy by your back door or in your pocket. During a quick break, pop a few pea seeds along a trellis or lettuce seeds into a container to keep succession planting going.

  • Three-Minute Tool Tidy – Clean and oil a few garden tools, like pruners, that may be getting rusty or sticky.

5-Minute Gardening Tasks

  • Tie-Up Tuesday (and Thursday!) – Dedicate a few minutes twice a week to trellis plants like cucumbers. Keep tie tape or twine in your pocket so you can do this quickly while walking through the garden.

  • Shade Cloth Oasis – Pre-clip shade cloth to trellises so you can dash out and cover plants when the sun is blazing.

  • End-of-Season Cleanups – Pull out dead plants and toss them into nearby trash bins or pop-up bins to keep your garden tidy.

8 & 10-minute tasks

8- & 10-Minute Gardening Tasks

  • Summer Salad Station – Plant a container with salad greens, a tomato or cucumber, and herbs for a quick, ready-to-harvest dinner garden.

  • Hustle & Bustle Garden Bed Prep – In spring, refresh your garden beds with soil amendments like Espoma Organic Land & Sea Gourmet Compost and worm castings.

30 min tasks

30-Minute Gardening Tasks

  • Compost Pile Refresh – Toss together kitchen scraps and yard waste to build your compost pile. Give it a splash of water, then walk away and let nature do the work.

  • Tree Branch Trellis – Gather a few sturdy sticks and lash them together to create a simple, rustic trellis for climbing plants.

Be Consistent and Keep Things Within Reach

The key is to keep everything handy and accessible. You don’t need complicated strategies to make gardening easier. Keep a basket of seeds by the door, stash pruners in multiple spots, and have tie tape at the ready. Making tools and supplies accessible ensures you stay consistent and efficient.

Listen to the Growing Joy with Plants Podcast

For more time-saving tips, listen to Episode 266 of the Growing Joy with Plants Podcast!

Featured Products:

Espoma Organic Land and Sea Espoma Organic Indoor! liquid fertilizer


Where to Buy

https://www.espoma.com/wp-content/uploads/2025/09/Time-Saving-1.jpg 1080 1080 Matt Dauphinais https://www.espoma.com/wp-content/uploads/2023/05/espoma-logo340w-1.png Matt Dauphinais2025-09-11 16:15:582025-09-11 16:15:5810 Time-Saving Tactics for a More Efficient Garden | Growing Joy with Maria

VIDEO: Growing Veggies and Herbs 🍅🌿🥕 with Summer Rayne Oakes

August 25, 2025/in Blog, Espoma Videos, Fruits & Vegetables, Summer Rayne Oakes, Vegetable Gardening

Summer Rayne Oakes of Flock Finger Lakes is back in her gazebo garden, where she refreshed her raised beds with Espoma Organic All-Purpose Garden Soil, giving her fruits, veggies, and herbs a nutrient-rich foundation.

From basil to beans, this garden is brimming with variety—and Summer shares her best lessons she learned along the way.

6 Quick Tips from Summer’s Garden

  1. Refresh your soil each season – Even healthy beds benefit from a fresh top-off of organic soil like Espoma Organic All Purpose Garden Soil to replenish nutrients and structure.

  2. Try companion planting – Marigolds tucked near tomatoes deter pests like hornworms and invite pollinators to the party.

  3. Prune and plant tomatoes deeply – Snip off lower leaves and bury stems a little deeper so they develop stronger root systems.

  4. Mix in perennial herbs and crops – Plants like sea kale, rhodiola, and schisandra return year after year, offering beauty and resilience.

  5. Stagger your sowing – Succession planting of quick crops like radishes, lettuce, and calendula ensures continuous harvests and blooms.

  6. Grow what you’ll actually use – Whether it’s sweet potatoes for soups or basil for summer salads, plant to fit your kitchen habits.

A Garden That Nourishes All Season

From tender greens to black goji berries, Summer Rayne shows how diverse plantings and thoughtful soil care can make a small space abundant. With Espoma Organic All-Purpose Garden Soil supporting strong roots and steady nutrition, her gazebo garden is set to thrive all season long.

*****

Learn more about Flock Finger Lakes here:

Website: flockfingerlakes.com

Instagram – @flockfingerlakes

YouTube –Flock Finger Lakes

X – @flockny

Facebook –Flock Finger Lakes

Featured Products:


Espoma Organic All-Purpose Garden Soil imageEspoma Raised Bed Mix bagEspoma Organic Land and SeaEspoma Organic Bio-tone Starter Plus Bag Image


Where to Buy


https://www.espoma.com/wp-content/uploads/2025/08/Title-18.jpg 720 1280 Matt Dauphinais https://www.espoma.com/wp-content/uploads/2023/05/espoma-logo340w-1.png Matt Dauphinais2025-08-25 15:45:322025-08-25 15:45:32VIDEO: Growing Veggies and Herbs 🍅🌿🥕 with Summer Rayne Oakes

VIDEO: Planting A Shade Garden 🌿 with Wyse Guide

August 13, 2025/in Blog, Espoma Videos, Gardening, Kaleb Wyse

Whether you’re working with dry shade or full sun, Kaleb Wyse of Wyse Guide proves that every pocket of your garden can thrive with the right planning—and a little help from Espoma Organic.

In his latest video, Kaleb brings us along as he refreshes his shade beds and layers in new perennials in full-sun areas, showing how he builds textured, healthy spaces across his Iowa homestead. He’s not just planting—he’s feeding the soil and supporting every root with care.

Kaleb’s shade garden is a great example of adapting to conditions. Not all shade is the same—some spots, often under large trees, are dry shade, where roots compete for moisture and soil drains quickly. Other shady areas, like low spots or places near downspouts, hold more water, creating wet shade. Kaleb’s property has dry shade under mature maple and crabapple trees, so he selects plants that can handle lower moisture while still brightening dim areas.

To get his new additions off to the best start, Kaleb relies on Espoma Organic Bio-tone Starter Plus, his go-to for all new plantings. For hostas and other acid-loving favorites, Espoma Organic Holly-tone is also in his toolkit, enriching the soil with just the right nutrients for long-term success.

🌿 Kaleb’s Top Tips for Planting Success

1) Water Before You Plant
Always begin with a well-watered root ball so plants adjust quickly and absorb water efficiently post-planting.

2) Use a high-quality organic Starter Fertilizer
“It’s like planting insurance!” Kaleb says. He sprinkles Espoma Organic Bio-tone Starter Plus in every hole to encourage strong root development and minimize transplant shock.

3) Only Disturb Roots When Necessary
If roots aren’t bound tightly, skip scarification. Gentle handling helps reduce stress.

4) Embrace Compost—Even Last Year’s Leaves
Kaleb layers homemade compost—or a high-quality mix like Espoma Organic Land & Sea Gourmet Compost, a rich blend of natural ingredients enhanced with lobster and crab shells—right over last year’s fallen leaves. This creates a living mulch that enriches the soil naturally and builds long-term garden health.

5) Group Plants in Odd Numbers
Repeating clusters of five or seven create harmony and visual rhythm, especially in larger beds.

6) Prioritize Soil Coverage
From epimedium to hosta to Agastache, Kaleb aims for dense plantings that naturally suppress weeds and conserve moisture.

Ready to Grow Like Kaleb?

If Kaleb’s video inspires one thing, it’s that soil health is at the heart of every thriving garden. Whether your shade is dry or wet—or your planting area is in full sun—start with rich compost, thoughtful watering, and organic support from Espoma, and your plants will thank you season after season.

Let’s get growing—whether you’re filling a shady nook or bringing a sunlit border to life.

*****

Learn More about Wyse Guide:

🪴 YouTube

🪴 Facebook

🪴 Instagram

🪴Website

Featured Products:

Espoma Organic Bio-tone Starter Plus Bag ImageEspoma Organic Holly-toneEspoma Organic Land and Sea


Where to Buy

https://www.espoma.com/wp-content/uploads/2025/08/Shade-Garden.jpg 720 1280 Matt Dauphinais https://www.espoma.com/wp-content/uploads/2023/05/espoma-logo340w-1.png Matt Dauphinais2025-08-13 12:03:002025-08-14 18:07:24VIDEO: Planting A Shade Garden 🌿 with Wyse Guide

How to Care for Alocasia | Growing Joy with Maria

August 5, 2025/in Blog, Growing Joy with Maria, Indoor Gardening

Do you think it’s difficult to care for Alocasia? They are so easy to fall in love with because of their alien-like leaves and colors, but many plant parents feel confused when they suddenly drop leaves or look unhappy. This is particularly true if you’re not a Mindful Plant Parent (find your Plant Parent Personality Here). But the answer is no. Alocasia isn’t a difficult plant; it’s just particular. 

This blog is inspired by Episode 219 of the Growing Joy with Plants podcast with Maria Failla. After years of trial and error, she finally cracked the code on keeping Alocasia alive indoors, and now you can too.

Why So Many People Struggle with Alocasia

Alocasia isn’t “difficult.” It just has high standards. They are native to Southeast Asian rainforests, so they are used to high humidity, indirect light, and evenly moist soil. So most modern homes are not exactly a match. But if you can recreate that environment indoors, your Alocasia will gift you with its stunning leaves that you see all over Pinterest and social media..

How to Care for Alocasia

1) What light do Alocasia need?

Alocasia like bright indirect light

Bright, Indirect Light

This means “filtered sunlight,” not direct rays. Alocasias prefer to be a few feet from a sunny window or under a grow light. If it’s only holding onto 2 to 3 leaves, that’s a sign it’s starving for more light.

2) How often should I water an Alocasia?

Alocasia like even moisture

Keep the soil evenly moist at all times.

Alocasia like even moisture, so make sure you’re using quality organic soil like Espoma Organic Potting Mix. Let only the top inch dry out before watering. It stores water in little tuber-like roots that look like mini potatoes, so don’t be alarmed when you see them while repotting!

3) What type of humidity does my Alocasia need?

Alocasia like 50% to 70% humidity

High Humidity is Everything

Crispy tips? Curling leaves? That’s low-humidity talking. Alocasia loves 50%–70% humidity, which is achievable with a humidifier, a grouped plant setup, or a closed terrarium. Note that misting is not enough and can even cause fungal issues.

4) When do I fertilize my Alocasia? 

Fertilizer with Espoma Organic Indoor! liquid plant food

Fertilize When It’s Growing

Whenever new leaves appear, it’s time to feed. You can feed them using Espoma Organic Indoor! liquid plant food for greener leaves! Simply dump a capful into your watering can. Many Alocasia under grow lights continue growing through winter, so adjust your fertilizer routine to match the plant and not the calendar.

5) Do Alocasia go dormant? 

Not exactly….In winter, Alocasia may drop a few leaves. This is a natural rest period (also known as quiescence) and not a full dormancy. So don’t freak out if you see a few yellow or dropped leaves come wintertime. It’s natural.

Troubleshooting Common Alocasia Problems


1) Why does my Alocasia have yellowing leaves? 

Yellow leaves on Alocasia are likely due to overwatering. Trim the leaf and let the soil dry slightly before watering again.

2) Why is my Alocasia drooping or wilting?

Drooping or wilting is likely due to underwatering, overwatering, or low humidity.

3) Why can’t my Alocasia grow more than 3 leaves at a time?

It likely needs more light to support a larger leaf system..

4) Why are the edges of my Alocaisa leaf crispy and brown? 

This is usually due to dry air and humidity.

Favorite Alocasia Varieties to Try

If you’re ready to bring one home, here are the top picks for you:

  • Alocasia Ninja – almost black leaves with bold stripes.
  • Alocasia Cuprea (Red Secret) – copper-toned leaves with deep purple backs.
  • Alocasia Dragon Scale – pale green leaves with deep veining!
  • Alocasia Polly (African Mask) –  small, classic that you’ll see in so many garden centers.
  • Alocasia Lola – taller than Polly
  • Alocasia Watsoniana (White Vein) – Glossy leaves with striking white veins.
  • Alocasia Stingray – wild, tail-shaped leaves that really do look like a stingray.

The Alocasia isn't difficult to grow, give it a try! (graphic)

Give Alocasia a Try

The Alocasia is a diva… in the best way. It isn’t impossible to care for, but it just wants what it wants. Give it good light, humidity, and care, and it will grow and give you stunning leaves and be the envy of all your plant friends! Think of it as a little green alien that just needs the right home environment to feel at peace.

Listen to episode 209 of the Growing Joy with Maria Podcast

To learn more about Alocasia care, listen to Episode 219 of the Growing Joy with Plants podcast, all about Alocasia, with Maria Failla.

Learn more about Growing Joy with Maria:

🪴🌿 Website

🪴🌿 Facebook

🪴🌿 Instagram

🪴🌿 YouTube


Featured Products:

Espoma Organic Indoor! liquid fertilizer Espoma Organic Potting Mix


Where to Buy

https://www.espoma.com/wp-content/uploads/2025/08/Alocasia-1.png 1080 1080 Matt Dauphinais https://www.espoma.com/wp-content/uploads/2023/05/espoma-logo340w-1.png Matt Dauphinais2025-08-05 13:05:412025-08-05 13:05:41How to Care for Alocasia | Growing Joy with Maria

VIDEO: How to Fertilize Roses 🌹 with Skye Hamilton

July 8, 2025/in Blog, Espoma Videos, Flowers, Skye Hamilton

Skye Hamilton @hamiltonhousedesigns shares her secret to achieving multiple flushes of gorgeous rose blooms—feeding them with Espoma Organic Rose-tone! In this video, Skye walks us through her process, showing exactly how to apply Rose-tone to keep roses healthy, vibrant, and blooming repeatedly throughout the season.

 Skye’s top tips for feeding roses:

1) Fertilize & Prune Regularly: Consistent pruning and fertilization encourage repeat blooming and healthier plants.

2) Monthly Feeding: For the most spectacular blooms, feed your roses at least once every month during the growing season.

3) Choose a Quality Fertilizer: Skye recommends Espoma Organic Rose-tone, specially formulated for roses. Rose-tone is a granular, slow-release organic fertilizer enriched with humates and beneficial microbes, providing a rich blend of natural and organic ingredients that promote bigger, more beautiful blooms.

4) Apply Around the Dripline: Skye emphasizes applying fertilizer around the dripline of the plant. The dripline is the area directly beneath the outer circumference of the plant’s branches, where rain naturally drips off the leaves. This is the most effective spot for feeding, as the feeder roots, which absorb nutrients, are concentrated in this location.

5) Water Thoroughly: After applying Rose-tone, water it in thoroughly to ensure nutrients penetrate deep into the soil and reach the roots.

Ready to give your roses the royal treatment? Try Espoma Organic Rose-tone for roses that flourish all season long!

*****

Learn More about Skye Hamilton:

🌹Website

🌹 Instagram

🌹 Facebook

🌹 YouTube

🌹 Pinterest

🌹 TikTok

Featured Products:

Espoma Organic Rose-tone


Where to Buy


https://www.espoma.com/wp-content/uploads/2025/07/SKYE_Rose-tone_Edited.jpg 1920 1080 Matt Dauphinais https://www.espoma.com/wp-content/uploads/2023/05/espoma-logo340w-1.png Matt Dauphinais2025-07-08 12:59:202025-07-08 12:59:20VIDEO: How to Fertilize Roses 🌹 with Skye Hamilton

VIDEO: Boost Your Blooms: 🌸 Fertilizing Hydrangeas the Organic Way with Skye Hamilton

April 29, 2025/in Blog, Flowers, Skye Hamilton, Spring Gardening

When it comes to hydrangeas, proper fertilizing is key to ensuring beautiful blooms and overall plant health. Skye Hamilton, gardening enthusiast and hydrangea expert, stresses the importance of fertilizing these stunning plants with a high-quality organic fertilizer as a smart investment in your garden. Unlike synthetic fertilizers, which often contain excessive nitrogen that encourages foliage growth at the expense of blooms, Skye recommends using Espoma Organic Holly-tone.

How to Fertilize in the Spring 🌸: 

How to Fertilize in the Summer ☀️:

Why Holly-tone? Because it’s an organic fertilizer specially formulated for acid-loving plants like hydrangeas. Its slow-release formula ensures steady nutrient availability, promoting vibrant, plentiful blooms rather than just leafy growth.

Skye Hamilton with Holly-tone

Here’s Skye’s quick guide for successful hydrangea fertilizing:

  1. Fertilize twice a year: once in mid to late spring and again in mid-summer.
  2. Your first application should occur after leaves emerge but before blooms appear.
  3. Apply the second round no later than July to avoid disrupting bloom cycles.
  4. Missed spring fertilizing? Early summer application still benefits your plants.
  5. Apply fertilizer during mild weather or in the evening shade to prevent root burn.
  6. Distribute fertilizer along the drip line of your hydrangeas and gently work it into the soil surface.
  7. Always water thoroughly after fertilizing to ensure nutrients reach the roots effectively.

Skye Hamilton's Hydrangeas in full bloom

With Espoma Organic Holly-tone, your hydrangeas receive exactly what they need, resulting in lush blooms and healthier plants overall. Go organic, bloom better!

*****

Learn More about Skye Hamilton:

Website

Instagram

Facebook

YouTube

Pinterest

Featured Products:

Holly-tone bag


Where to Buy


https://www.espoma.com/wp-content/uploads/2025/04/IMG_5813.jpg 2095 1179 Matt Dauphinais https://www.espoma.com/wp-content/uploads/2023/05/espoma-logo340w-1.png Matt Dauphinais2025-04-29 11:46:202025-07-30 15:59:43VIDEO: Boost Your Blooms: 🌸 Fertilizing Hydrangeas the Organic Way with Skye Hamilton

VIDEO: Repurposing Leaves for an Easy DIY Mulch Layer 🍂 with Garden Answer

October 28, 2024/in Blog, Fall Gardening, Garden Answer

Follow along with Laura from Garden Answer as she demonstrates how to turn fallen leaves into a powerful soil booster using leaf mulch in her garden beds. She starts by gathering and shredding leaves with her lawn mower, this helps with breaking down the leaves and preventing the formation of a thick mat layer that prevents water and air movement.

Laura adds Espoma Organic Blood Meal to balance the carbon-rich leaves with a nitrogen source, creating an ideal mix for a quick breakdown of the leaves and soil nourishment. A leaf mulch layer can be a natural insulator for delicate plants, shielding them from winter chill and enriching the soil for the next season.

Learn more about Garden Answer here:

https://www.youtube.com/c/gardenanswer

https://www.gardenanswer.com/

https://www.facebook.com/gardenanswer

https://www.instagram.com/gardenanswer/

Featured Products:

Espoma Organic Bio-tone Starter Plus bag Espoma Organic Potting soil Mix Big bag


Where to Buy

https://www.espoma.com/wp-content/uploads/2024/10/Thumb1.jpg 720 1280 Matt Dauphinais https://www.espoma.com/wp-content/uploads/2023/05/espoma-logo340w-1.png Matt Dauphinais2024-10-28 15:33:532024-11-13 11:20:06VIDEO: Repurposing Leaves for an Easy DIY Mulch Layer 🍂 with Garden Answer
Page 1 of 212
Where to Buy

Get News & Updates

Recent Posts

  • VIDEO: How to Winterize Your Chicken Coop with Summer Rayne Oakes
  • VIDEO: Planting Spring Bulbs in Containers 🪴🌷 with Summer Rayne Oakes
  • VIDEO: Planting the Last Bulbs of the Season with Garden Answer
  • How to Care for Ferns 🌿 | Growing Joy with Maria
  • VIDEO: One Last Autumn Stroll 🍁🍂 with Summer Rayne Oakes

Tags

All-Purpose Potting Mix bio-tone Bio-tone Starter Bio-tone Starter Plus Cactus Mix caring for houseplants Container Gardening DIY project Espoma espoma grown espoma organic Espoma Organics Espoma Video fall gardening Family fert flower garden flowers garden Garden Answer Gardening gardening tips gardens grow holly-tone houseplants Indoor! indoor gardening indoor plants Kaleb Wyse organic organic fertilizer Organic Gardening organic plant food Organic Potting Mix Outdoor Gardening Planting plants Potting Mix potting soil Spring Gardening summer rayne oakes vegetable garden Vegetable Gardening Wyse Guide

Espoma. A Family Tradition Since 1929.

Espoma Organic logo
  • Espoma Dealer
  • Espoma Pro
  • Garden Club
  • Privacy Policy

Scroll to top