Espoma Organic
  • Products
    • Close
    • Product Line Overview
    • Plant food finder
    • Garden Fertilizers
    • Potting Soils
    • Liquid Fertilizers
    • Lawn Fertilizers
    • Single Ingredients
    • Conventional Plant Foods
    • Animal Care Products
  • Where to Buy
  • Our Story
    • Close
    • Our Story
    • Locations
    • Historical Timeline
    • Our Commitment
    • Directions
    • Solar
    • Join our Team
    • Espoma Brand Partners
  • Learn
    • Close
    • Espoma Blog
    • FAQ’s
    • Pocket Guide
    • Espoma Guides
    • Garden Clubs
    • Safe Paws Lawn
    • PRODUCT FACT SHEETS
    • Fertilizer Fundamentals
      • Close
      • Understanding Plant Nutrition
      • Reading Labels
      • Choosing the Right Type of Fertilizer
      • Terms & Definitions
    • Gardening Projects
    • Resource Links
  • Contact Us
  • Menu Menu

4 Tips for Getting the Most Out of Your Poinsettias

December 16, 2020/in Blog, Flowers, Indoor Gardening

red poinsettias

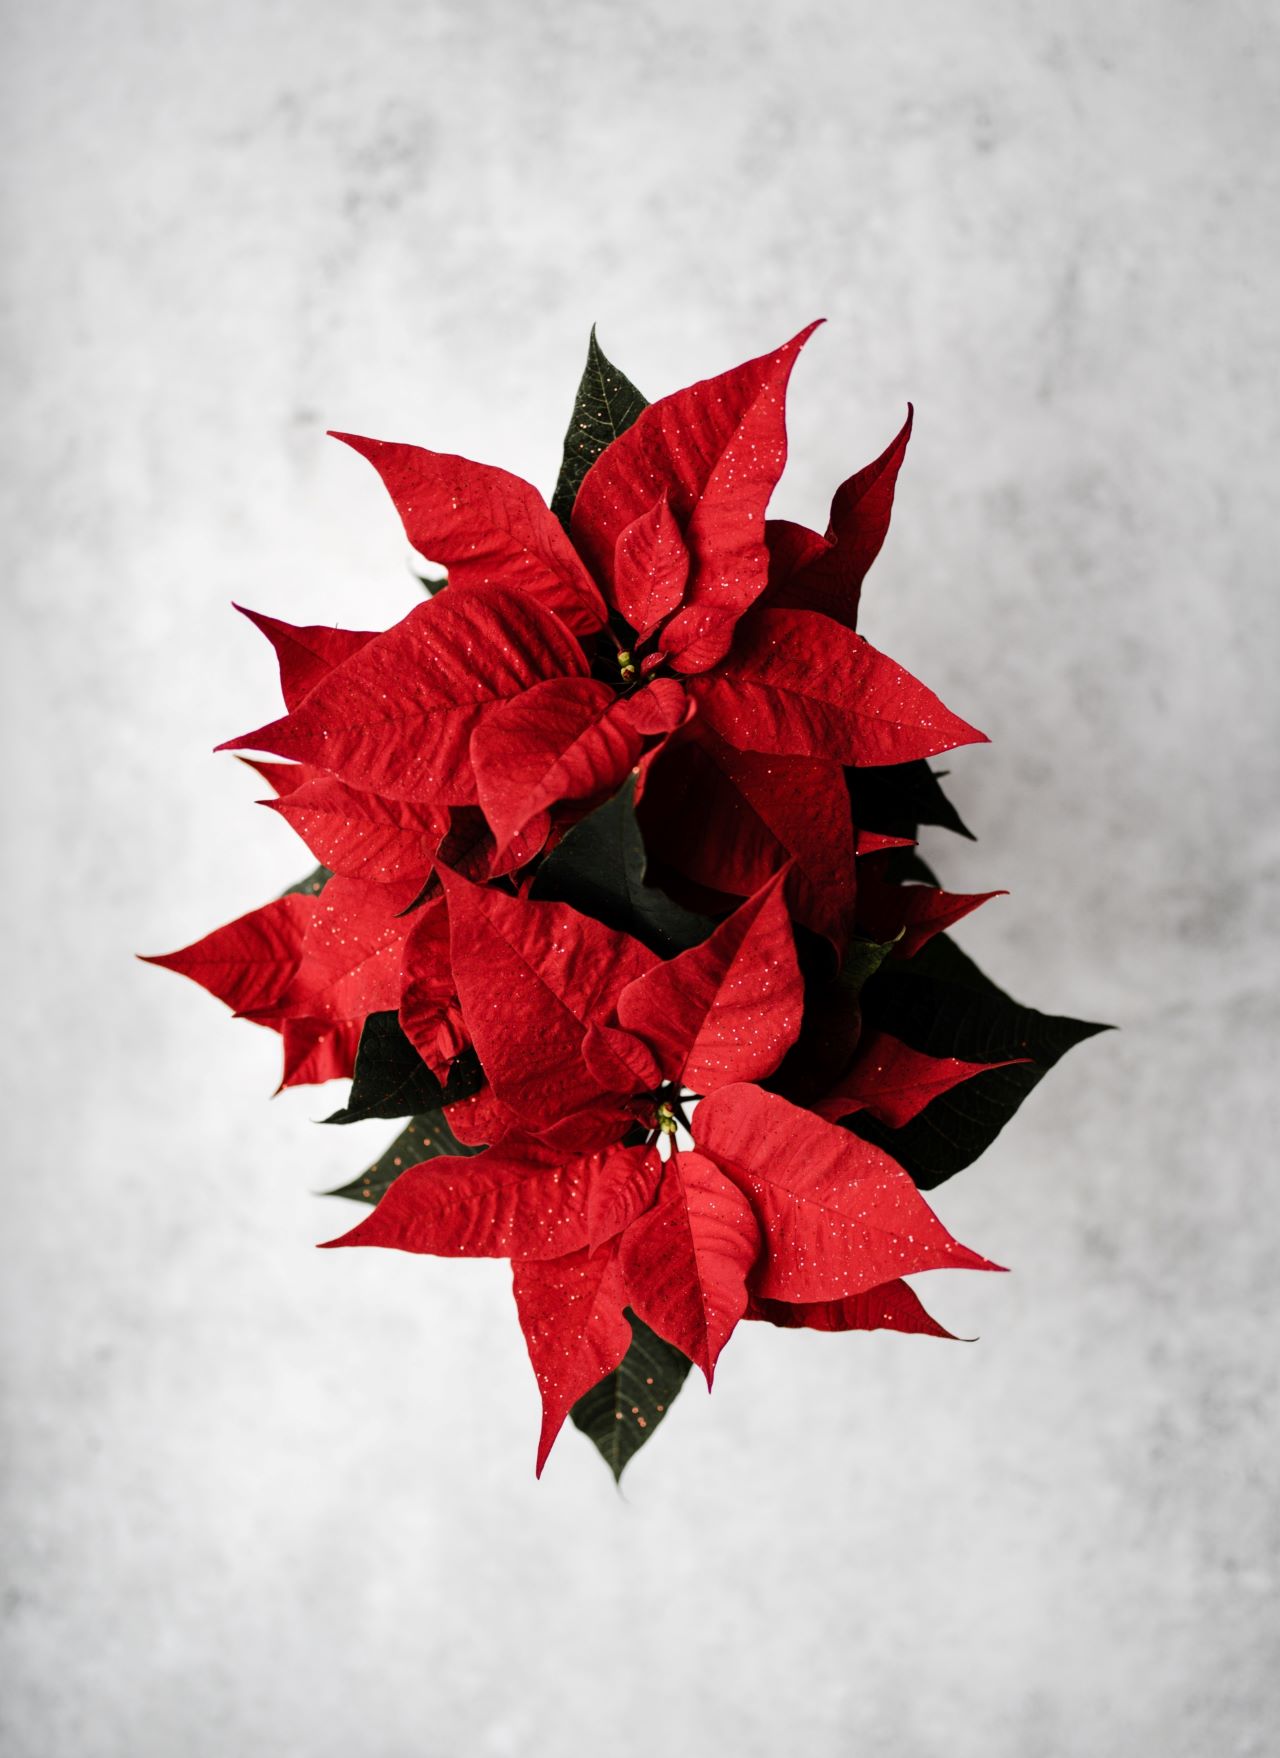
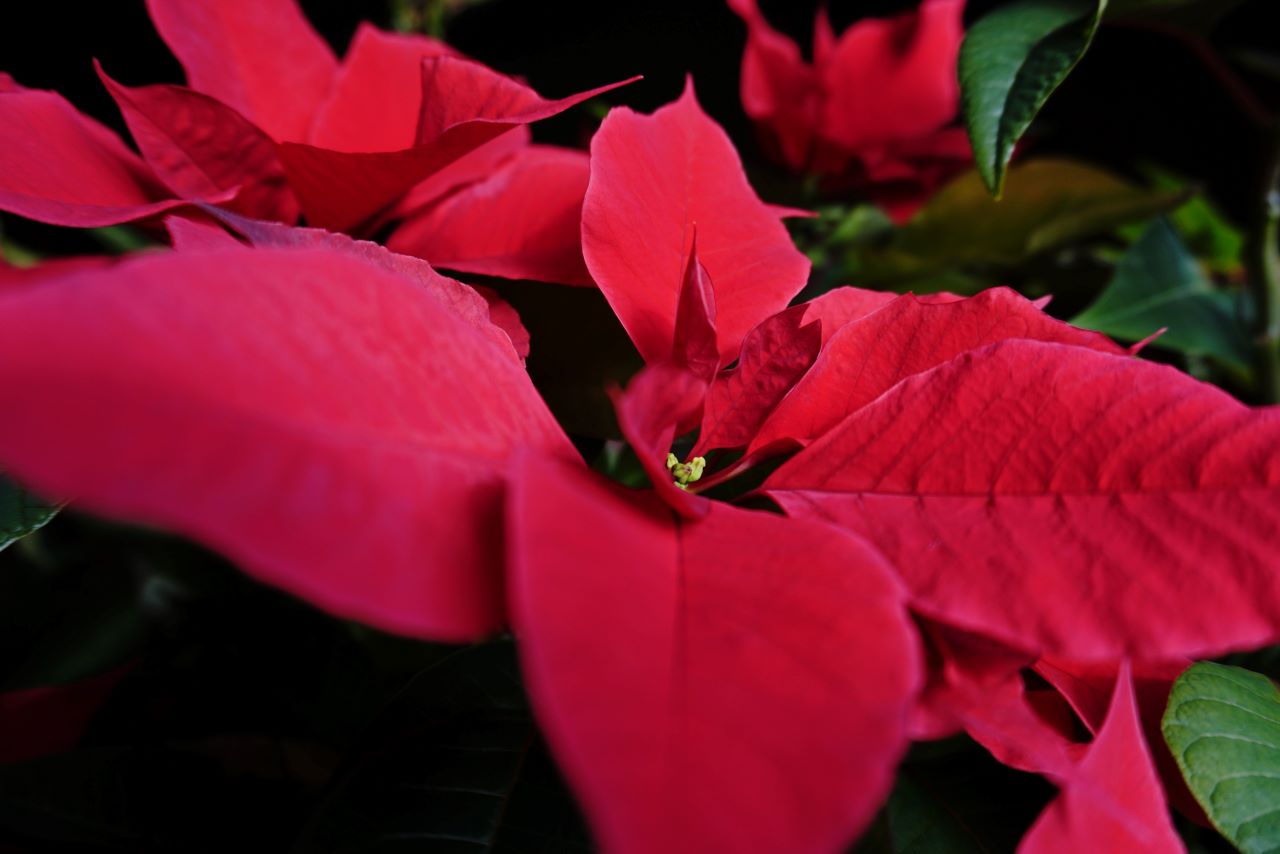
‘Tis the season of poinsettias! These jolly red plants are a classic holiday gift and household decoration all across the country during the winter months. Unfortunately, for many people, the leaves quickly turn lackluster and the plant dies soon afterward. But you can avoid this outcome with proper care and maintenance! Here are 4 ways yours can thrive this holiday season, as told by Garden Answer.

1. Get a healthy start

Did you know poinsettias are actually tropical plants? These festive spurges have somehow become a staple during the colder months, but they very much still appreciate their native climate! That means you should try to avoid the ones that are placed near the entrance of your local grocery store, since the draft from outside and the dry heat from inside are already harming the plants’ health. If you find them elsewhere, be sure to check that the foliage has solid colors and is not showing any green as this could mean they’re finished flowering for the season.

2. Give them a loving home

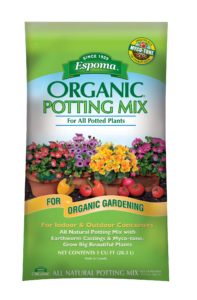
Since poinsettias appreciate that tropical climate, be sure to place them somewhere with lots of light that’s away from cold glass. As mentioned before, keep them away from any drafts — warm or cold. Be sure to check their soil moisture regularly as heated homes often lack moisture in the air. You can water them when the top layer of soil feels dry. As a finishing touch, feel free to mist them regularly and use Espoma Bloom! to give them a boost.

Red poinsettias, organic

3. Stay safe this holiday season

A widely believed myth is that poinsettias are incredibly toxic to pets and humans. But the truth is that you would have to ingest an exorbitant amount of it for it to actually be dangerous! You should still err on the side of caution since the white sap that’s produced when the stems break can be a skin irritant, and it’s best to set them somewhere pets and kids can’t reach as with all houseplants.

4. Start anew next year

No matter how devoted you are to your beloved poinsettias, you should still think of them as annual plants that need to be replaced each year. It can be very difficult to get them to bloom again a year later and it involves much stricter care than the tips listed above. 


Check out this video from Kevin @Epic Gardening for some additional tips and tricks to get the most out of your poinsettias.


Now that you have all the necessary knowledge, go find the biggest and brightest poinsettias you can locally buy — and rest assured that they’ll last much longer than last year’s!
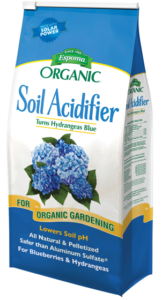
Featured Products

Where to Buy
https://www.espoma.com/wp-content/uploads/2020/12/annie-spratt-H0IhIwdJpc0-unsplash.jpg 1758 1280 Danielle Kirschner https://www.espoma.com/wp-content/uploads/2023/05/espoma-logo340w-1.png Danielle Kirschner2020-12-16 16:15:442024-10-21 10:35:094 Tips for Getting the Most Out of Your Poinsettias

Best Indoor and Outdoor Plants for Halloween Decor

October 27, 2020/in Blog, Fall Gardening, Flowers

halloween, jackolantern

Halloween is on our heels and we can’t wait! The spooky season is a great time to go all out decorating your home, and here at Espoma, we believe in adding so much more to your decor than just pumpkins. Get in the holiday spirit by throwing these plants into the mix!

red flower, Halloween


1. Red Spider Lily


Red in color with spider-like flowers, this plant is perfect for your spooky yard! One of the best parts of it is that it’s virtually pest and disease-free. It’s great for late summer and early fall and needs well-draining soil to grow.


2. Bat Flower

This flower personifies the spookiness of Halloween perfectly and will make your house one to look out for! While the flower barely resembles a bat, the black color makes it look like it belongs to the Addams family. Keep this flower indoors to match your outside decor — and make sure to keep it in indirect sunlight or partial shade.

Small, white flowers


3. Indian Pipe/Ghost Plant

This plant grows white instead of green because it has no chlorophyll and is a parasite that takes from nearby trees. (Anyone else spooked just from that description?) From afar it looks like melting candles or finger bones sticking out from the ground — it doesn’t get scarier than that! As if it knows where it belongs, the plant prefers dark, damp places to grow, so make sure you plant it accordingly. Even though it doesn’t require sunlight, it’s best to plant it outside. But don’t forget to give nearby plants lots of nutrients so the ghost plant can take from them without depleting their food!

Amorphophallus titanum flower


4. Corpse Flower

The corpse flower can take years or even decades before it blooms for the first time. This flower earned its name from the odorous smell it emits that has been compared to body odor or sweaty socks. This smell is meant to attract insects to spread the flower’s pollen to start new blooms. If the smell doesn’t scare you, maybe the size will. The corpse flower can grow to a height of 8 feet!


5. Devil’s Claw

This plant grows out curved with pointed ends, making it look like the devil’s claw, hence the name. You might think it’s another poisonous plant that you have to stay away from, but on the contrary, this plant is a popular medicine for back pain arthritis. 

Mixing and matching these plants with your other Halloween decorations is sure to make your house look like the most haunted on the block. Which ones made it onto your shopping list? Don’t forget, as many of these plants are quite uncommon, they may require some extra upkeep. So be sure to take care of them accordingly!


Where to Buy

https://www.espoma.com/wp-content/uploads/2020/10/0.jpg 854 1280 Danielle Kirschner https://www.espoma.com/wp-content/uploads/2023/05/espoma-logo340w-1.png Danielle Kirschner2020-10-27 12:02:482024-10-18 09:51:26Best Indoor and Outdoor Plants for Halloween Decor

Dig Canna, Dahlia and Caladium

September 25, 2019/in Flowers

Some of our favorite summer show-stoppers like Cannas, Dahlias and Caladiums, need to be dug up in the fall for overwintering. It isn’t a difficult job and you’ll be rewarded with larger and larger plants every year. You’ll also get more of them. That’s how these plants spread.  Besides, it feels good to be outside on a crisp fall day wearing that faded out sweatshirt you love. Let someone else rake the leaves while you divide and conquer.   

Canna

Cannas are amazing planted in the ground. And, rising three to five feet tall, they can really elevate large container combinations. Their rhizomes are modified roots that store the plant’s energy for the next year. The rhizomes of a happy canna can easily double in size after one growing season. Just imagine how showy they’ll be next year.

Digging

In late fall, when the stems and leaves have died back or been killed by the first hard frost, is the perfect time to lift them. Make sure to do it before the ground freezes. First, cut stems back to two inches. Then, use your shovel to cut a circle at least two feet in diameter around the plant’s rhizomes, and gently lift the clump. Using your hands, shake off all the excess soil. If the soil is sticking to the rhizomes, rinse them with the hose until they’re fairly clean.

Drying and Storing

Pick a spot in your garage, basement or someplace dark with good ventilation. It should be at least 70 degrees F. Spread them out on several layers of newspaper. Let them dry for at least a week, it helps to discourage mold. Now they are ready to store. Use paper grocery bags or crates, something that allows airflow to put them in. Look for a cool (but not freezing) dark place to store them like a basement or a garage. Check them now and again to make sure none are shriveled or mushy, discard those as soon as possible.

Planting

Plant the following spring after the threat of frost has passed and the soil has begun to warm. Always add Espoma’s organic Bulb-tone when planting to give them the specialized nutrients they’ll need to flourish.

Dahlias

Dahlias come in hundreds of shapes, heights, sizes and colors. Besides being superstars in the garden they make excellent cut flowers. Some flowers are dinner plate sized and many reach four to five feet in height. They enjoy full fun in moderate climates. Prepare to be wowed!

Lifting

After the first frost, cut the dahlias back to four inches and dig the clumps just like you would have for cannas. The tubers are breakable so, go slow and gently shake off extra soil. No need to rinse them. Let the clumps air dry for several days in a dark place with good ventilation.

Storing

You can pack dahlia tubers several ways. Planting them in large nursery pots with damp soil is one way. Storing them in cardboard boxes, filled partially with damp potting soil, peat moss or vermiculite will also work. It’s also possible to store several clumps in large black plastic bags. Gather the top of the bags loosely so there is still some air circulation. Store in a cool dark place that does not freeze. A frozen tuber is a dead tuber. Check on them now and then, go easy on the water since you don’t want them to be too moist. If they are dry, you can mist them or add some damp organic potting mix.

Planting

In the spring, divide the clump into several with some of last year’s stem. Plant outdoors after the threat of frost has passed and add Bio-tone Starter Plus to help them get a good start.

Caladium

Caladiums are popular for their large foliage in shades of white, red and pink, often in wild mosaic patterns. They like shade to part sun, making them perfect for displaying in less than sunny spots in the garden. There are now a few varieties that are sun tolerant. It will say so on the plant tag. While they do thrive in sun, regular, perhaps even daily watering will be needed.

Lifting

When temperatures begin to fall below 60 degrees F, dig up tubers and leave stems attached. You don’t need to remove all of the soil just yet. Leave them to dry in a cool, dark space for two to three weeks.

Storing

After the tubers have cured, brush off the remaining soil and cut back the withered stems. Store them in a cool dark space. Packing them in sawdust or sand will help keep them from drying out too much.

Planting

You can plant them outside after the threat of frost has passed and the ground has warmed up. They can also be started early indoors. Just pot them up on a good quality potting soil like Espoma’s organic potting mix and give them some Bulb-tone to give them the best possible start.

Here are links to some of our other blogs we hope you will enjoy.

Get Easy Blooms with Spring Planted Bulbs

5 Reasons to Start a Cutting Garden

Winter is Coming – Frost Preparedness

Espoma Products


Where to Buy

https://www.espoma.com/wp-content/uploads/2019/09/CAXHO_FancyLeafedCaladium_20160626_2.jpg 997 1500 espoma https://www.espoma.com/wp-content/uploads/2023/05/espoma-logo340w-1.png espoma2019-09-25 08:00:182024-08-14 18:31:33Dig Canna, Dahlia and Caladium

Tulip Time

August 22, 2019/in Flowers

It’s still summer — time for picnics, backyard barbeques and going to the beach. Kids get to stay up late to chase fireflies and make s’mores.  While these sunny days conjure images of suntan lotion, lemonade, this is the best time of year to plan for a colorful spring.

Photo courtesy of flowerbulbs.com

Order Early and Save

When the afternoon sun hits its zenith, grab your bulb catalogs or iPad and head for the air conditioning. Choosing now could save you money. You’ll also have the opportunity to get the best and newest varieties before they run out. You’ll thank yourself next spring.

Photo courtesy of flowerbulbs.com

The Easiest Way to Plant

Ask your local garden center when they expect to have the bulbs you’re looking to plant and then mark it on your calendar. Planting bulbs is easy, especially if you have an auger for your cordless drill. When spring hits, the first flowering bulbs will brighten your spirits immeasurably. No plane tickets to Holland required.

Photo courtesy of flowerbulbs.com

Is Your Style Contemporary or Traditional?

Flowerbulbs.com is a great website for all things related to growing bulbs. They don’t sell bulbs, you’ll want to go to your local garden center for those, the site is all about inspiration. They have information about deer resistant bulbs, fun combination recipes and great information on every kind of bulb. When you do plant this fall, don’t forget to grab a bag of Espoma’s organic Bulb-tone to make sure they are off to the best start.

Photo courtesy of flowerbulbs.com

Lasagna Planting

‘Lasagna Planting’ is a special way to plant spring flowering bulbs in large pots, in layers. The bulbs that flower the latest, like tulips are planted near the bottom of the pot. The bulbs that will flower first, like crocus are planted near the top. By planting several varieties, you’ll have flowers blooming for several months. Bulbs need good drainage and a quality potting soil like Espoma’s organic Potting Mix.

We hope you will enjoy this video and blog with more information on spring flowering bulbs.

Plant Fall Bulbs with Garden Answer

Your Fall Planted Bulb Questions Answered

Espoma Products

Where to Buy
https://www.espoma.com/wp-content/uploads/2019/08/vase-of-spring-flowering-bulbs.jpg 1280 919 espoma https://www.espoma.com/wp-content/uploads/2023/05/espoma-logo340w-1.png espoma2019-08-22 08:00:122019-08-13 10:16:10Tulip Time

Grow Them, Cut Them, Smell Them, Share Them

August 8, 2019/in Flowers

Gardening has many rewards and one of the best might be picking your own bouquet from the garden. Starting with the earliest spring flowering bulbs and extending to late fall mums and asters, having fresh flowers in the house is a wonderful luxury. Plus, it’s a joy to share and bring flowers to friends and family.

If you have room for a cutting garden —create one! It doesn’t need to be big or fancy to be effective. Just remember to feed the plants to get the best flower power. Try Espoma’s organic Flower-tone or  liquid  Bloom! fertilizer to give plants the nutrients they need.

Creating a beautiful floral arrangement can be fun and stress-relieving. Here are some tips to get you started.

Select a Vase

Select a vase, mason jar, vintage watering can or whatever fun object suits your mood. Make sure it’s clean, dirty containers can contaminate plants with bacteria. Think about the colors and the height of the flower stems when making your choice.

Clean the Stems

Remove leaves that will be below the water’s surface to help keep water clean and clear. If you’re working with roses, cut off the thorns to avoid getting pricked. Many people choose to remove the stamens of lilies because the pollen can stain skin and clothing. In any case, give the stems a fresh cut at a 45-degree angle and place them in water right away.

Choose a Style

Monochromatic arrangements use different flowers that have the same color. Choose varying shapes and textures to keep it interesting. Try using complementary or contrasting colors. Google a color wheel for inspiration. Using just one kind of flower in a vase gives a pop of color with a clean look. The more flowers you use in this design style the more dramatic the arrangement will be. Use odd numbers of flowers for a natural look.

Height and Width

The height of your arrangement should be about one and a half times as tall as your vase for a classic design. Taller flowers are used in the center while smaller flowers and fillers like green foliage should be used around them to create a width that’s pleasing to you.

No Rules

The hottest trend right now is perhaps the easiest of all arrangement styles — it’s called a field bouquet. The rules pretty much all go out the window here. These are bouquets that have a variety of colors, and forms. They needn’t match per se. The design is free form. Sit down, take your time and keep turning the vase so you are seeing all sides of it. They aren’t necessarily symmetrical, they’re loose and playful. Let your creative self shine. When there are no rules, it can’t be wrong!

Here are a few of our blog posts we think you’ll might be interested in. 

Nature Never Goes out of Style – Transition into a Fall Cutting Garden

7 Flowers for a Sun-Kissed July Bouquet

Best Wildflowers for Your Wedding Bouquet

Espoma Products

Where to Buy
Bloom! Plant Food

FB

https://www.espoma.com/wp-content/uploads/2018/07/zinnia-cut-flower-bouquet.jpg 667 1000 espoma https://www.espoma.com/wp-content/uploads/2023/05/espoma-logo340w-1.png espoma2019-08-08 08:00:352019-07-31 15:12:26Grow Them, Cut Them, Smell Them, Share Them

Limitless Lavender

July 31, 2019/in Flowers

Lavender conjures up images of the south of France with row upon row of plants covered in deep purple flowers. Its familiar fragrance is in everything from soaps and soothing beauty products to essential oils. This treasured flower has so many uses and is so easy to grow.

Perennial lavender likes full sun but appreciates some afternoon shade in hot climates. They are hardy in USDA zones 5-10. Feeding with Espoma’s organic Bloom! fertilizer promotes flowering. Water young plants deeply. Once established in the ground, they are drought tolerant. Over watering can stress established plants.

Lavender is considered a woody plant and should be pruned back by one third in the spring to keep them tidy. They bloom in early to mid-summer and the flowers may be harvested to use fresh or dried.

How to Harvest and Use Lavender

  1. Harvest lavender when the flowers just begin to open. They are at their most fragrant and beautiful at that time. Plus, cutting them early encourages plants to flower a second time.
  2. It’s best to harvest lavender in the morning after the dew has dried and before the hot sun draws out their essential oils. Cut them back to about an inch above the place the foliage starts. It’s best to just cut the thin stems and not the foliage.
  3. Use fresh lavender in bouquets to fill your home with their delicate fragrance. Add a fresh organically grown stem to a glass of Prosecco, it looks gorgeous and imbibes the drink with a delicate flavor. Try it in lemonade for a refreshing new twist. Make lavender sugar by layering fresh flowers in between layers of sugar in a jar. The flowers will impart flavor and color. Use it as sanding sugar for cookies or add to ice tea.
  4. Dry lavender in small bunches, hanging upside down in a cool dark place. A drying rack for laundry works well. Keep an eye on them, they may need to be re-tied as they dry and stems shrink.
  5. Dried lavender can be made into sachets, potpourris, soap, and more. Pair dried lavender with a thick slice of brie, drizzled with honey and strewn with a few dried lavender flowers for an “instagramable” cheese board. Keep in mind, dried lavender has a strong flavor, so use it sparingly.

If this isn’t enough to convince you to try growing lavender, it’s good for the environment too. It attracts butterflies, bees and other beneficial insects.

Here are some of our blogs that we think you might be interested in.

Bug Off: Plants to Repel Mosquitoes (Spoiler Alert – one of them is lavender!)

5 Edible Flowers to Grow in Your garden

Grow a garden Spa for Mother’s Day

Espoma Products  Bloom!

Bloom! Plant Food

Include the below code at the bottom of all blogs

Where to Buy
https://www.espoma.com/wp-content/uploads/2018/06/lavender-.jpg 854 1280 espoma https://www.espoma.com/wp-content/uploads/2023/05/espoma-logo340w-1.png espoma2019-07-31 12:00:212024-10-01 17:31:17Limitless Lavender

No Fuss Roses – REALLY!

June 19, 2019/in Flowers
Photo Courtesy of Kerry Ann Mendez

I used to consider growing roses a form of self-punishment. It was a tedious, never-ending job that more often than not, ended in disaster.   Thankfully there are stunning roses now available that don’t need pampering.  These game-changers require less water, fertilizer and pesticides – plus some are even ‘self-cleaning’ (no deadheading required). And if the thorns are a ‘thorn in your side’, there are thornless varieties.

As a garden writer and passionate gardener, I’ve trialed many roses. Praise-worthy contenders are held to high standards by this no-fuss gardener. Not surprisingly, I primarily evaluate roses grown on their own roots (not grafted) and hardy to at least Zone 5, if not colder.

Below are a few favorites:

‘At Last’  I was spellbound by this 30”-36”, fragrant, sunset orange rose with deep green, shiny leaves.  And I wasn’t the only one. Last year the garden center where I work sold out of this winner by mid-summer!

Photo Courtesy of Kerry Ann Mendez

Knock Out Roses  Knockout roses have become highly popular, given their superior performance requiring little input.  There are many cultivars to choose from. My personal favorites are Double Knock Out (red), Pink Double Knock Out and Peachy Knock Out – one of 2018 winners of the American Rose Trials for Sustainability (A.R.T.S).

Courtesy of Star® Roses and Plants

Earth-Kind Roses  Roses earning the Earth-Kind award do well in a variety of soils plus they require minimum fertilizer, pesticides and water. These trials for sustainable roses began at the Texas AgriLife Extension Service but are now operational in 27 states. ‘Carefree Beauty’ is one of these exceptional performers. To discover others, click here.

Photo Courtesy of Kerry Ann Mendez


No matter how praiseworthy a rose is, if it is not sited in the right location, all bets are off. Roses like full sun (six or more hours, preferable mostly afternoon sun in hardiness zones 6 or colder). They also do best in well drained, organically enriched soil with a pH between 6.0 and 7.0.  Treat roses to Rose-tone, a slow-release organic fertilizer in spring and then 6 weeks later to boost the bloomathon.  Japanese beetles and rose sawfly (caterpillar-like larvae) can sometimes pester roses, even superstars mentioned above. Handpicking, as well as organic products containing Neem oil or Spinosad, will solve the problem.  The time to prune shrub roses is in late winter or early spring. Prune back canes by 1/3 to half their height.

About the author: As an award-winning garden designer, author and lecturer, Kerry Ann Mendez focuses on time-saving gardening techniques, workhorse plants and sustainable practices.  She has been on HGTV and in numerous magazines including Horticulture, Fine Gardening, Garden Gate and Better Homes & Gardens.  Kerry Ann was awarded the 2014 Gold Medal from the Massachusetts Horticultural Society for her horticultural accomplishments.  She has published four popular gardening books, her most recent being, The Budget-Wise Gardener (February 2018). In 2016 Kerry Ann introduced National Gardening Webinars that are attended by thousands.  For more about Kerry Ann visit www.pyours.com  

Where to Buy
https://www.espoma.com/wp-content/uploads/2019/06/Rose_At_Last_PW_Oct_13_2016-1000.jpg 1000 750 espoma https://www.espoma.com/wp-content/uploads/2023/05/espoma-logo340w-1.png espoma2019-06-19 10:39:512024-09-07 18:31:03No Fuss Roses – REALLY!

100 Reasons to Fall in Love with Peonies

May 21, 2019/in Flowers

Peonies have been a garden favorite for hundreds of years. The gorgeous flowers are delicate with silky petals and an irresistible fragrance. Imagine cutting a bouquet to grace your dinner table or to share with a special friend. Peonies are easy to grow and can live to be over 100 years old.

https://youtu.be/t6Uj96jR5Hw

Three types of Peonies

There are three main types of peonies. Tree peonies, Itoh peonies and herbaceous peonies. In this Garden Answer video, Laura plants herbaceous peonies. They are small shrubs that grow to be about two to three feet tall and wide. They die back all the way to the ground in winter but reemerge in spring. They’ll grow happily in zones 3 to 7.

Flower Form and Fragrance

Herbaceous peonies are available as early, mid- and late season bloomers. By planting some from each category you can have peony flowers for months on end. They also have six different flower forms ranging from a single row of petals to exceedingly full ones called bombs. The fragrance level varies too, from a light perfume to an intoxicating mix of roses and lemon. Peony ‘Festiva Maxima’ and ‘Duchesse de Nemours’ are among the most fragrant.

Planting Herbaceous Peonies

Select a spot where peonies will get full sun and moist well-drained soil. Good air circulation is a must to prevent powdery mildew. Dig a hole wider than the nursery pot and mix in a handful of Bio-tone Starter Plus to help the plants get established. It’s also a good time to install a plant support to help hold the heavy blooms upright. Garden Answer uses a Grow Through Grid. They are very easy to use and highly effective.

Continuing Care

After the beautiful flowers have dropped their petals, it’s a good idea to dead head them. Cut off the flower and stem far enough down that it is covered by the foliage, a foot or so. When all of the flowers are spent, fertilize with Espoma’s organic Plant-tone. This will give them the energy they need to recuperate from blooming and keep a healthy root system. Peonies don’t need to be divided. In fact, they dislike being moved. However, you should cut the foliage down to the ground before winter.

Bare Root Peonies

It is also possible to buy what is called a bare root peony. That means that the plant hasn’t been potted in soil. It’s a thick bunch of roots that may have pinkish, new shoots. Bare root peonies are generally planted in the fall about 6 weeks before the frost. Select the best site, as described above and plant them so the top of the roots are one to two inches below the ground surface. If you plant them too deep, they may not emerge. It’s a good idea to add a handful of Bio-tone Starter Plus to the planting hole to help establish a healthy foundation.

Summer flowering plants for later

5 Reasons to Start A Cutting Garden

Hello Sunshine – Plants that Love the Sun

Where to Buy

Espoma Products for Peonies


https://www.espoma.com/wp-content/uploads/2019/05/Thumbnail.jpg 1080 1920 espoma https://www.espoma.com/wp-content/uploads/2023/05/espoma-logo340w-1.png espoma2019-05-21 16:15:312024-08-16 15:47:51100 Reasons to Fall in Love with Peonies

Give Perennials Some Love and More Leg Room

April 24, 2019/in Flowers

Perennial plants are relatively care-free additions to the garden. They come up every year growing bigger and better. But, believe it or not, they can actually get too big. The new shoots and roots get crowded, the stems in the center can die off or the foliage may turn yellow. They’ll produce fewer and smaller flowers. These are all signs that your perennials need to be divided.

Dividing your perennials has benefits that go beyond plant health. With all of your new divisions you can increase their footprint in the bed they’re in or plant them out to enliven other perennial borders. Sharing them with friends and neighbors is always appreciated. Maybe they’ll share with you.  Who doesn’t love free plants?

When to Divide Perennials

A general rule of thumb is that perennials should be divided about every three or four years. Like all rules, there are exceptions. Some very vigorous growers like gooseneck loosestrife may need to be divided every year or two. Others, like peonies don’t like to be disturbed at all. When to divide is a frequently asked question. Spring flowering perennials are best divided in the fall and fall blooming plants should be divided in the spring. Naturally, there are exceptions. Many people in cold climates do all of their dividing in the spring because plants don’t have a chance to reestablish themselves before freezing weather hits in the autumn.

Rules are made to be broken, given enough TLC before, during and after dividing, you can do it whenever it best suits you as long as the ground is not frozen. The advantages of spring and fall division is that weather conditions are usually cool and wet. This reduces the chances of your plants becoming stressed and dehydrated during the process.

How to Divide Perennials

Prep Perennials

Water the perennials you intend to divide the day before you’ll actually divide them. This makes it easier to get them apart and helps guard against the roots drying out. It’s also a good idea to prepare the new bed they’ll be going into so that the plants’ roots spend the least amount of time above ground. This is also the best time to incorporate Espoma’s Bio-tone Starter Plus into the soil. It will help the plants grow bigger, healthier roots and also helps them to establish more quickly.

Divide the Plants

Grab some gloves and a spade and let’s start dividing. Use the spade to cut a ring all the way around the plant to be divided and then pry it up. Depending on the size of the plant or the root depth, you may need to use a trench shovel. Holding the root ball over a wheelbarrow, gently loosen the soil around the roots. Using a plant knife, an old kitchen knife or spade, divide the root ball the best you can leaving as many roots as possible intact. If there a lot of top growth on the plant, cut it back to about 6 inches so it is in balance with the disturbed root system.

Relocate

Place the divided sections in their new locations and the divided plant back where it came from. Back fill with soil, making sure the top of the root ball is at the same level it was previously. Water deeply. And, continue watering well every few days for the first couple of weeks, then you can taper off. Your plant might look a little sad and droopy at first. Don’t worry, it will need a couple of weeks to recover and then everything will be fine. After your plants have established themselves feed with Espoma’s Organic Plant-Tone.

Want more perennials? Check out these powerhouse perennials that work overtime…so you don’t.

Espoma Products for Dividing Perennials

Where to Buy
https://www.espoma.com/wp-content/uploads/2018/06/Day-lillies-.jpg 666 1000 espoma https://www.espoma.com/wp-content/uploads/2023/05/espoma-logo340w-1.png espoma2019-04-24 08:00:112019-05-07 09:56:08Give Perennials Some Love and More Leg Room

Awesome Astilbe

April 10, 2019/in Flowers

Astilbes are the drama queens of the shade garden.  You cannot help but admire these ‘no-fuss’ divas for their beauty and grace. Flowers can be delicate and frothy or stiff and compact.  Blooms range in color from red, burgundy, white, purple, rosy-purple, peach and various shades of pink. The handsome, fern-like foliage is a delightful contrast to heftier leaves like those of Hosta and Rodgersia. Leaves can be shiny, matted or coarse.  I like to insert additional zing to the garden by incorporating Astilbe with foliage that is bronze or burgundy tinged (‘Delft Lace’, ‘Fanal’, ‘Maggie Daley’), chocolate (‘Chocolate Shogun’), chartreuse rimmed in red (‘Amber Moon’) or chameleon-like (‘Color Flash’) – the leaves start out brilliant green and then morph to burgundy-purple before closing the season in blazing orange, red and yellow.

Photo Courtesy of Kerry Ann Mendez


Even though Astilbe is typically known as a shade perennial, it tolerates full sun, as long as there is enough moisture.  Those in the chinensis species are best suited for drier conditions.  These beauties also make wonderful container plants. Hardy in Zones 4 to 9 (many references claim Zone 3), pollinator-friendly Astilbe provides four seasons of appeal (leave the dried flower stalks up for winter interest) with little effort on your part!

Astilbes flower for three to four weeks but by mixing early, mid and late season cultivars, you can enjoy glorious blooms from mid-June until mid-August. These deer and rabbit resistant workhorses range in height from only around 8” (‘Lilliput’) to spectacular back of the border giants that can reach 4’ (‘Purple Candles’, ‘Mighty Pip’).  Astilbe ‘Pumila’ makes a terrific, weed-smothering ground cover with low, overlapping leaves and late season, lilac-pink flowers that top out at 10”.

Photo courtesy of Kerry Ann Mendez


Astilbe does best in organically enriched, moisture retentive soil.  You can achieve this by simply amending soil – or mulching – with compost, aged manures or similar materials.  Further boost the floral display by fertilizing with Plant-tone, a slow release, organic fertilizer. Astilbe prefers an acidic soil (pH in the high 5’s or low 6’s).  Check soil pH by taking a sample to your local extension office or use a do-it-yourself-kit such as Rapitest. To lower pH apply Espoma’s organic Soil Acidifier (elemental sulfur).

About the author: As an award-winning garden designer, author and lecturer, Kerry Ann Mendez focuses on time-saving gardening techniques, workhorse plants and sustainable practices.  She has been on HGTV and in numerous magazines including Horticulture, Fine Gardening, Garden Gate and Better Homes & Gardens.  Kerry Ann was awarded the 2014 Gold Medal from the Massachusetts Horticultural Society for her horticultural accomplishments.  She has published four popular gardening books, her most recent being, The Budget-Wise Gardener (February 2018). In 2016 Kerry Ann introduced National Gardening Webinars that are attended by thousands.  For more about Kerry Ann visit www.pyours.com  

Where to Buy
https://www.espoma.com/wp-content/uploads/2019/04/Astilbe-my-garden-kerry.jpg 1200 1600 espoma https://www.espoma.com/wp-content/uploads/2023/05/espoma-logo340w-1.png espoma2019-04-10 08:00:092024-09-07 07:56:24Awesome Astilbe
Page 5 of 12«‹34567›»
Where to Buy

Get News & Updates

Recent Posts

  • VIDEO: Tulip Garden Tour with Summer Rayne Oakes 🌷
  • VIDEO: Planting a Reblooming Lilac 🌸 with Garden Answer
  • VIDEO: Porch-Perfect Ferns: 🌿 Planting Hanging Baskets with Wyse Guide
  • VIDEO: Euphorbia Repotting 🌵 with Summer Rayne Oakes
  • VIDEO: Planting a NEW Tree 🌳 🍁 with Wyse Guide!

Tags

All-Purpose Potting Mix bio-tone Bio-tone Starter Bio-tone Starter Plus cactus and succulents Cactus Mix caring for houseplants Container Gardening DIY project Espoma espoma grown espoma organic Espoma Organics Espoma Video fall gardening flower garden flowers garden Garden Answer Gardening gardening tips gardens grow holly-tone houseplants Indoor! indoor gardening indoor plants Kaleb Wyse organic organic fertilizer Organic Gardening organic plant food Organic Potting Mix Outdoor Gardening Planting plants Potting Mix potting soil Spring Gardening succulents summer rayne oakes vegetable garden Vegetable Gardening Wyse Guide

Espoma. A Family Tradition Since 1929.

Espoma Organic logo
  • Espoma Dealer
  • Espoma Pro
  • Garden Club
  • Privacy Policy

Scroll to top