In this fall episode of Garden Answer, Laura is making leaf mulch from her fallen leaves. It’s a free resource that will help build healthy soil. Instead of going to all the trouble of bagging leaves, recycle them.
She begins by blowing all of her leaves onto an open grassy
area and mulch mowing them. Laura has a
large riding lawn mower but you can get the same results with a regular walk-behind
model. Just go back and forth until the foliage is fairly small and then attach
the bag to suck them up.
Laura wants to enrich the empty raised beds in her vegetable
garden. She pours about two inches of shredded leaves on the top of each one.
Followed by a sprinkling of Espoma’s
organic Blood Meal. She’s creating a
mini compost pile. In summer, grass clippings would provide the nitrogen to
help break down the leaves. Since she isn’t cutting grass anymore, she uses the
blood meal as an organic nitrogen supplement.
Blood meal may keep plant-eating pests away but it can
attract meat-eaters like dogs, raccoons, and possums. If that would be a potential
problem, put the two inches of shredded leaves down and wait until spring to
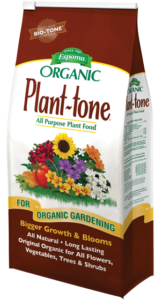
add Espoma’s organic
Garden-tone.
More leaves? Try making leaf mold. It might sound terrible
but it’s a fantastic soil conditioner. It improves soil structure, helps the soil
retain moisture and creates the perfect habitat for beneficial microbes. Simply
take shredded leaves and pile them up in a wire bin or a quiet corner of the
yard. The following spring you will have the most beautiful, natural-looking
mulch for garden beds. It’s gardeners’ gold.
Here are a few more videos from Garden Answer we hope you
will enjoy:
In this video from Garden Answer, Laura plants a new garden
for her sister–in-law. She has already
outlined the new beds and removed the sod. The next steps are installing a drip
irrigation system by tapping into an old one and marking the spots for the
trees she will be planting.
Drip irrigation emits water at the base of the plants, which
is better for plants than overhead watering. Hard water can leave damaging
build up on foliage and wet leaves can invite diseases. With drip irrigation,
all of the water soaks into the ground and doesn’t evaporate. It’s the most
efficient method of watering.
Irrigation systems take the work out of watering, but it’s
not – set it and forget it. Water needs vary at different times of the year.
Laura is using emitters that deliver one gallon of water per hour, a standard-setting.
She still waters each newly planted tree with the garden hose to make sure the
soil has settled and that there are no air pockets.
Planting in mid-summer isn’t ideal because of the heat, but
it can be done with a tiny bit of extra care and water. Laura always recommends
using Espoma’s
Bio-tone Starter Plus whenever she plants. And, as she points out, it’s
even more important when the plants are stressed, in this case by heat. The
mycorrhizae in Bio-tone helps stimulate root growth to ensure new plants get
maximum water and nutrients from the soil to minimize transplant shock and
loss.
These trees will become the “bones” of her design. She has
taken into account the mature height of the trees so they do not interfere with
the power lines above them or the fire hydrant between them. She has also
chosen narrow varieties of evergreens that will not outgrow their allotted
space in the garden.
Slim Trees for Small Spaces
Weeping White Spruce
An elegant, straight trunked tree with weeping branches. The
needles are green with a bluish tint. A perfect choice for narrow spaces. Hardy
in zones 2-7.
Merlot Redbud
Bright lavender-pink flowers bloom in spring before the
leaves unfurl. Dark purple, glossy foliage stands up to summer heat. Perfect
for smaller landscapes. Hardy in zones 6-9.
‘Baby Blue’ Blue
Spruce
Attractive silvery-blue needles make this spruce standout,
plus it maintains its color throughout the year. The habit is smaller and
narrower than other blue spruce. Hardy in zones 2-8.
‘Hillside’ Upright
Norway Spruce
A narrow, upright form growing to just 10 feet tall in the
first 10 years. Perfect for smaller urban gardens. Dark green needles are
backed by attractive, burnt orange stems. Hardy in zones 3-7.
Columnar Dwarf Mugo
Pine
A narrow, upright form of mugo pine, makes a strong
architectural statement. Will grow to just 8 feet tall. Produces small, yet
ornamental cones. Hardy to zones 2-8.
Here are a few of our other blogs and videos that we think
you’ll enjoy:
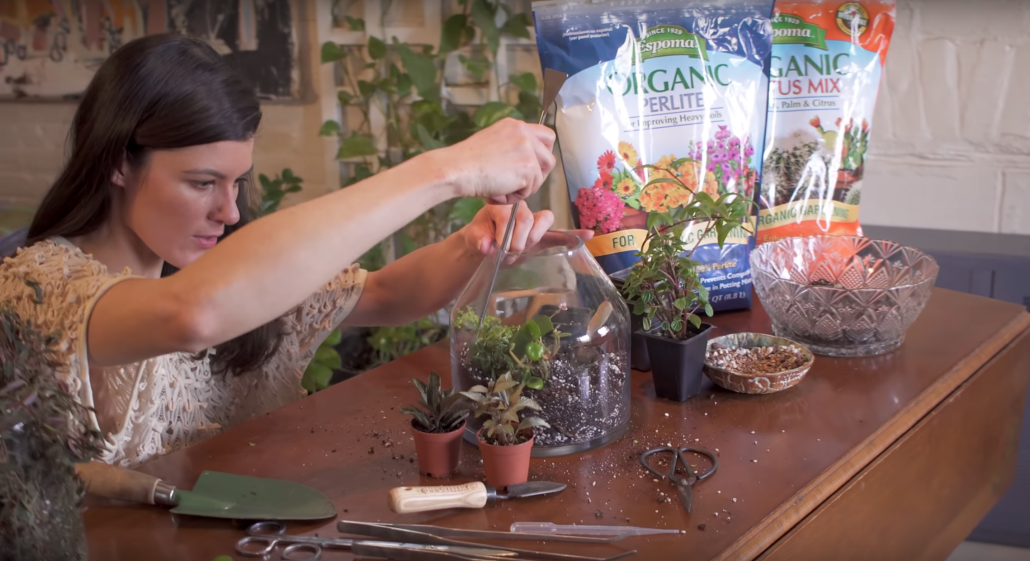
Terrariums are beautiful, fun to make and easy to care for. Our
favorite Brooklyn plant expert, Summer Rayne Oakes, guides us through the
process step-by-step in this episode of Plant One on Me.
Summer covers which plants, tools, containers and soil mix you’ll need. Plus, how to water, the number one reason people kill plants.
If this terrarium seems too large to start with, go with a
smaller version.
You don’t need a green thumb for this DIY project, promise.
Getting Started
First of all, choose a glass container. It’s easiest if the
container is big enough to fit your hand inside. Next, choose plants that have
the same kinds of light and water requirements. Check the plant tags to make
sure they’ll be compatible. Generally speaking, terrariums are best in bright,
indirect light. Full sun can be magnified by the glass and burn foliage. Base
the container size on the number of plants you’d like to include.
Tools
Summer uses a set of aquarium tools for her terrariums. It’s
a clever idea because they are extra-long. Having said that, it isn’t really
necessary to buy this type of set when starting out. A long pair of chopsticks
does a great job. She also uses a spoon and a narrow garden trowel. A watering
can with a thin spout is handy to direct the water.
Soil Mix
The soil for terrariums needs to be a light, free draining
mixture. Espoma’s
organic Cactus Mix combined with perlite makes the perfect
blend. If plants are small you can start with a drainage layer of an inch or so
consisting of small rock and or charcoal. In this case, she didn’t use a
drainage layer because the plants were relatively large and would have rooted
into the drainage layer too quickly.
Planting
Add an inch or two of the soil mixture to your glass
container. Play around with the plants until you have an idea of how you’d like
them to look. Every plant won’t be blooming all of the time so choose ones with
different textures and foliage to create the terrariums subtle beauty. Plant
around the edge first, adding soil around the plants as you go. Plant the
centerpiece last.
Watering
Terrariums create their own humidity which means they’ll
need to be watered less frequently than houseplants in pots. Water sparingly
and keep an eye on them. If plants seem to be wilting, water them. As time goes
by, you’ll find the right watering schedule for your terrarium. Once every two
weeks is about average.
Plant List
Here is a list of the plants Summer used in this video:
Monstera siltepcana – light and dark varieties
Peperomia trinervula
Hemigraphis/Strobilanthes alternate
Pilea asp.
Begonia conchifolia
Peperomia caperata
More Information
Here are links to other videos and blog posts we think you
may find interesting:
https://www.espoma.com/wp-content/uploads/2019/08/Espoma-screenshot.png15642872espomahttps://www.espoma.com/wp-content/uploads/2023/05/espoma-logo340w-1.pngespoma2019-08-06 12:00:062019-08-06 12:01:23How to Plant a Terrarium with Summer Rayne, Homestead Brooklyn
Why does Laura from Garden Answer use Bio-tone Starter
Plus? Because it’s the ultimate starter fertilizer. Bio-tone Starter Plus
is super charged with microbes and mycorrhizae to help new plants establish
quickly, grow more robust root systems and experience less transplant
shock. Let’s break it down.
Mycorrhizae
Unlike maintenance fertilizers that are generally spread on
the surface of the ground and lightly worked into the soil, Bio-tone Starter
Plus is added to the planting hole, where it is in direct contact with the
roots. Fun fact: Mycorrhizae literally means “fungus roots.” These specialized
fungi act like extensions of the roots themselves, creating hundreds or
thousands more entry points for the roots to take up water and nutrients.
Microbes
Microbes are bacteria that breakdown nutrients to make them
available for plants to take up. Bio-tone contains 50 percent more microbes
than maintenance fertilizers like Holly-tone, for example. These microbes and
mycorrhizae help restore balance to your soil and are a cornerstone of the
“Regenerative Gardening” trend.
No Sludges or Fillers
At Espoma, we’re proud to offer products that are organic
and do not contain any sludges or fillers. Sand and lime are often used as
filler ingredients that don’t add any nutrient for plants. Sludge, or Bio-solids
comes from waste treatment plants — it’s never allowed in organic gardening.
All ingredient in Bio-tone Starter Plus and all Espoma Organic ‘Tone’ plant
foods are helping to feed the plant.
Espoma Products
Here are some blog posts we hope you’ll find interesting.
https://www.espoma.com/wp-content/uploads/2019/07/IMG_6794-2.jpg13472400espomahttps://www.espoma.com/wp-content/uploads/2023/05/espoma-logo340w-1.pngespoma2019-07-11 16:45:282019-07-11 16:30:53Get Plants off to a Good Start with Bio-tone Starter Plus
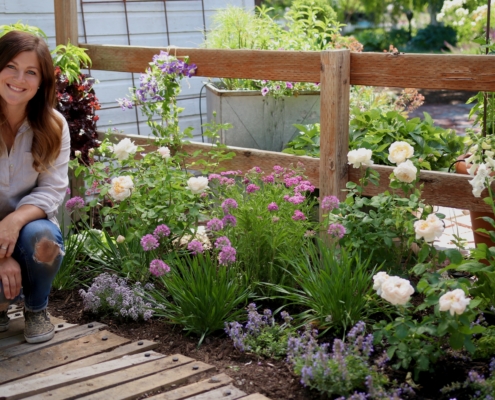
English cottage gardens date back centuries. They were used to grow vegetables, herbs for healing, fruit trees, perhaps a beehive, and common flowers. The informal style went through a renaissance in the late 1800’s when they became somewhat more nostalgic than practical.
The informal aesthetic of dense planting and natural materials is still en vogue today. In this video, Laura outlines 10 design principles to help you design a cottage garden. Before you start, make sure you have plenty of Espoma’s organic Bio-tone Starter Plus plant food to make sure your plants get the best possible start.
No Straight Lines
Cottage gardens are always informal and a touch whimsical. Avoid straight lines. Gently curving edging looks more natural and playful. If your site restricts you to a straight edge, let the plants spill over it to create an unrestrained look.
Large Groups of the Same Plant
White cottage gardens are more relaxed in their design, it is still best to use large sweeps of the same plant. Think of planting in groups of three, five or seven. That is far more restful to the eye than a jumble of onsies and twosies.
Spacing Doesn’t Matter
This is one time you do not have to follow the advice on the plant tag. Cottage gardens are always densely planted and generally grow more densely packed with time. Annuals and biennials are often used in cottage gardens and will self-sow in the border. Biennials are plants that take two years to grow and flower from seed like the foxgloves shown. Another advantage to planting things close together is that there is less room for weeds to grow.
Color Harmony
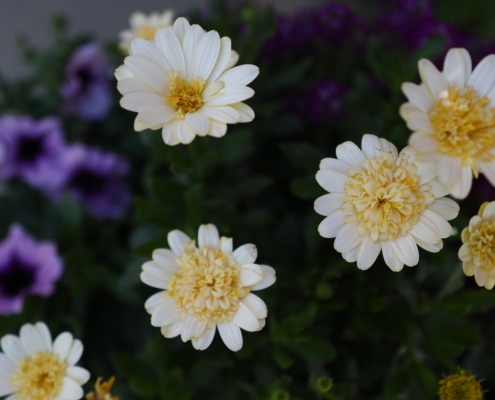
It’s very important to pick a collection of plants that have harmonious colors. Without that the border would look chaotic. Garden Answer uses a collection of soft pinks and peaches with touches of blue and lavender. It needn’t always be soft colors, but they do need to be unified in some way.
Use Varied Heights and Textures
In any planting, it’s a good idea to think about texture, height and foliage color as major design elements. Nothing blooms all the time. Varied foliage forms and colors will create interest even when the flowers aren’t in bloom. Laura uses Heuchera specifically for the silvery foliage color.
Anchor Plants/Structural Elements
This is sometimes referred to as the “bones” of a garden. It’s a structural element that all of the other plants get woven around. In this case, it’s a beautiful shrub rose named Rose ‘The Lady Gardener’, a fragrant beauty with full, apricot blossoms. The rose is repeated three times. Repetition is soothing to the eye. It’s possible to use evergreens for a slightly more formal feel, or whatever peaks your interest.
Fragrance
The first thing everyone does when they pick a flower is to hold it up to their nose. Cottage gardens are known for their fragrance. Try to select varieties that smell good at the garden center. Roses, lavender, sweet peas, and sweet alyssum are all good choices.
Not Perfectly Maintained
Along with relaxed design principles, comes relaxed maintenance. Planting tightly will discourage weeds. Annuals like poppies will self-seed and move around the border, just like the biennial foxgloves. Weeding everything that comes up might mean that you weed out these plants and inhibit their spontaneous movements.
The Look Will Change Over Time
This style of gardening is the exact opposite of a formal border filled with geometric shaped boxwood. By its very nature this is meant to be more random. People often sow cosmos, violas and other plants that have a tendency to move around. Let them surprise you. If you really don’t like where one popped up, it’s easy enough to remove.
Be Patient
Being patient is really what gardening is all about. A garden is never really finished. Enjoy the journey!
Garden Answers Plant List
Nepeta ‘Cat’s Pajamas’ – catmint
Achillea – pink yarrow
Allium ‘Serendipity’ – ornamental onion
Rose ‘The Lady Gardener’
Heuchera Dolce ‘Spearmint’ – Coral Bells
Clematis ‘Brother Stephan’
Digitalis Foxy Hybrids – foxglove
Lobularia ‘Blushing Princess’ – sweet alyssum
Here are more videos from Garden Answer we hope you will enjoy.
Mom is the best! For years, she’s showered you with love in
so many ways, big and small.
Now, it’s your turn to remind her how much you truly appreciate her. Creating a beautiful container is something she’ll enjoy for months or even years to come. Watch as Laura from Garden Answer visits her family’s garden center to pick out a selection of plants, potting soil and fertilizer to make the cutest planter for her own mom.
Tips for Making a Flowery Container for Mom
First, start by selecting a container that’s her style.
You’ll find lots of fun, colorful and patterned containers at your local garden
center. Check to make sure your container has drainage holes in the bottom and
will fit the plants you select at their mature size.
Next, choose plants that spill, thrill and fill! You want one
plant that cascades, one that mounds and one that stands taller than the rest.
Look for 3-5 varieties of flowering plants, grasses or greenery. Does Mom have
a favorite flower or color? Try your best to incorporate those features into
your creative design.
The options are endless. Have fun as you mix colors and
textures for a winning combination. Check plant tags to make sure your plants
like the same growing conditions, sun exposure and amount of water before
checking out.
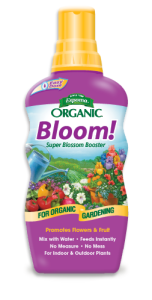
While you’re still shopping, grab a bag of the best organic
potting soil mix and Espoma’s
liquid Bloom! fertilizer. These Espoma products will help the plants adjust
to their new home and grow healthy roots for bigger plants.
Remove plants from their original containers and arrange
them in the new planter. Play around a bit and move the plants around to see
where each plant looks best. Remember to consider their mature size and give
them ample room.
Once the plants look perfect to you, fill in any gaps in the
container with more organic potting soil.
Water well.
Wait till you see you mom’s face when you arrive on Mother’s Day with a beautiful, homemade container garden!
Laura walks us through fertilizing trees, shrubs, perennials in early spring. Wait until you see some growth on your plant to fertilize.
1. Gardening always starts with the soil. Organic fertilizer “feeds the soil that feeds the plants”. The process by which organic fertilizers deliver their nutrients enhances the fertility and structure of the soil.
Organics are digested by soil microorganisms, which then release the nutrients in a form available to plants. This process produces humus, a spongy material that improves soil structure. When you improve soil structure, the soil is better able to hold the proper balance of water, air and nutrients until they are required by plants.
Plants respond by developing larger root systems. Larger roots support more vigorous top growth and make plants less susceptible to drought. And by stimulating a healthy population of beneficial microorganisms in the soil, plants become more resistant to insects and diseases.
2. Organic fertilizers will provideslow, steady feeding, as the plants require it. The release process is slow and largely dependent upon three factors: the microbial population in the soil, moisture, and soil temperature.
A healthy population of microbes in the soil is necessary for the digestion process. Moisture is required to sustain microbial life as well as to keep nutrients flowing into the plants root zone. And soil temperature is critical because as it rises, plants require nutrients more rapidly.
Fortunately, microbial activity mimics these requirements and increases as soil temperature rises, so that organics feed the needed nutrients as the plants require them.
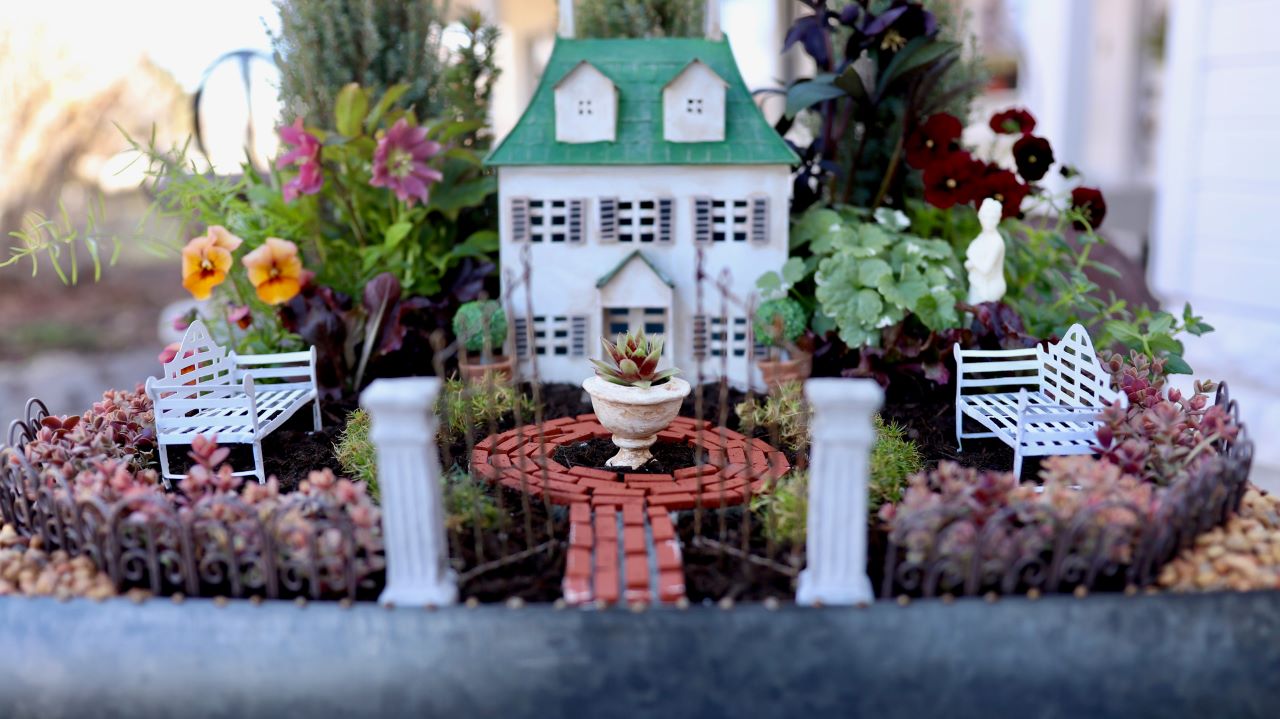
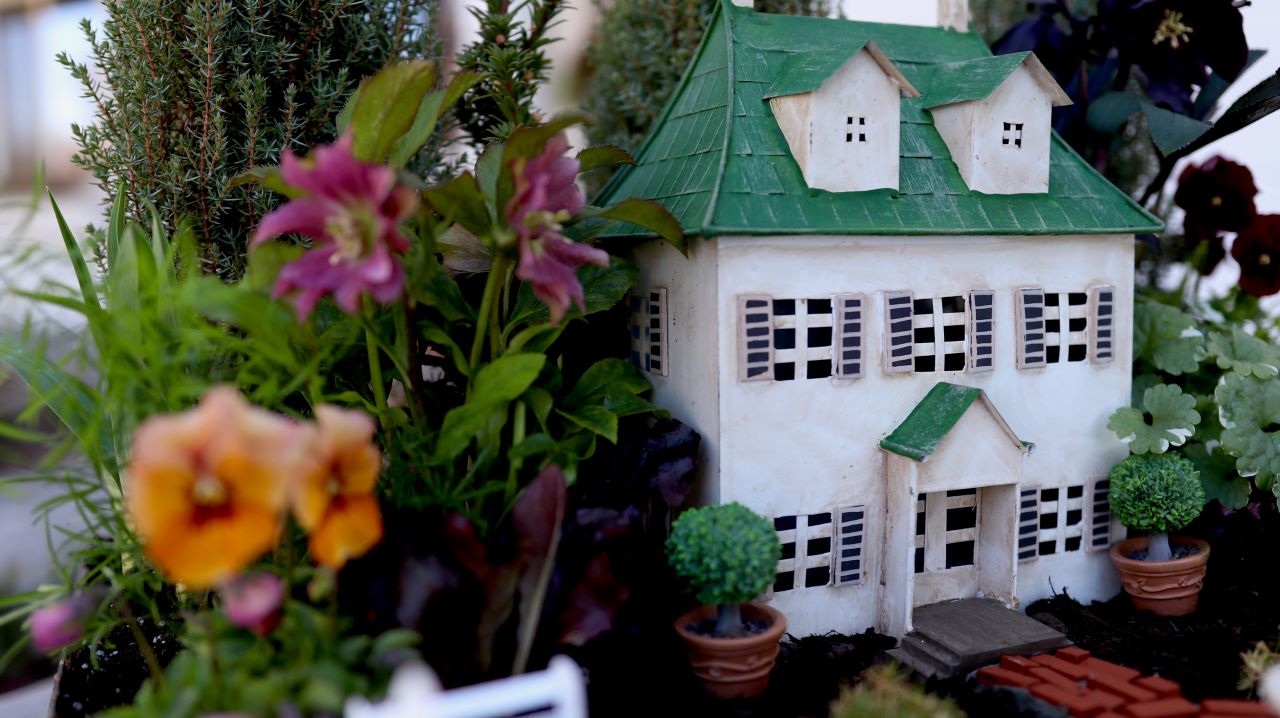
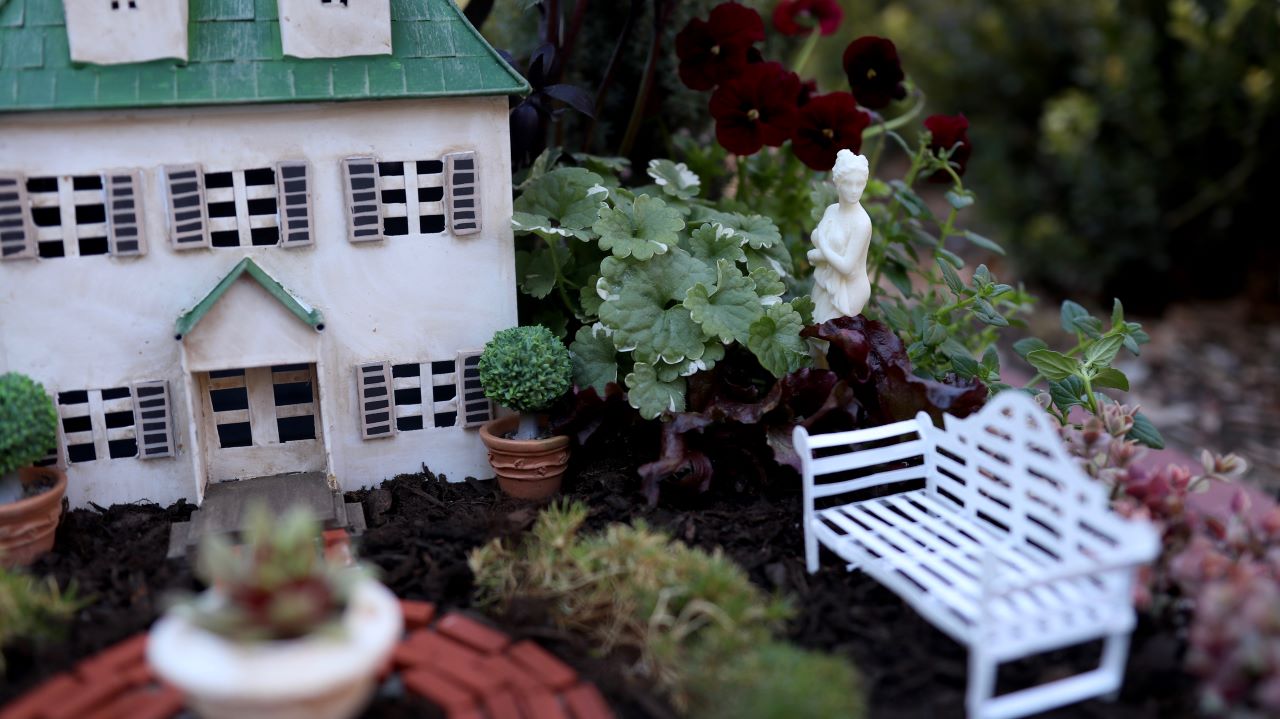
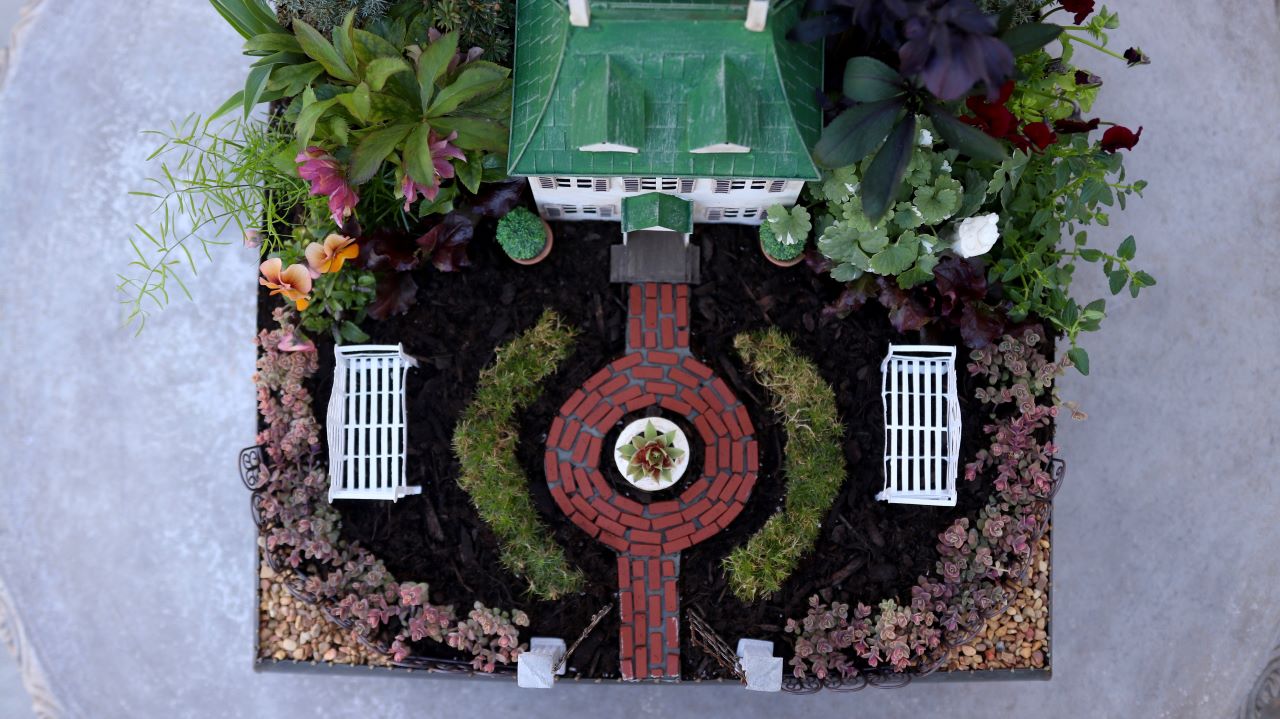
Miniature gardens are adapted from Japanese bonsai gardens, taking the idea of shaping and caring for a miniature tree for relaxation and creating a new way of gardening. Because they are miniature, the idea is to welcome fairies and small creatures to enjoy them, just as you enjoy your garden.
Your new mini garden will do better in an area protected from the elements. When thinking about where to create or place your Mini Formal Garden, think about the environmental factors like wind and rain that can ruin the garden. When Laura is done, she will place it on her covered porch where it will be protected!
Before we begin, there are a few things to note:
There is no drainage in this miniature garden, so water lightly and only when the plants need it. Laura suggests using a syringe to get the right amount of water exactly where it’s needed.
This is a seasonal project, so before winter comes find a new home for the plants, either in a greenhouse or indoors, in order to preserve them.
Line a container, box or old suitcase with heavy plastic in order to preserve it and keep the soil in one place.
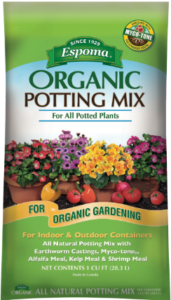
Fill with Espoma’s Organic Potting Mix and trim the excess plastic from the container to make it look clean and precise.
Add plants. Remember to work from back to front adding height and texture to the miniature landscape. Use plants that will stay small, so they don’t outgrow your garden.
Create a pathway. Cut photo paper to make a guide where you want the road to go. Mix water with shapecrete and pour between the photo paper. Let dry 30 minutes before removing the paper. It’ll continue to cure for 24 hours.
Now is the time to set the formal scene and add in your elements. The little succulent hedge and gates are out favorite!
Enjoy your new Mini Formal garden!
Use Espoma’s organic potting mix in your formal garden.
https://www.espoma.com/wp-content/uploads/2019/03/IMG_3045.jpeg7181280espomahttps://www.espoma.com/wp-content/uploads/2023/05/espoma-logo340w-1.pngespoma2019-03-31 10:07:502019-05-07 09:56:09Make a Mini Formal Garden
Great for or Seed Starting or blending a custom potting mix
Helps loosen heavy soils and prevents compaction
White granular particles contain about 6% water
Neutral pH
Holds nutrients and 3-4 times it’s weight in water
Clean, odorless, sterile and non-toxic
Will not rot or mold
Lightweight substitute for sand
Can float to the top of potted plants due to its light weight
Vermiculite
Great for or Seed Starting or blending a custom potting mix
Helps loosen heavy soils and prevents compaction
Retains moisture and plant nutrients
Mixes well with soil
Clean, sterile, odorless, non-toxic
https://www.espoma.com/wp-content/uploads/2019/03/IMG_3082.jpeg33686000espomahttps://www.espoma.com/wp-content/uploads/2023/05/espoma-logo340w-1.pngespoma2019-03-29 14:39:432024-08-12 20:37:58Perlite vs. Vermiculite
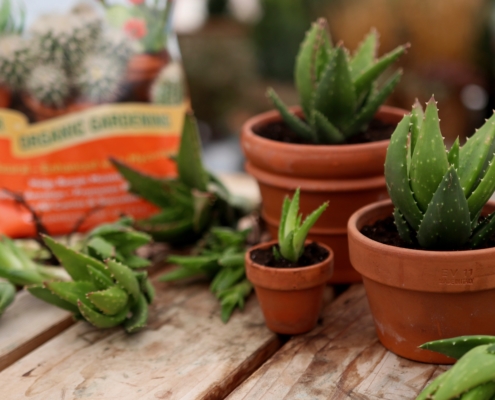
Separating large aloe plants into several smaller ones is a wonderful way to propagate new plants to share with friends and family or to use in other projects. It’s also a great way to save money. The large Gold Tooth Aloe Laura from Garden Answer divides in this video cost $22 and produced over 20 new plants.
Aloes are desert plants that are hardy in zones 9-11, or to about 20 degrees Fahrenheit. In cooler regions they may be grown in containers and brought indoors for the winter. Aloe is a clump-forming plant meaning they naturally produce many baby plants called offsets. Mature plants flower in late spring and early summer with bright orange-red blossoms that attract pollinators.
Six Steps to Separating the Offsets
Gently slide the plant out of its container
Wear gloves when handling succulents with sharp foliage
Carefully tease the soil away from the roots
Select an offset and follow its stem down to the spot that it’s attached to the main plant
Break it off with gentle pressure, take your time to remove all of the others
Remove dead, damaged or dried up leaves
Replanting the Mother Plant
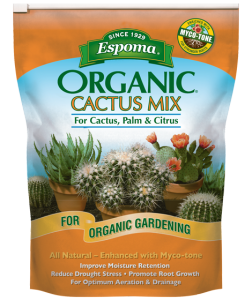
It is always best to use fresh soil when repotting since the nutrients in the nursery potting soil are likely used up. All succulents and cacti need a free-draining, organic, potting soil like Espoma’s Cactus Mix. Roots will rot in wet soil. The main plant will still have plenty of roots and can be repotted. Wait to water it for about a week to allow the leaf scars to callous over. This helps to prevent disease and infections.
Photo courtesy of Garden Answer
Replanting the Offsets
The offsets all have open wounds where they were broken off from the main plant. The wounds need several days to dry and callus over. One method involves letting them dry on a table in bright, but indirect sunlight for 5-7 days before planting. They may also be planted right away but not watered in for a week.
Care and Feeding
Aloe prefers full sun to light shade. These plants are drought-resistant but container plants benefit from some extra water during the hottest days of summer. Feed regularly with an organic fertilizer like Espoma’s Cactus! Always follow the package directions.
Check out these blogs for more information about growing succulents and the secrets to their care.