Video: Planting Amaryllis Bulbs with Garden Answer
Garden Answer has both new and old Amaryllis bulbs that she’s looking to get some beautiful blooms out of. Follow along as she gets them ready.
Featured Products:

Garden Answer has both new and old Amaryllis bulbs that she’s looking to get some beautiful blooms out of. Follow along as she gets them ready.
Featured Products:
Your Thanksgiving dinner may look different this year with a smaller number of attendees, but that’s all the more reason to stun them with holiday decor! It’s more important than ever to relax with members of your household and find ways to put everyone in that classic festive mood. Here are some ways to make a beautiful table centerpiece to help this holiday season be as cheerful as the last.
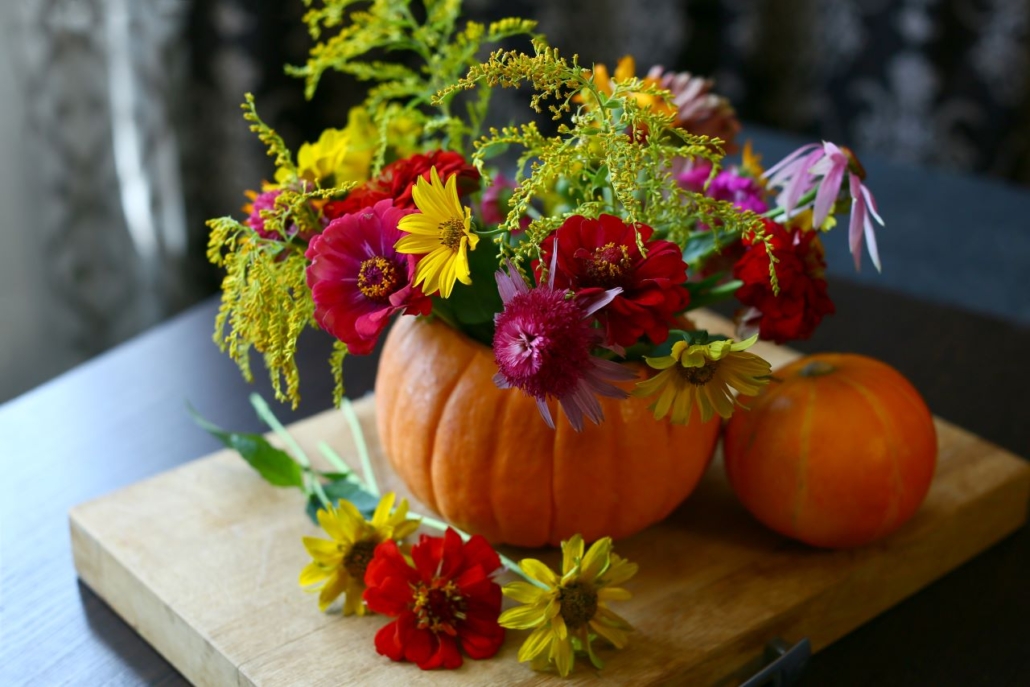
1. Pumpkins everywhere
Not sure what to do with all the pumpkins you got for Halloween? Turn them into flower pots and get the full effect of fall! Hollow them out and put in some of your favorite flowers. You can even paint them to match any decor color you already have.
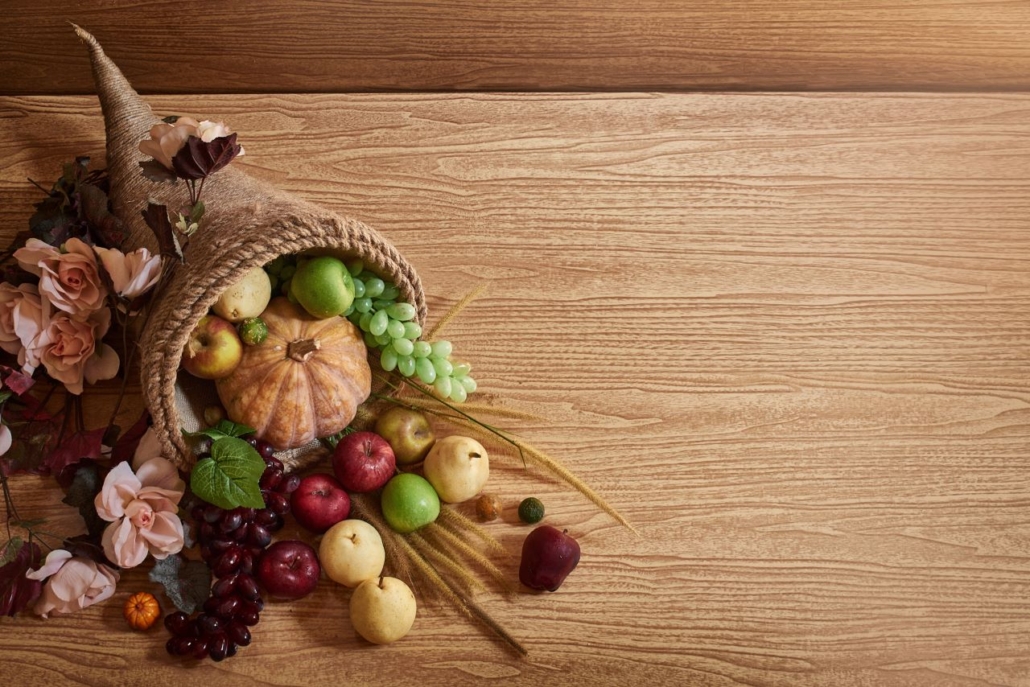
2. Create your own cornucopia
Thanksgiving is celebrated to give thanks for the harvest for the year and all the food you’re going to eat, so it’s fitting to display your harvest on the table too! If you took part in growing fruits and vegetables over the summer, why not display your hard work on the table in the form of a cornucopia?
After all the meal planning, preparing, and time spent in the kitchen, the Thanksgiving table needs some love. A Thanksgiving centerpiece is simple with all of the seasonal produce. Check out the video below from Wyse Guide for some inspiration.

3. Flower arrangements
Another creative trick you can try is creating flower arrangements! If you’ve been growing flowers, you already have everything you need. But if you haven’t, hop on over to your local florist and pick out some fall-colored bouquets and arrange them however you want. There’s no wrong way to do it!

4. Shrubs and leaves
If you’re looking for an inexpensive yet effective way to get it done, your backyard is your oyster! Don’t want to pluck out your flowers? Simply bring in some fallen leaves that are bound to be a mix of red, yellow, and orange. This will definitely give your home a more rustic look. Add some branches and evergreen shrubs for some texture!
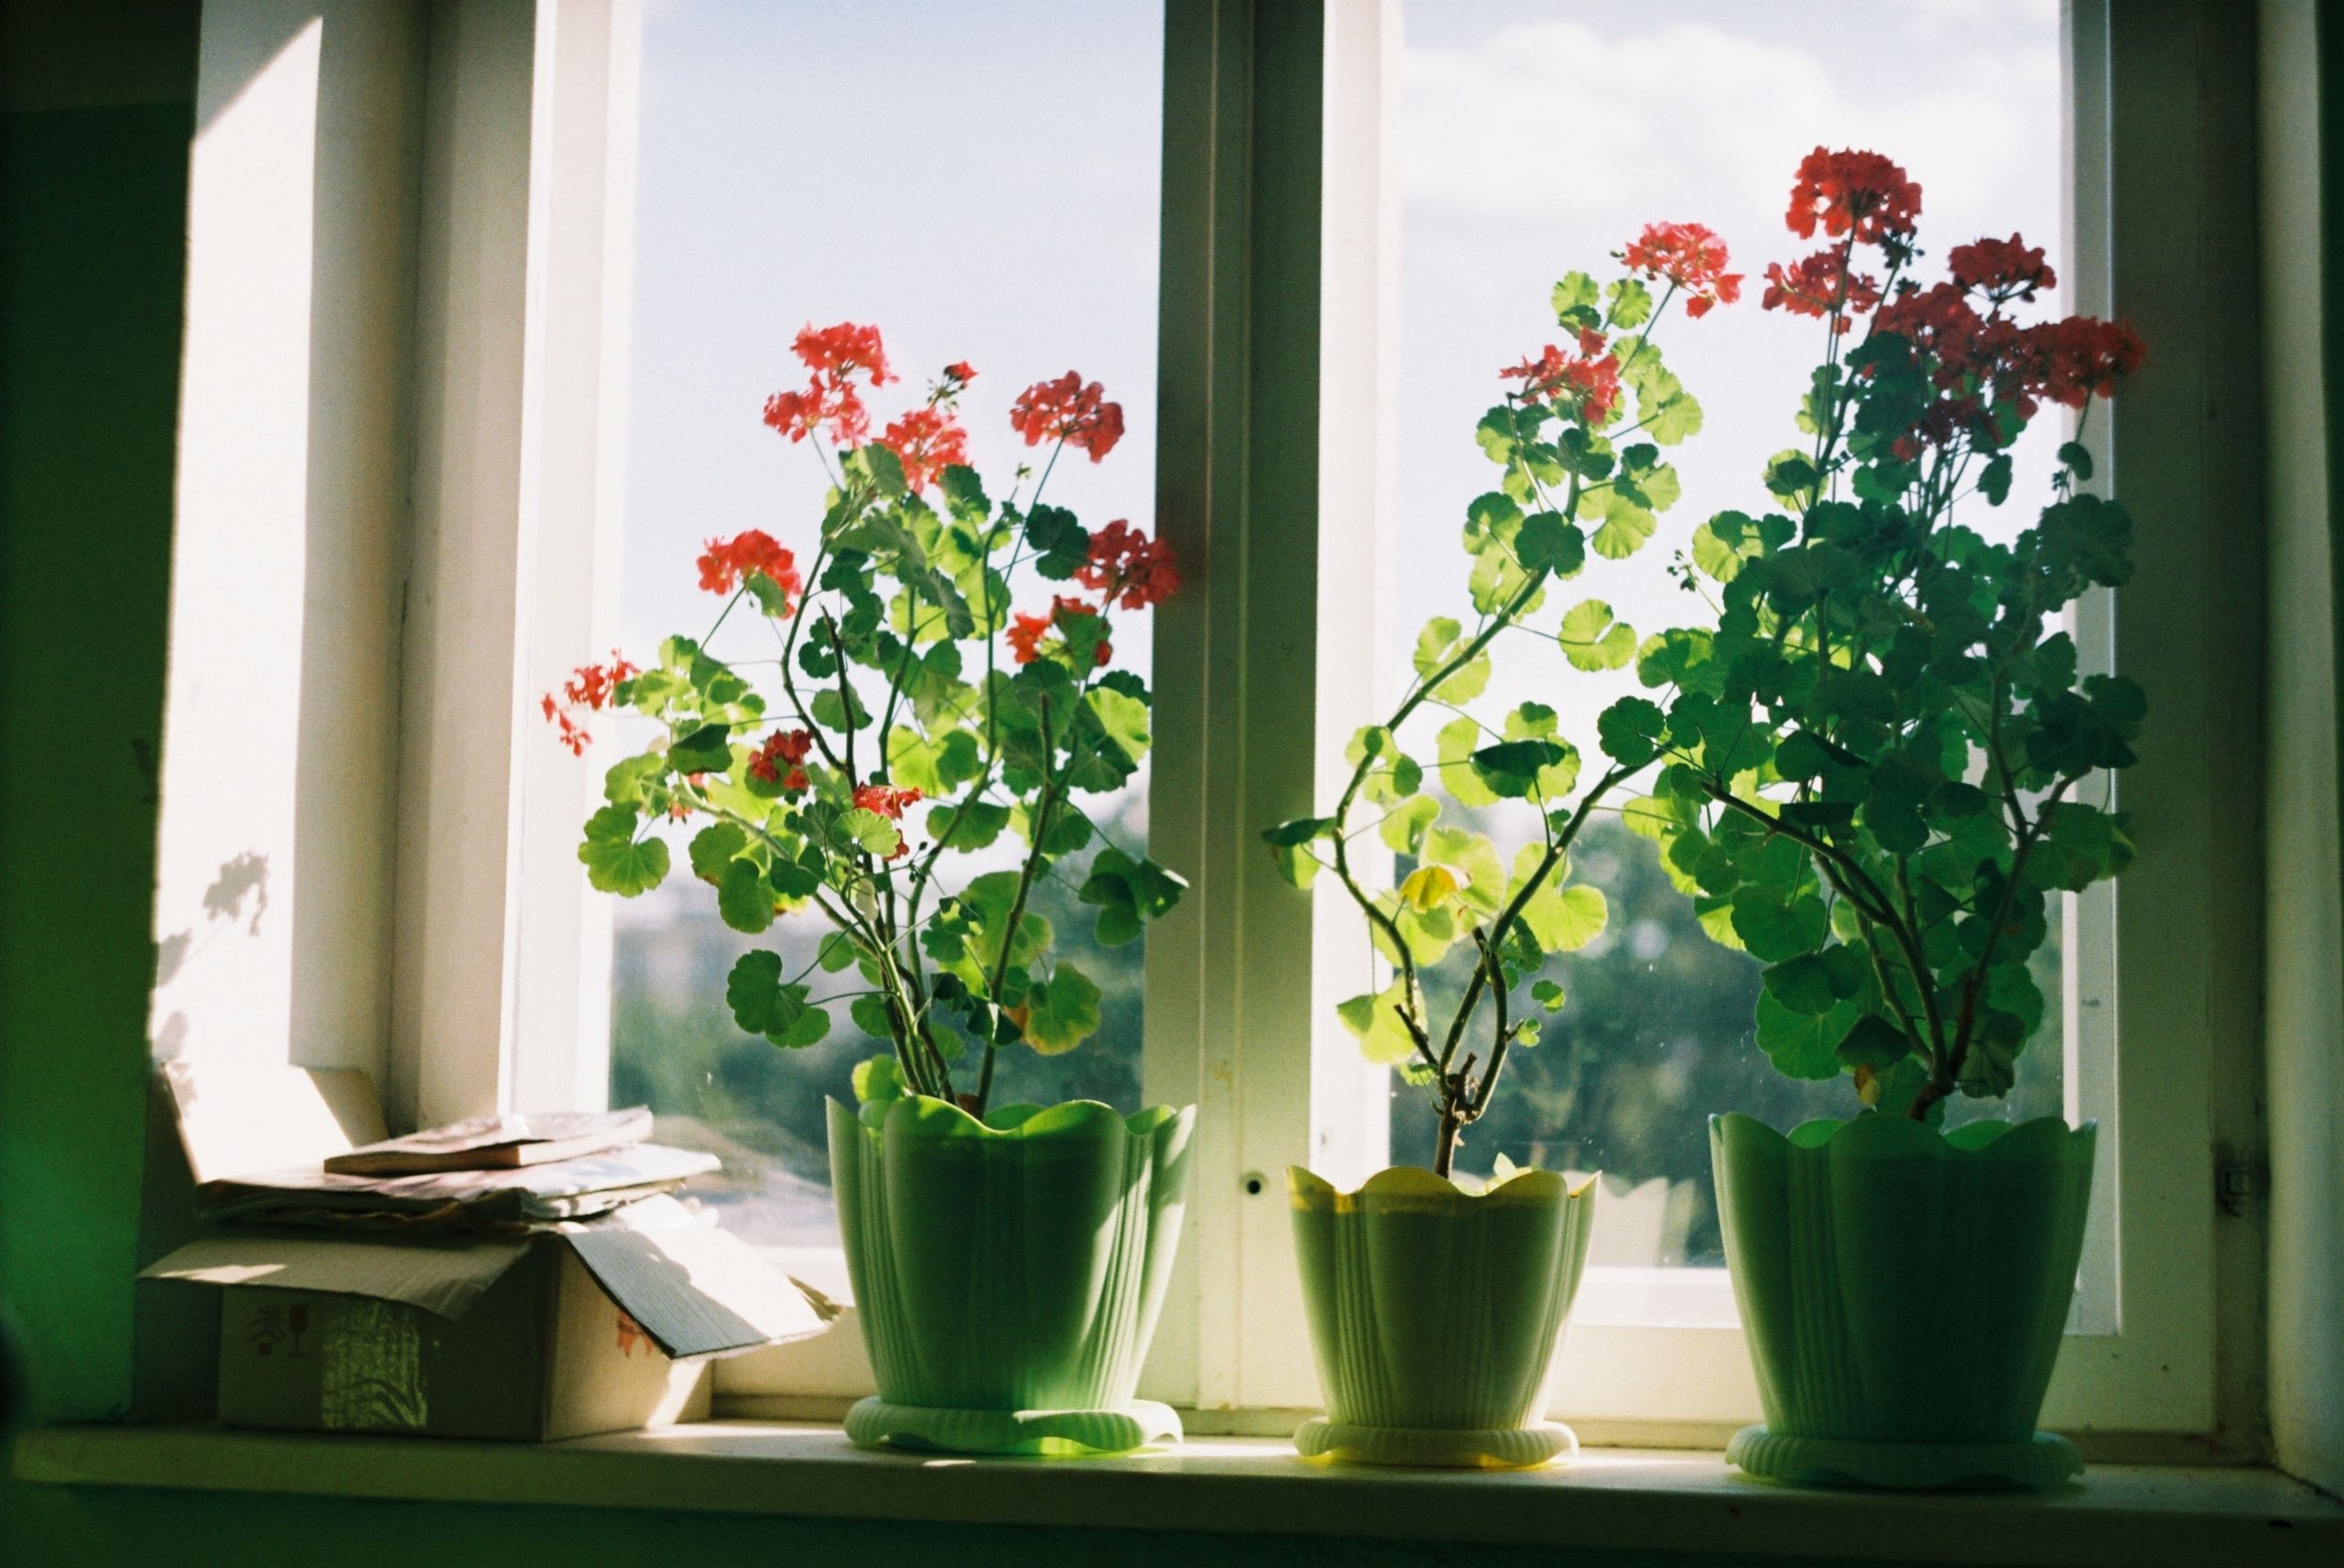
5. Don’t forget houseplants
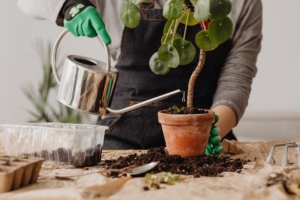
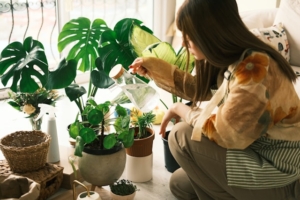
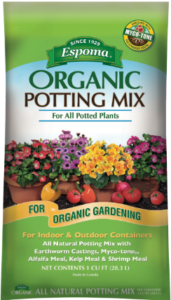
If you’re a dedicated plant parent, you probably already have some unusual houseplants around your house. Now all you need to do is re-pot them into something more festive to brighten up everyone’s spirits! Make sure to add some potting mix while repotting and some Indoor! Houseplant food to keep them perky throughout dinner.
Whether you’re going all out or only want to make a small arrangement, adding some festive decoration is sure to get everyone feeling more festive and joyful this holiday season. Even if Thanksgiving is dinner for one — remember that plant care is self-care!
Featured Products

Watch as Laura from Garden Answer creates a beautiful planter for Fall using Flower-tone and Potting Soil Mix!
Featured Products:

Ever notice how a moment spent tending your plants feels like a mindful pause in a busy day? You’re not just watering—you’re nurturing calm, presence, and connection. We believe that caring for your green companions is one of the most natural forms of self-care. And just like you thrive on nourishing food, your plants thrive when you feed them regularly with Espoma Organic fertilizer —gentle, effective, and safe for people, pets, and the planet.

Sharper Mind + Better Mood
Studies show that being around plants can boost memory and attention by about 20%, while reducing background noise and enhancing productivity and creativity—especially in home or little work-from-home nooks.
Soil for the Soul
That earthy scent? It comes from microbes like Mycobacterium vaccae (lovingly nicknamed “outdoorphins”), and they don’t just feed your plants—they may help boost your mood and immunity, too.
Pulling weeds, misting leaves, or simply observing new growth—these are gentle rituals that anchor us in the now. As one soothing tip from our brand partner, Maria Failla of Growing Joy with Maria, reminds us:
“Use watering or caring for them as an excuse to get up from your computer and take some ‘me-time’—because plant care is self-care.”
Pair that with feeding your plants Espoma Organic fertilizer, and you’re nourishing life in every sense.

Your indoor plants do more than brighten a room—they improve your air, calm your mind, and remind you to slow down. To keep them thriving year-round, a little extra nourishment goes a long way.
That’s where Espoma Organic Indoor! liquid fertilizer comes in. This gentle, balanced formula is made from natural ingredients and feeds instantly, giving your leafy friends the nutrients they need for lush growth and vibrant color—even in the lower light of winter months.
Self-Care Tip: Pair your plant feeding with your own wellness ritual. Set a reminder every 2–4 weeks to water and feed your plants, then take a few minutes to enjoy a cup of tea nearby. Watch how your plants respond over time—you’ll notice deeper greens, healthier new leaves, and a little spark of joy in your day.

During the busy holiday season, a mini Christmas cypress or Norfolk Island Pine—with its fresh sap-like scent—can be both a peaceful décor choice and a mindful project. Pot it up in our Espoma Organic Potting Mix, give it a slow sip of water, and feed it with an organic fertilizer like Indoor! for lasting joy. It’s a gift that grows for you, not just from you.
Micro-Meditation Moments
Set a daily two-minute ritual—touch the soil, check a leaf, breathe deeply. Call it a “plant-powered reset.”
Mini Salad Gardens with Maria Failla
Maria Failla of Growing Joy with Maria, makes self-care—and dinner—even simpler. She grows an entire salad (including herbs, lettuce, mini-tomatoes, and edible blooms) in a single container using Espoma Organic Potting Mix, Bio-tone Starter Plus, and Garden-tone organic fertilizer for steady nourishment.
Create a Kitchen Corner of Calm
A small shelf of herbs like basil, lavender, or even mint provides an aromatic escape and practical joy when cooking. Watering and feeding them with organic fertilizer like Indoor! can become a lovely action in your daily rhythm.
Mindful Mondays with Biophilia
Start your week by simply sitting with your plants—observing new buds, leaf shapes, and subtle color shifts. This biophilic practice connects you to growth and groundedness.
Plant care is not just about pretty greenery—it’s caring for yourself, too. You pause, breathe, tune in, and the soil responds. Whether it’s a festive tree, a potted herb, or a tranquil succulent, your green space is your sanctuary. And with a little love, light, and organic fertilizer, your plants—and your spirit—can truly thrive.
*****
Here are some of our other blogs and videos we think you will enjoy.
Give Some Green for the Holidays
Parenting Advice for New Plant Parents
Poinsettia Care Guide from Garden Answer
Featured Products:


Houseplants are so much more than decorations. They help reduce stress and tension and create a relaxed and happy atmosphere. They absorb carbon dioxide and produce oxygen while purifying the air by removing toxins. They say we spend a third of our life sleeping, so let’s do it in the best possible environment, a room full of house plants.
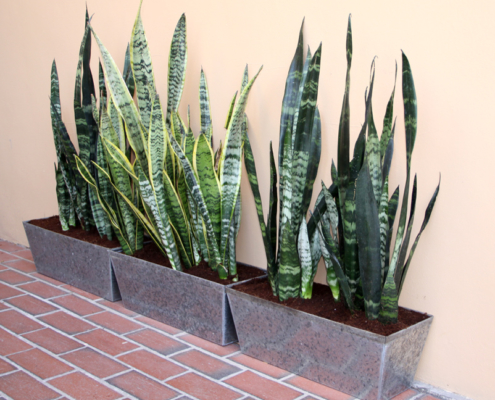
Snake Plant
Snake plants convert carbon dioxide to oxygen at night. It is also one of the easiest and most forgiving houseplants you can grow. Whether you have bright or low light, a snake plant will adjust to it. It doesn’t require much water and even if you forget to water it for a couple of weeks, it will still look great. Overwatering it is really the only way to kill it.
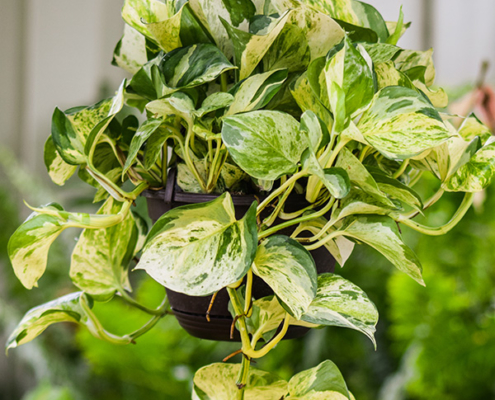
Golden Pothos
A study from NASA shows that pothos removes toxins, mainly carbon monoxide and formaldehyde from the air. This low-maintenance plant grows well in low light. Water it only when completely dry. Always pot your houseplants in quality potting soil like Espoma’s Potting Mix or a mixture of potting mix and Cactus Mix for plants like this that require excellent drainage.
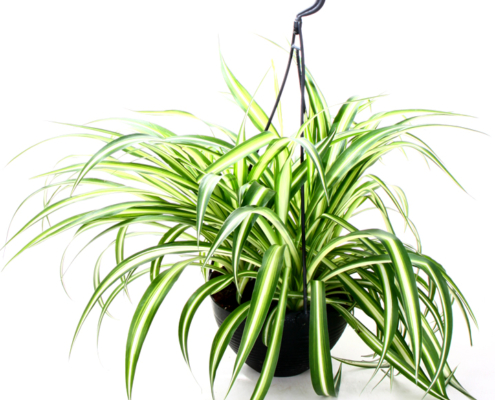
Spider Plant
The spider plant removes formaldehyde from the air, which is a common carcinogen found in many household products and items. This is another easy to grow selection that enjoys bright light, but will adapt to low light situations. Like all house plants, a regular schedule of fertilizing will help keep spider plants in tip-top shape. Organic liquid fertilizer like Espoma’s Indoor! works beautifully and has an easy dose cap, meaning you’ll never use too much or too little.
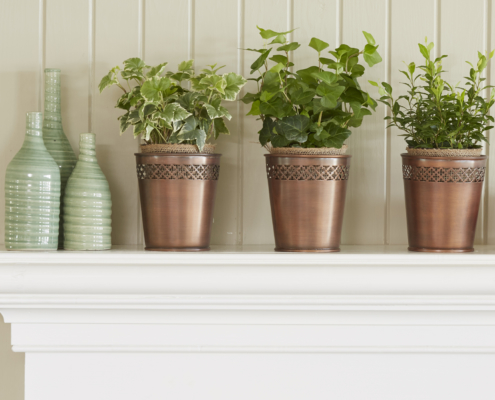
English Ivy
English ivy has the unique ability to clean the air of mold. Ivy is a trailing plant that you can train to grow up a trellis or let it cascade down from a shelf. It can be an aggressive plant outdoors, but inside it’s well behaved. Keep the soil moist, but not wet, and give it a place with indirect light.
Aloe vera
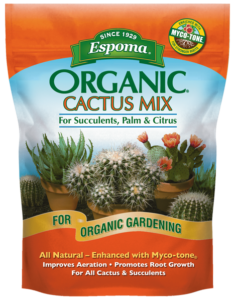
Aloe has been used as a medicinal plant to heal: sunburn, cuts, insect bites, minor burns, and dry skin. It’s also an air purifier. Aloe likes bright light. Water it well every two weeks or when the soil feels very dry. Fertilize with Cactus! monthly to give it nutrients.
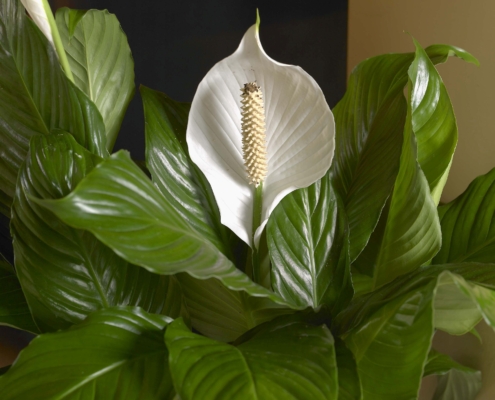
Peace Lilies
Peace lilies also made it on NASA’s list of toxin removing plants. They can absorb mold spores from the air into their leaves. It’s a pretty plant with calla-like flowers that likes bright light. Regular watering is a must (they’ll let you know when they’re thirsty by letting their leaves droop.)
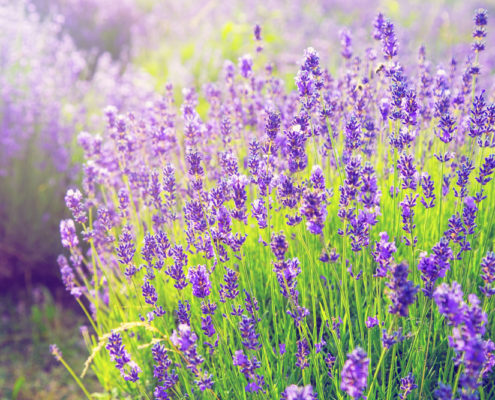
Lavender
Lavender has been used for centuries for its soothing, sleep-inducing properties. Victorian ladies used to stuff their pillows with lavender to relieve stress. Today you can find a wide array of lavender products to help whisk you off to sleep. Lavender isn’t often sold as a houseplant but you can grow it outdoors and harvest the flowers for the bedroom.
*****
Ready for more relaxing? Check out these blogs for ideas.
How to Decorate for Thanksgiving with Plants
Featured Products:


Spring has sprung and it’s time to get outside and plant up some early spring containers. A trip to the local garden center will surely inspire you. Plant big pots of brightly colored bulbs and annuals to liven up entryways, patios and balconies. Laura from Garden Answer shows you just how easy it is to do in the video below.
Laura fills her containers with tulips and violas, true harbingers of spring. Alternatively, you could also use daffodils and other cold hardy annuals like Iceland poppies or nemesia. In cold climates, it’s important to select plans that are hardy enough to withstand a cold snap.
These early spring containers will flower for a month or so, bridging the gap from early spring to the frost-free date. When it’s time to plant summer containers, replant the tulips out into the garden where they’ll bloom again next spring. The violas may also be moved to a lightly shaded area of the garden.
Four Easy Steps to Early Spring Containers
Enjoy flowers for even longer by choosing tulips or daffodils that are not yet in full bloom. When finished blooming, just remove the flower stem. The leaves will still provide a vertical accent and the bulbs need the foliage to replenish themselves.
Taking time to deadhead the violas will extend their bloom time. If temperatures are cool, you may only need to water containers once a week.
Check out these videos from Garden Answer about tulips and early spring planting.
Plant Your Window Boxes Like Garden Answer
How to Care For Your Tulips After They’ve Bloomed
Featured Products:
![]()
Ferns are classic yet fussy houseplants. Laura @GardenAnswer has all the tips and tricks you need to be successful in growing ferns indoors.
Light Exposure
Contrary to popular belief, ferns need quite a bit of light. Though, they don’t like to be in direct sunlight as their foliage will change to a light yellow color or burn. Keep them near a place that receives plenty of sunshine throughout the day.
Only a few varieties can handle shade and moisture as most people think. Check your plant tag for the most accurate information about your fern.
Temperature
Ferns like their surroundings to be similar to what we like between 65 and 75°F, matching the temperatures in our home. They don’t like it too drafty so keep them away from doors that lead outside and away from air vents.
Humidity
This is the most important thing to be aware of for keeping your fern healthy, especially if you live in a dry climate. Placing your fern in a bathroom or kitchen near the water source can help, since they typically get more moisture in there naturally.
For a more decorative option, place pebbles in a tray with some water and place your fern on top. The moisture will carry up to the foliage as it evaporates. Add water to the tray as needed.
Soil Type
Use Espoma’s Organic Potting Mix for your ferns. Organic potting mixes have the right kind of drainage and will hold just enough water that is needed without drowning your fern.
Repotting
Typically, ferns need to be repotted every two years. Check its roots once a year. If the roots are starting to circle around the container, it is time to repot. If there is still soil around the edge of it, it should be fine for another year.
When it is time to repot your fern, only go up one size for your container. Be sure there is a drainage hole at the bottom of your container. Place a small layer of Espoma’s Organic Potting Mix in the bottom and fill around the sides as needed.
Watering
Ferns like to be consistently damp, but not wet and soggy like many people think. Each fern and home is a bit different, especially this time of year. Water your fern and keep an eye on it. If the soil at the top feels dry, water it again.
Fertilizing
Ferns like to be fed about once a month during their growing season. Each zone and climate will have a different growing season, which you can ask your local garden center about. Feed your fern with Espoma’s Organic Indoor! liquid plant food. Check the label for instructions on how to use.
Grooming
All houseplants should be groomed about once a month. Remove any foliage that looks damaged, unhealthy, or is turning brown or yellow. Discard any leaves or debris that is on top of the soil to keep insects and diseases at bay.
Insects
The most common insects to watch out for are mealybugs, aphids, fungus mites, white flies, and spider mites for just about any houseplant. If you are unsure of the insect you are dealing with, take a picture and take it to your local garden center. They will be able to offer suggestions on how to get rid of it.
Toxicity
Ferns are non-toxic, but it is still a smart idea to keep your pets and kids away from eating or playing with a fern. That might just cause a tummy ache or a mess in your home!
*****

Monstera is commonly called Swiss cheese plant or split-leaf philodendron referring to the beautifully cut leaves. It’s a must have for its Caribbean feel. The foliage is deep green, lush and tropical. With time the foliage can become quite large and exotic looking. There is also a rare white variegated form that is slower growing. They generally don’t bloom indoors but in its natural environment they will produce edible fruit that is said to taste like fruit salad.
Light and Placement
As a tropical plant it’s no surprise that your Monstera likes warm indoor temperatures between 68 and 86 degrees Fahrenheit. A little humidity makes them feel right at home, too. Bathrooms and kitchens can often supply a touch of humidity or you can simply mist your plant now and then. These plants grow naturally in the dappled light of the forest floor. To mimic that, place your Monstera in bright or filtered, indirect light. They can actually grow in deep shade, but may not exhibit as much of the cut leaf foliage. If you live in zones 10 or 11, you can grow it outdoors in a shady spot.
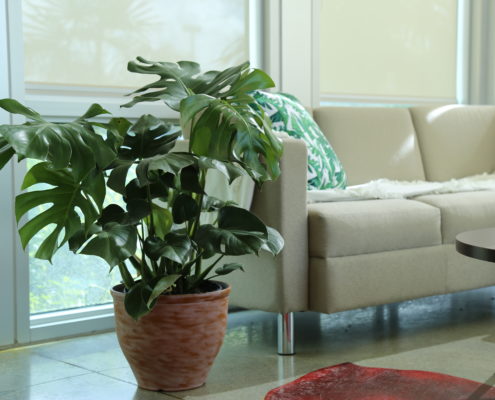
Photo courtesy of Costa Farms
Food and Water
Monstera likes moist soil, but not one that stays soggy or overly wet. Make sure the pot has good drainage. Water weekly, when the top inch of the soil is dry. Make sure any excess water drains away. In spring and summer, when the plants are actively growing, it’s a good idea to feed them once a month with a liquid fertilizer like Espoma’s Organic Indoor! plant food.
Repotting
Repot young plants every year to encourage growth and add soil nutrients. Gradually go up in pot size by 2 inches per year. Once your plant has reached its optimal height for your space, you can give it a top dressing of new soil once a year and only repot it about every 3 years. Always use a quality potting soil to help keep the soil moist but free-draining. These are natural climbers that use their aerial roots to hold on to trees. When you do repot your plant, be sure to add a trellis or moss covered plant stake for support.
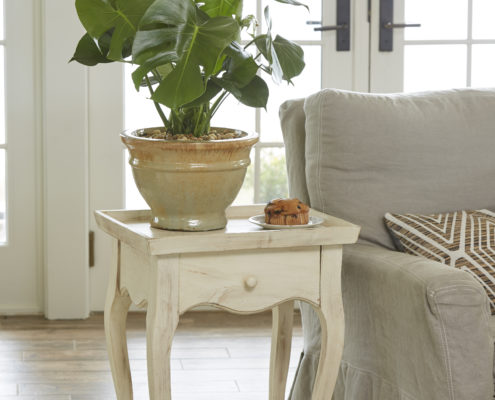
Photo courtesy of Costa Farms
Pruning
Young plants often have compact, bushy habits. As they grow, they will begin to show their vining nature. You can either give them support to climb and become a tall and dramatic or if you prefer, you can pinch them to rein in the lankiness. Pinch off the new growth tip with your finger at the height you’d like it to stay at. Feel free to prune out stems that are producing few or no leaves. If you can’t tuck the aerial roots back into the pot, you may remove them as well.
Pest and Disease
Monstera is rarely bothered by pest or disease. Wipe off the leaves with a damp cloth from time to time or give it a shower to remove dust. Check for spider mites when you do. This is a long-lived house plant that will give you years of pleasure with little care.
Ready for more houseplants? Check out “How to Fertilize Houseplants” with Homestead Brooklyn!
Best products for Monstera

How to Overwinter Your Plants
Laura with Garden Answer is answering some commonly asked questions on how to get your plants and containers prepared to bring inside for the winter. She lays out her step-by-step instructions on how to keep your plants happy and healthy, even when they are inside.
Step 1 – Figure Out What You Want to Bring Inside
Walk around your garden and gather what you want to save. Think about your succulents, perennials and herbs out in the garden. Even, window boxes, displays and smaller containers can survive indoors with a little bit of help.
Once you have gathered everything you want to bring inside, think about the containers they are currently in. Will they work for inside your home? Will you dig something out of your garden that needs a new container? These questions will lead you to gather the right supplies.
Step 2 – Gather All Your Supplies in One Place
It’s easier to have one designated area to work. It will keep you from moving your supplies all over your garden and keep the mess contained.
Tools you might need are a trowel, a shovel, snips, pruners, gloves and containers. If the containers were previously used, be sure to sanitize them with 1-part bleach to 10-parts water to rid of any insects or diseases that may be hiding. The last thing you will need is the right kind of soil. Succulents and cactus, African violet and orchids and regular everyday plants all have different soil needs to thrive.
Step 3 – Groom and Trim Plants
Trim off any leggy branches or make any aesthetic cuts. Also, trim dead leaves and spent blooms as those are what diseases and insects use to find their way indoors.
Step 4 – Check for Insects
It’s best not to bring insects inside your home. Be sure to check the top of the soil, the top of leaves and the underside of leaves. Anything that is crawling around in there should stay outside. This will guarantee other houseplants will not be infected later on.
Step 5 – Refresh Your Soil
If you aren’t repotting, evenly scrape off the top inch or two, whatever will come up easily, and replace it with fresh soil. This will help ensure all insect eggs are out of the soil.
Step 6 – Repot If Necessary
Now is the time to repot any containers if they need to go up a size or you want to match your interiors. This is also when you should pot anything that you have dug up from the garden. Remember, use the right kind of soil for your plants. Espoma has soil for every kind of plant.
Step 7 – Water with a Deep Soak
While this isn’t required to do before moving your plants into the house, it is highly recommended. While they can still drain outdoors, give your plants a big drink of water. It will help get them established in their new containers and release the nutrients in the fresh top soil.
Step 8 – Bring Your Plants Inside
Think about how much light each of these plants need and find the appropriate place to put them. If they like full light, find a window with bright light they will enjoy living in for a few months. It’s best to place a saucer underneath each of the pots to catch anything that may find its way out.
Cooler temperatures, changing leaves, crisp apples and pumpkin picking are all signs that fall is here. Make fall come to life in your very own fairy garden!
Fairy gardens do better when in an area protected from the elements. When thinking about where to create or place your fairy garden, think about the environmental factors like wind and rain that can ruin the garden. When Laura is done creating her fairy garden, she will place it on her covered porch where it will be protected!
Before we begin, there are a few things to note:
Watch Laura dive into this fun autumn fairy garden! Here is a list of supplies she uses.
Materials Used:
Old Suitcase
Heavy Black Plastic
Espoma’s Organic Potting Mix
Small Plants
Tree Figurines with LED lights
Shapecrete
Native soil
Putka Pods (Look like Miniature Pumpkins)
Autumn Themed Fairy Figurines and Décor
Mulch
Embellishments
Plants Laura Used:
Tiny Tim Euphorbia
Irish Moss
Straw Flower
Creeping Jenny
Sempervivums
How to Create an Autumn Fairy Garden:
Enjoy your new fairy garden!
Use Espoma’s organic potting mix in your fairy garden.
Sorry, no posts matched your criteria