Espoma Organic
  • Products
    • Close
    • Product Line Overview
    • Plant food finder
    • Garden Fertilizers
    • Potting Soils
    • Lawn Fertilizers
    • Liquid Fertilizers
    • Single Ingredients
    • Conventional Plant Foods
    • Animal Care Products
  • Where to Buy
  • Our Story
    • Close
    • Our Story
    • Locations
    • Historical Timeline
    • Our Commitment
    • Directions
    • Solar
    • Join our Team
    • Espoma Brand Partners
  • Learn
    • Close
    • Espoma Blog
    • FAQ’s
    • Pocket Guide
    • Espoma Guides
    • Garden Clubs
    • Safe Paws Lawn
    • PRODUCT FACT SHEETS
    • Fertilizer Fundamentals
      • Close
      • Understanding Plant Nutrition
      • Reading Labels
      • Choosing the Right Type of Fertilizer
      • Terms & Definitions
    • Gardening Projects
    • Resource Links
  • Contact Us
  • Menu Menu

Tag Archive for: houseplants

How to Care for a Fiddle Leaf Fig

March 24, 2017/in Espoma Videos

Laura from Garden Answer shares her tips for caring for Fiddle Leaf Figs. This “it” plant is loved by designers and decorators for it’s large, violin-shaped leaves. Give fiddle leaf figs everything they need to continue growing healthy and strong year-round.

Visit our YouTube Channel for more gardening videos.


https://www.espoma.com/wp-content/uploads/2017/03/IMG_3139.jpg 719 1280 espoma https://www.espoma.com/wp-content/uploads/2023/05/espoma-logo340w-1.png espoma2017-03-24 13:03:192019-05-07 10:03:17How to Care for a Fiddle Leaf Fig

Indoor Planter Inspiration with Garden Answer

March 16, 2017/in Espoma Videos

The Espoma Company brought Laura from Garden Answer to visit Primex Garden Center near Philadelphia for a container challenge. Watch as Laura picks out plants for easy succulent and fairy gardening containers. Follow along with her how-to instructions as she brings together two lovely containers for indoor gardening. Plus, you’ll learn how to care for and fertilize these indoor gardens.

Want more inspiration? Watch the miniature gnome garden come together in no time at all!

https://www.espoma.com/wp-content/uploads/2017/03/Garden-Center-Projects-Thumb.jpg 1080 1920 espoma https://www.espoma.com/wp-content/uploads/2023/05/espoma-logo340w-1.png espoma2017-03-16 11:59:552019-05-07 10:03:17Indoor Planter Inspiration with Garden Answer

How to Create a Mini Gnome Garden with Garden Answer

March 16, 2017/in Espoma Videos

Laura from Garden Answer designs a tiny gnome garden that is sure to delight and inspire. While fairy gardens get all the glory, gnomes also enjoy living in mini villages filled with plants and whimsy.

Want to see more from Garden Answer’s trip to Philadelphia? Check out this video from The Philadelphia Flower Show.

https://www.espoma.com/wp-content/uploads/2017/03/Gnome-Garden-thumbnail.jpg 1188 2116 espoma https://www.espoma.com/wp-content/uploads/2023/05/espoma-logo340w-1.png espoma2017-03-16 11:55:132019-05-07 10:03:17How to Create a Mini Gnome Garden with Garden Answer

Spring Houseplant Care Tips

March 16, 2017/in Indoor Gardening

After months spent overwintering or dormant, your houseplants are ready to welcome spring with open arms and begin their active growing period. Houseplants are easy to care for but they still need some TLC.

The warmer weather calls for some extra attention! Gear up for repotting, feeding, sunning and scheduling.

Make a happy home for plants with the following tips. Here’s how you do it!

cyclamen-11290_1920

Four Tips for Spring Houseplant Care

  1. Rehome and Repot: When repotting plants, we recommend using a new container that’s a little bigger than your plant’s current home. If you choose to use a previously used container, clean it with soap and water first to rid of any diseases or houseplant pests that could be hiding inside. Once your container is ready, fill it about halfway with Espoma’s potting mix or appropriate soil for your plant type. If any of the roots have grown tightly bound in a circular pattern, gently loosen them to stimulate new growth. Then, place the plant in the center of the new pot and fill with soil to within 1-3” of the rim. Water well and allow the soil to settle. Add more potting soil if necessary.
  2. Give Houseplants a Spring feeding: There’s no doubt that your plants are hungry after a long winter nap! Feed bi-weekly with Espoma’s indoor liquid houseplant food. This gives plants the natural proteins and beneficial microbes they need to provide beautiful results.
  3. Bring Plants Outside: Give plants some fresh air once in a while. As it warms up, set your plants outside during the day to soak up some rays. When the temperatures begin to drop in the evening, it’s time to bring them back inside.
  4. Create a schedule: Houseplants thrive with regular care. Add water if the soil is dry to the touch. But be careful not to water too much or too frequently. Overwatering is the number one cause of houseplant death. So if the is not dry to the touch, check it again in a few days. In order to protect your plants from not getting the right about of water, create a schedule of watering times and days to help you remember when your plants need your attention.

Plants need water, light and nutrients to thrive indoors. So, determine what kind of houseplant you have and it’s specific needs. With the proper care, your plant will let you know it’s happy by maintaining healthy leaves.

Ready to learn more? Find out how to Make a Happy Home for Plants!

https://www.espoma.com/wp-content/uploads/2017/03/Succulent-6.jpg 444 1200 espoma https://www.espoma.com/wp-content/uploads/2023/05/espoma-logo340w-1.png espoma2017-03-16 09:00:472024-08-20 07:53:09Spring Houseplant Care Tips

Give Succulents Some Light

February 28, 2017/in Indoor Gardening

Succulents make the perfect houseplants. They come in a variety of sizes and styles ranging from leafy to spiky and even fuzzy. They’re pretty low-maintenance, and only need sunlight, water and nutrients from time to time. Somehow, things can still go wrong.

The number one sign your succulent isn’t growing as well as it should? It’s looking stretched. While you might think your succulents are growing, they’re actually stretching out for more light.

Succulents stretch when they aren’t getting enough sunlight, which actually causes the plant to grow faster. First, the plant will bend toward the sunlight it is receiving, and then you’ll notice it continuing to grow taller, leaving more space between the leaves.

If your succulents are stretched, they won’t go back to the way they were before. You can continue to grow them as is, just move them to a spot where they’ll get more indirect light. You can also start propagating to grow new succulents. Unless plants are placed where they will get enough light, the new cuttings will eventually stretch out, too.

4 Tips to Make Sure Succulents are getting the right light

  1. Succulents love sun. These desert plants thrive in hot climates with plenty of sunlight. A dimly lit apartment or shady part of your home just isn’t going to cut it. Place succulents near windows that let in lots of natural light throughout the day.
  2. Keep succulents close to windows. They’ll soak up the sun for hours when given indirect light. Don’t lean succulents right up against the window or they may get sunburned.
  3. Add a grow light. If you can’t count on natural light to keep plants healthy, consider investing in a grow light. This will keep your plants happy and give you the option of moving them to dimmer areas in your home.
  4. Try out different kinds of succulents. They’re not all alike. Some will thrive in indoor conditions that others might not like.

Next time you notice your succulents leaning or stretching, go ahead and start some new ones and try again with better lighting.

Now that you know how to give succulents the best light, learn how to have success with succulents. 

https://www.espoma.com/wp-content/uploads/2017/02/stretched-echeveria.jpg 2658 2752 espoma https://www.espoma.com/wp-content/uploads/2023/05/espoma-logo340w-1.png espoma2017-02-28 09:30:062019-05-07 10:03:48Give Succulents Some Light

Common Orchid Problems and How to Fix Them

January 31, 2017/in Indoor Gardening

It’s a myth that orchids are difficult to grow. In fact, they are highly adaptable and fairly low- maintenance plants. The hardest part might be choosing an orchid. There many types of orchids to choose from, and while some are more temperamental, plenty will thrive in in your home.

With that being said, they are susceptible to problems like any other houseplant. Take a look at these common orchid questions and find out what you can do to fix them.

shutterstock_131800958

Why is my orchid’s foliage changing colors?

Orchids are especially sensitive to environmental changes. The problem in this case is likely due to the lighting conditions. If orchids receive too much light, the tissues to yellow. If they don’t receive enough light, they develop dark spots. It can help to gradually expose your orchid to more light over time and to keep it by a window that is shaded by a sheer curtain.

Help! My orchid’s buds are drying up without any sign of pests or disease!

This is a common problem with orchids and again, a good indication of an environmental problem. Bud Blast is a condition where buds dry up and die. This is typically caused by an environment that is not humid or bright enough, but could also be a result of incorrect watering. Orchids should be watered about once per week, allowing the soil to dry out in between. Dropping your home’s temperature by about 10 degrees at night can help initiate flower buds.

My orchid has a sticky substance on its surface, is it harmful?

If you see small white ovals along with the sticky substance, then it is harmful. The sticky substance is left behind by scale pests, which can be treated with an organic insecticide soap. If white ovals aren’t visible, it is harmless and simply due to a drop in temperature.

The leaves of my orchid are turning to mush and the roots look like they are rotting. What am I doing wrong?

Due to the high humidity levels that orchids need to survive, they are at a higher risk for fungal and bacterial diseases. This can lead to conditions like root rot and spots on flowers and leaves. Remove severely damaged leaves using sterile tools and treat plants with a copper based spray.

The orchid’s roots are growing above the soil; does it need to be repotted?

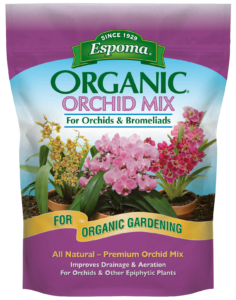
These are called “air roots” and are normal for orchids. Air roots can actually be helpful. Orchids generally need to be re-potted once a year. It’s time to re-pot when you see: yellow foliage, lack of growth or dead or damage roots, or the plant starts growing over the edge of the pot. The best time to re-pot is just after flowering, or when new growth appears. Use Espoma’s Organic Orchid Mix for best results.

Many orchid issues are not as serious as they seem. What may appear as a problem can sometimes be helpful in determining what set of conditions your orchid prefers to grow in.

Ready to know more? Learn what orchids need. 

https://www.espoma.com/wp-content/uploads/2017/01/shutterstock_491195248.jpg 2922 4384 espoma https://www.espoma.com/wp-content/uploads/2023/05/espoma-logo340w-1.png espoma2017-01-31 08:00:382024-08-21 04:48:21Common Orchid Problems and How to Fix Them

How to propagate succulents from individual leaf cuttings

January 24, 2017/in Indoor Gardening

Why have just one succulent when you can have many? Luckily, it’s easy to grow an entire garden of these hardy plants when you propagate them from leaf cuttings.

All you need are a few simple materials and a single succulent. Get started now!

Propagate Succulents in 7 Steps

  1. Select healthy leaves. Pick a leaf from your succulent that has no rips or blemishes and looks healthy. It’s best to choose larger, mature leaves rather than under-developed ones.
  2. Make the cut. Remove the leaf using a razor blade or craft knife. Sterilize the blade beforehand with rubbing alcohol to prevent the spread of any disease that could harm the plant. You can also use “volunteers” from plants that occasionally drop their leaves like Jade does. The entire succulent leaf must be cleanly broken off the plant or it won’t root. If the part that was attached to the stem is broken off, discard the leaf and try again.
  3. Let leaves dry. Allow leaves to dry on a baking sheet for 1-3 days after removal, until the raw ends have calloused.
  4. Get ready to grow. Place dried leaves on top of a container filled with Espoma’s Organic Cactus mix. Do not bury in the soil. Place the container in a spot where it will be protected from full sun exposure.
  5. Keep soil moist, without being watered too much. Water leaves when the soil is dry to the touch.
  6. Wait. In about a month or so new roots will appear and the parent leaf will wither. Remove the parent leaf carefully, avoiding damage to the new roots.
  7. Replant. Once your propagated succulents have taken root, they can be replanted. Show them off in a repurposed planter. Feed regularly with our Cactus! Succulent Plant Food for best results.

And just like that you’ll have plenty of succulents. Grow enough to decorate your home and garden and give a few away as gifts.

The growing doesn’t stop here! Learn how to care for succulents here.

https://www.espoma.com/wp-content/uploads/2017/01/shutterstock_400819741.jpg 3988 5982 espoma https://www.espoma.com/wp-content/uploads/2023/05/espoma-logo340w-1.png espoma2017-01-24 15:29:442024-08-20 07:16:21How to propagate succulents from individual leaf cuttings

VIDEO: Orchid Care 101 with Garden Answer!

January 24, 2017/in Blog, Espoma Videos, Flowers, Garden Answer, Indoor Gardening, Indoor Gardening

Laura from Garden Answer demonstrates how to care for moth orchids, also known as Phalaenopsis orchids. Repot, fertilize and give orchids exactly what they need to help them thrive.

For this project, you will need:

  1. Moth orchid
  2. Organic orchid mix
  3. Orchid pot with holes
  4. Watering can
  5. Orchid! Bloom Booster


Featured Products:

Where to Buy

https://www.espoma.com/wp-content/uploads/2017/01/IMG_2375.jpg 3072 5472 espoma https://www.espoma.com/wp-content/uploads/2023/05/espoma-logo340w-1.png espoma2017-01-24 08:00:192024-09-07 08:03:09VIDEO: Orchid Care 101 with Garden Answer!

Five Ways to Celebrate Houseplant Appreciation Day

January 10, 2017/in Blog, Indoor Gardening

The winter season can seem to drag on forever with its harsh weather, short days, and dreary landscapes. Which means now is the perfect time to bring the memory of the warm spring weather indoors with houseplants.

January 10 is Houseplant Appreciation Day, and there’s no better way to celebrate than to acknowledge all the things they do for you. They’re decorative, boost well-being, and purify indoor air.

kitchen-sink-212854_1920

Here are 5 simple tips to celebrate the day:

  1. Recognize houseplants for all they do

Many houseplants do double duty by looking good and cleaning the air, absorbing up to 87 percent of volatile organic compounds (VOCs) that hide in ordinary household products such as paints, carpets, and ink. Studies from the US Environmental Protection Agency (USEPA) have found that levels of indoor air pollution can be two to five times higher — and in some cases 10 times more polluted than outdoor air.

  1. Add a Plant

You can never have too many houseplants, right? According to the EPA, most people spend 90 percent of their time indoors; a houseplant is the perfect way to be reminded of the beauty the world has to offer outside. Houseplants bring a breath of fresh air to a room when placed in colorful pots and made into a focal point. Succulents, orchids and African violets all make good additions.

    1. Learn how to care for your plant


Plants need water, light, and nutrients to thrive indoors. Step one; determine what kind of houseplant you have. This can be as simple as checking the plant tag. Your plant will let you know it’s happy by maintaining healthy leaves.

  1. Create a schedule

Houseplants do best with regular care, trust us. Now is the time to create a watering schedule if you don’t already have one. Add water if the soil is dry about an inch below the surface. Overwatering is the number one cause of houseplant death. So if the plant does not seem too dry, check it again in a few days.

  1. Feed them

Fertilizing is easy with Espoma’s liquid plant foods. Give plants the natural proteins and beneficial microbes they need to provide beautiful results.

*****

Show gratitude for your favorite plants by giving them proper care. Learn how here:


Featured Products:


Where to Buy


https://www.espoma.com/wp-content/uploads/2017/01/cactus-1566184_1920.jpg 1317 1920 espoma https://www.espoma.com/wp-content/uploads/2023/05/espoma-logo340w-1.png espoma2017-01-10 12:25:182024-01-11 12:06:59Five Ways to Celebrate Houseplant Appreciation Day

Beginner Tips for Succulents

January 3, 2017/in Indoor Gardening

It’s easy to see why succulents are one of the trendiest plant groups right now. Their unique shapes, colors, textures and sizes add drama and interest to the décor of any room. They also look great on their own or paired with other succulents. Not to mention, they’re so easy to grow and can handle drought.


You have to start somewhere, though. With the right growing conditions and care, your succulents can survive year-round. Follow these beginner tips to get started.

7 Beginner Tips for Growing Succulentssucculent-echeveria-ciliata-1789883_1920

  1. Pick a healthy succulent – Look for succulents with full shapes, good color and with healthy foliage. Avoid plants with insects or signs of damage.
  2. Choose the right soil – Succulents like to be dry and need a well-draining soil. Use Espoma’s Cactus Mix to keep plants healthy.
  3. Select containers – Succulents can be planted in almost anything that allows for proper drainage. Make sure containers have a drainage hole for water to flow through.
  4. Give enough water– Succulents with leaves that pucker aren’t getting enough water and ones with soggy leaves are holding onto too much water. Get into a regular watering schedule to help plants thrive. Water succulents when the top inch of soil feels dry by pour water into the pot until it flows through the drainage hole. Remove all excess water.
    succulent-planter
  5. Soak up the sun – Most succulents love light. Place them in spaces where they’ll receive four to six hours of sun.
  6. Feed them – Give succulents a boost by fertilizing as needed with Espoma’s new Cactus! Succulent plant food.
  7. Keep plants looking good – Remove dead or decaying leaves to keep plants looking nice and insects at bay.

Want to know more? Learn how to care for succulents in winter.

https://www.espoma.com/wp-content/uploads/2017/01/succulent-cactus-1842260_1920.jpg 1280 1920 espoma https://www.espoma.com/wp-content/uploads/2023/05/espoma-logo340w-1.png espoma2017-01-03 11:30:062024-08-20 07:21:25Beginner Tips for Succulents
Page 12 of 14«‹1011121314›»
Where to Buy

Get News & Updates

Recent Posts

  • VIDEO: A Formal Garden Tour with Summer Rayne Oakes
  • VIDEO: Repotting in the Greenhouse with Garden Answer
  • VIDEO: How to Winterize Your Chicken Coop with Summer Rayne Oakes
  • VIDEO: Planting Spring Bulbs in Containers 🪴🌷 with Summer Rayne Oakes
  • VIDEO: Planting the Last Bulbs of the Season with Garden Answer

Tags

All-Purpose Potting Mix bio-tone Bio-tone Starter Bio-tone Starter Plus Cactus Mix caring for houseplants Container Gardening DIY project Espoma espoma grown espoma organic Espoma Organics Espoma Video fall gardening Family fert flower garden flowers garden Garden Answer Gardening gardening tips gardens grow holly-tone houseplants Indoor! indoor gardening indoor plants Kaleb Wyse organic organic fertilizer Organic Gardening organic plant food Organic Potting Mix Outdoor Gardening Planting plants Potting Mix potting soil Spring Gardening summer rayne oakes vegetable garden Vegetable Gardening Wyse Guide

Espoma. A Family Tradition Since 1929.

Espoma Organic logo
  • Espoma Dealer
  • Espoma Pro
  • Garden Club
  • Privacy Policy

Scroll to top