Espoma Organic
  • Products
    • Close
    • Product Line Overview
    • Plant food finder
    • Garden Fertilizers
    • Potting Soils
    • Liquid Fertilizers
    • Lawn Fertilizers
    • Single Ingredients
    • Conventional Plant Foods
    • Animal Care Products
  • Where to Buy
  • Our Story
    • Close
    • Our Story
    • Locations
    • Historical Timeline
    • Our Commitment
    • Directions
    • Solar
    • Join our Team
    • Espoma Brand Partners
  • Learn
    • Close
    • Espoma Blog
    • FAQ’s
    • Pocket Guide
    • Espoma Guides
    • Garden Clubs
    • Safe Paws Lawn
    • PRODUCT FACT SHEETS
    • Fertilizer Fundamentals
      • Close
      • Understanding Plant Nutrition
      • Reading Labels
      • Choosing the Right Type of Fertilizer
      • Terms & Definitions
    • Gardening Projects
    • Resource Links
  • Contact Us
  • Menu Menu

Tag Archive for: Bio-tone Starter Plus

Hip, Hop, Hurray! Grow Hops for Homemade Beer

June 16, 2015/in Fruits & Vegetables, Spring Gardening, Vegetable Gardening

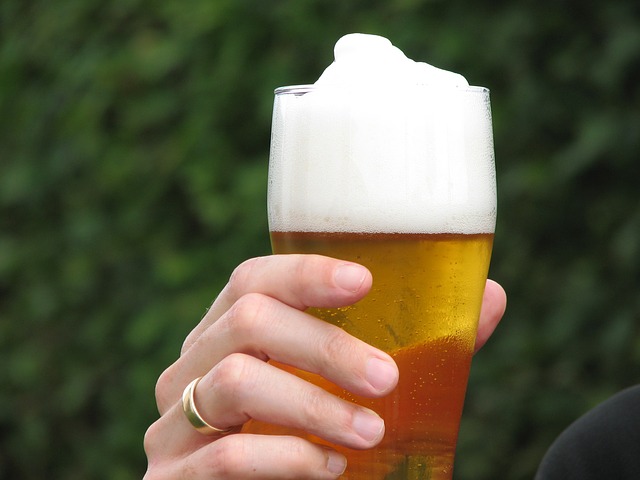
Homebrewed beer made of homegrown hops takes the craft beer movement to the next level. As you take that first sip, you don’t just taste the beer. You taste the pride, satisfaction and joy of brewing it yourself from scratch. Become a true brewmaster by growing your own hops.

Plus, growing your own hops is cheaper and makes your beer taste incredible.

Let’s plant some hops!homegrown hops

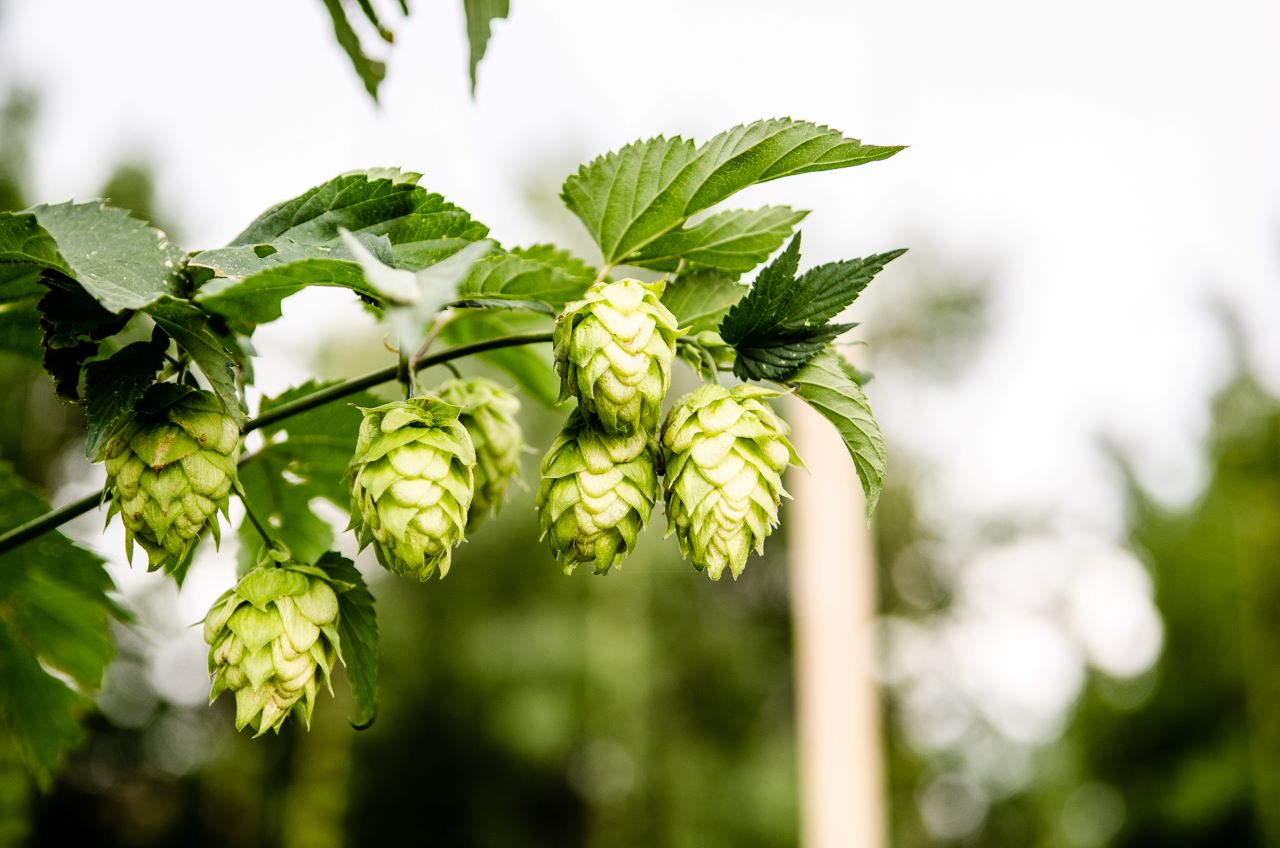
Get Hoppy! Grow Your Own Hops for Homebrews

  1. Which Hop to Crop? Buy hop rhizomes online that match the flavor and type of beer you like. They come in every flavor under the sun. Brewers typically use multiple hop varieties in their beers, so plant several varieties that you can mix and match.
  2. Spot a Spot. Hops need LOTS of sun to thrive — about 6-8 hours daily. Plus, the spot where you plant needs to have vertical space. Hops grow up, not out.

homebrewed beer

 How to Plant Hops for Home Brewing  

  1. Dig a Cozy Home. Dig 4” deep holes and mix in an organic fertilizer like Bio-tone Starter Plus by Espoma. If planting the same hop variety, dig each hole 3’ apart. If planting different hop varieties, plant them 5’ apart.
  2. Get ‘Em Situated. Place the rhizome horizontally in the hole with the root side down, pointy side up. If the rhizome is budding, plant the bud facing up. Fill hole, cover with soil and add mulch to conserve water.
  3. Bursts of Water. When soil is dry, provide a frequent, but short burst of water!
  4. Hungry, Hungry Hops. To grow strong hops, feed them an organic plant food each month. Find out how to apply Espoma’s Plant-tone.
  5. To New Heights. Once your hops are 1’ tall, select the strongest 2-3 vines and wrap them counter-clockwise around an 8-12’ trellis. Prune the remaining vines from the base of the hop. Over the next few days, keep wrapping the vines around the trellis to train them. Hops grow quickly so continue to check your vines regularly and keep wrapping!

Now those tiny hops don’t look like beer. Before long though, you’ll be sipping on their flavors in the most refreshing homebrew yet!

https://www.espoma.com/wp-content/uploads/2015/06/hops2.jpg 1200 1600 espoma https://www.espoma.com/wp-content/uploads/2023/05/espoma-logo340w-1.png espoma2015-06-16 09:56:422019-05-07 10:08:44Hip, Hop, Hurray! Grow Hops for Homemade Beer

Feed Tomato and Pepper Plants Now

June 10, 2015/in Fruits & Vegetables, Spring Gardening, Vegetable Gardening

By now you’ve planted your organic tomatoes and peppers! These homegrown veggies should be starting to flower — which means fruit isn’t far behind.

Now, it’s time to sprinkle a little magic.

The trick is to feed veggies monthly with an organic fertilizer. Tomatoes and peppers have big appetites, so they need plenty of organic food. Since plants get all their nutrients from the soil, their all-you-can-eat buffet runs out quick. Feed them right, and they’ll burst full of fresh produce.

how to grow tomatoes

Create a Balanced Diet:

  1. Go Organic. Since you’re eating this food and feeding it to your friends and family, you’ll want to ensure it’s the cleanest and healthiest possible. Choose an organic fertilizer.
  2. Take it slow. Chose a slow-release organic fertilizer. Artificial, rapid growth results in tall, lanky plants. Slow-release, organic fertilizers actually improve the soil as they break down.
  3. Plants need vitamins, too. Find a balanced food with calcium to help prevent blossom rot. Espoma Tomato-tone has 8% calcium! Be careful that you do not use too much nitrogen which will result in a lush, green plant with very little fruit.
  4. More Magic. Tomato-tone also includes Bio-tone®, a blend containing more than 3 million beneficial microbes. Sounds cool, right?

Don’t take it from us — Veggie Gardener had this to say:

“Bio-tone works magic with this fertilizer. These beneficial microbes do the dirty work of creating big and healthy plants which in turn grow large, plump, and juicy tomatoes. Beneficial microbes support good root growth by helping the roots absorb nutrients from the soil. Well producing tomatoes, or any plant for that matter, starts with a healthy and strong root system. Since I started using Tomato-tone, my tomato plants have grown faster, stronger, and produced more tomatoes.”

Ok, you get it. Fertilizing tomatoes and peppers is like sprinkling them with magic dust that makes them grow bigger, better produce. Now get growing.

how to grow peppers

Tips for Feeding Tomatoes and Peppers:

  1. Measure out the fertilizer according to instructions on bag.
  2. Feed single plants with 3 tablespoons of Tomato-tone. For rows of plants, apply 1 cup on each side per 5 feet. Feed potted plants 1.5 teaspoons per 4” pot diameter. More details here.
  3. Sprinkle Tomato-tone starting approximately 6” from the base of the plant.
  4. After feeding, water well.
  5. Feed tomatoes and peppers every month during the growing season.

Feeding tomatoes and peppers takes just a couple of minutes and drastically increases your harvest.

To feed your family lots of organic, homegrown veggies this summer, you’ll need to first keep your veggies well-fed! Get ready for the biggest, yummiest tomatoes and peppers you’ve ever grown.


Where to Buy

While you’re at it, take a selfie with your Tomato-tone! Tag us in the picture with @Espoma.

https://www.espoma.com/wp-content/uploads/2015/06/tomatoes-19577_640.jpg 360 640 espoma https://www.espoma.com/wp-content/uploads/2023/05/espoma-logo340w-1.png espoma2015-06-10 09:51:582019-05-07 10:08:45Feed Tomato and Pepper Plants Now

Grow Fresh Herbs at Your Fingertips

May 14, 2015/in Fruits & Vegetables, Spring Gardening, Vegetable Gardening

Forget dried, stale or store-bought herbs. There’s a cheaper, closer and fresher alternative.

Plant an herb container garden near your kitchen or next to the grill.

Having fresh, organic herbs right where you cook makes them easier to incorporate into any meal.

With just a few snips, fresh herbs will invigorate your cooking. With just one bite, you’ll instantly taste the difference. Plus, you can use fresh herbs in unexpected ways, like flavoring olive oil, tea or water

Whether you garden in a large space or a small apartment, an herb container garden is convenient and delicious!

All you need to cook up your next great dish is a sunny spot, a roomy container, the best organic potting mix and your favorite herbs.

First decide which (and how many) herbs to grow. Check old grocery lists or recipes to see which herbs you buy the most but especially spend the most money on. Choose those and grow some just for fun like relaxing lavender and lemon balm!

Herb
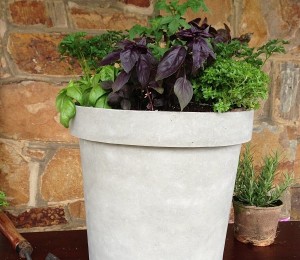
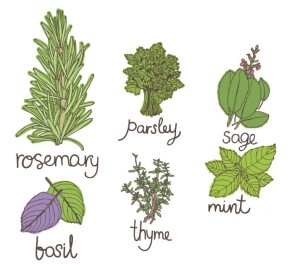
Most herbs will work in a container but the best herbs to plant in containers are: Basil, Mint, Rosemary, Thyme, Oregano, Cilantro, Parsley, Sage, Chives, Lavender, Tarragon, Lemon Verbena

Now pick a container with drainage holes. With container gardens, you can buy a modern or traditional container or get creative and use found objects.

Grouping herbs together that like the same amount of water, light and soil in the same container.

How many herbs you should plant in one container? There’s no hard and fast rule. Use your judgment and read the plant tags.

Go ahead and arrange containers on your deck, patio or any place that’s easy to access when you’re cooking. The area should get between 6-8 hours of sunlight a day.

Once your containers placed, fill half-way with a high-quality, organic potting mix such as Espoma’s Organic Potting Mix. Since you’ll be eating and serving them, organic potting soil is a must!

Now arrange the herbs to your liking! Try 3 or 4 different placements before planting. Read the plant tags to see how big the plants will get, too. And just like those class photos, the tallest go in the back!Container Garden

Once you’re happy with where the herbs are, fill the rest of the container with Espoma’s Organic Potting Mix. For a two gallon container, add 1 cup of Espoma’s Organic Bio-Tone Starter Plus to the top 4-6” of soil. For a five gallon container, add two cups.

Pat the soil to firm and remove air bubbles.

Feeding herbs with an organic fertilizer regularly promotes bigger plants, so you’ll have a bigger harvest. Bio-Tone Starter Plus is a microbe enhanced all natural plant food that will help your herbs to establish quickly.

Give your herb containers 1” of water a week.

Harvest herbs often! The more you pick, the more they’ll grow. Don’t you just love plants like that?

What herbs are you planting this year? Share your favorites by commenting below!

https://www.espoma.com/wp-content/uploads/2015/05/mint-521401_640.jpg 460 640 espoma https://www.espoma.com/wp-content/uploads/2023/05/espoma-logo340w-1.png espoma2015-05-14 08:35:362019-05-07 10:08:45Grow Fresh Herbs at Your Fingertips

The Secret to Growing Bigger Plants, Faster

March 31, 2015/in Vegetable Gardening

Drum roll please! The start of planting season is here!

After long weeks spent pouring over seed catalogs and admiring Pinterest gardens, it’s time to finally create the garden of your dreams.

If you started seeds a few weeks ago, it’s time to gradually move them outside. And if you didn’t, a trip to your local garden center awaits you.

So now that you’re ready, let’s plant your soon-to-be flourishing garden.

How to know if your garden is ready for planting:

To see if the ground is thawed and warm enough for planting, dig 3-4” deep. Grab a handful of soil and roll into a ball. If the soil won’t take shape, it’s too hard and dry for new plants.

If you can make a ball, drop it to the ground. If it breaks, your soil is ready. If the ball stays together, your soil is too wet, so try again in a few days.

Now comes the fun part, deciding what to plant!

Roses, snapdragons and pansies are some of our favorite flowers to plant in early spring. Plus, they add a pop of color when you need it most.

As far as veggies go; plant peas, spinach, kale, lettuce, broccoli, carrots and onions in early spring. Imagine how much you’ll save on groceries in the upcoming months!

Before you buy your new plants, check the plant tags to make sure you have enough space and sun.

Now time to plant:

If planting a flower bed, mix 4 lbs. (12 cups) of Bio-tone Starter Plus, an organic plant food, per 100 square feet into the top 4-6” of soil.

Adding all-natural, organic plant food enhanced with bacteria is the secret to bigger, better plants of all kinds.

Bio-tone Starter Plus is like a protein shake for your plants. This organic plant food is jam-packed with microbes and mycorrhizae to provide an instant health boost.

Seriously, the proof is in the plants.

Bio tone Starter Plus gives plants everything they need to grow bigger blooms faster. So, you’ll lose fewer plants along the way. You can also add Bio tone when planting bulbs, container gardens, shrubs and even trees. Using this organic plant food on veggies and fruits is a-ok since it’s all natural.

Now, get digging! You can plant in individual holes or a garden bed. Either way, dig holes as deep as the containers the plants came in, and check the plant tag to see how far apart to plant.

Remove plants from containers; loosen roots and pop ‘em in the hole!

Then, replace the soil around the plants and water.

Finally, add the finishing touch of 2-3” mulch — if you haven’t already.

What are you planting this spring? Comment below or better yet, share a picture on our Facebook page!

https://www.espoma.com/wp-content/uploads/2015/03/3847323170_08bf293f0e_b.jpg 683 1024 espoma https://www.espoma.com/wp-content/uploads/2023/05/espoma-logo340w-1.png espoma2015-03-31 10:21:212019-05-07 10:09:24The Secret to Growing Bigger Plants, Faster

Start Seeds Indoors in 10 Easy Steps:

February 11, 2015/in Vegetable Gardening

Planting seeds inside is the first step toward Spring! Starting now means you’ll be planting seedlings outside in just 4 to 6 short weeks.

Plus, planting seeds is as easy and fun as can be. Gather your kids, family or friends to plant seeds with you for a “think Spring” get-together.

There’s nothing more refreshing or rewarding than crunching down on produce you’ve grown from seed.

How to Plant Seeds Inside:

1. Dream big

Choose your favorite high-quality seeds from a huge selection. Starting hard-to-find or expensive plants from seed will give you the biggest bang for your buck.

2. Stock up

Get plastic trays with holes in the bottom or a seed-starting kit as well as an organic soil starter, such as Espoma’s Organic Seed Starter. An organic soil like this is made specifically to help your seedlings grow strong, sturdy roots in a healthy, safe environment.

3. Get plantin’

Fill seed trays to within ¼” of the top and lightly water. Then, follow seed packet instructions to see how deep and far apart to plant. Cover with soil, press down and label.

4. Water wisely

Water perfectly by placing tray in a larger pan of shallow water for a few seconds or up to a couple of minutes so the water seeps up from the bottom.

5. Find the right spot

Place seeds in a warm, safe place. To warm up a spot, place a space heater nearby or place trays on top of the refrigerator.

6. Take cover and wait

Loosely cover the tray with plastic wrap, or use the cover in your seed-starting kit. Check seeds daily for moisture.

7. Spot a sprout

Once you see sprouts, remove the cover and move seeds to a sunny, south-facing window that is 65-75°F. Then, turn the container a little each day to prevent leaning seeds.

8. Boost plants

When leaves grow, add a bit of fertilizer such as Espoma’s Plant-tone. Plant-tone is an organic fertilizer, so it’s safe to use on edibles and helps plants grow bigger than ever before.

9. Strengthen seeds

Check seed packets to see when to plant after the last frost. Before planting you’ll want to harden off seedlings. Hardening off is a process that gets seeds used to the outdoors. Simply place your tray outside for a few hours a day for 7-10 days. Each day, increase their time outdoors and reduce watering.

10. Plant permanently

Once the last frost date has passed, you’re ready to plant! Gently remove plants from containers without damaging the roots. Plant in a prepared bed and mix in organic starter plant food to keep them strong, such as Bio-tone Starter Plus.

You did it! Spring is just a step away – and so are your crisp, garden-fresh veggies and fruits!

Tell us, what seeds are you starting this year?

Featured Products:


Where to Buy
https://www.espoma.com/wp-content/uploads/2016/01/arugula-762557_1920.jpg 1280 1920 espoma https://www.espoma.com/wp-content/uploads/2023/05/espoma-logo340w-1.png espoma2015-02-11 22:22:472021-02-16 11:35:31Start Seeds Indoors in 10 Easy Steps:
Page 17 of 17«‹151617
Where to Buy

Get News & Updates

Recent Posts

  • VIDEO: Planting Potatoes & Ranunculus 🥔🌱🌸 with Garden Answer
  • VIDEO: Spring Garden Awakening with Summer Rayne Oakes 🌿
  • VIDEO: Planting Raised Beds 🌿 with Wyse Guide
  • VIDEO: How to 🌱 Grow a Whole Salad 🥗 in One Pot! 🪴 | Growing Joy with Maria
  • VIDEO: Prune & Feed Trees Like a Pro with Wyse Guide 🌳

Tags

All-Purpose Potting Mix bio-tone Bio-tone Starter Bio-tone Starter Plus cactus and succulents Cactus Mix caring for houseplants Container Gardening DIY project Espoma espoma grown espoma organic Espoma Organics Espoma Video fall gardening flower garden flowers garden Garden Answer Gardening gardening tips gardens grow holly-tone houseplants Indoor! indoor gardening indoor plants Kaleb Wyse organic organic fertilizer Organic Gardening organic plant food Organic Potting Mix Outdoor Gardening Planting plants Potting Mix potting soil Spring Gardening succulents summer rayne oakes vegetable garden Vegetable Gardening Wyse Guide

Espoma. A Family Tradition Since 1929.

Espoma Organic logo
  • Espoma Dealer
  • Espoma Pro
  • Garden Club
  • Privacy Policy

Scroll to top