Espoma Organic
  • Products
    • Close
    • Product Line Overview
    • Plant food finder
    • Garden Fertilizers
    • Potting Soils
    • Liquid Fertilizers
    • Lawn Fertilizers
    • Single Ingredients
    • Conventional Plant Foods
    • Animal Care Products
  • Where to Buy
  • Our Story
    • Close
    • Our Story
    • Locations
    • Historical Timeline
    • Our Commitment
    • Directions
    • Solar
    • Join our Team
    • Espoma Brand Partners
  • Learn
    • Close
    • Espoma Blog
    • FAQ’s
    • Pocket Guide
    • Espoma Guides
    • Garden Clubs
    • Safe Paws Lawn
    • PRODUCT FACT SHEETS
    • Fertilizer Fundamentals
      • Close
      • Understanding Plant Nutrition
      • Reading Labels
      • Choosing the Right Type of Fertilizer
      • Terms & Definitions
    • Gardening Projects
    • Resource Links
  • Contact Us
  • Menu Menu
Where to Buy

Build Your Own Vertical Strawberry Planter (Quick Version)

April 18, 2018/in Espoma Videos

Have a minute? Laura from Garden Answer shows us how to make vertical strawberry planters. She walks you through step by step, showing what materials to use, what potting soil and fertilizer is needed and how to hang the finished product.

This wind chime inspired planter will add life to your garden while adding an element of design to your home.

But, be sure to keep the materials in mind – even Laura almost used toxic tubing for the project.

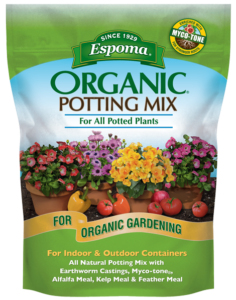
Pro Tip: Mixing Espoma Organic Potting Mix with the Organic Bio-Tone Fertilizer allows the strawberries to get a boost in their new container while releasing nutrients slowly to ensure the edibles are being fed for a long time.

Want to watch the extended version? View it here!

Materials she used includes:

  • Galvanized Duct Work and Cap
  • Self-Tapping Sheet Metal Screws
  • Drill, Bits and 2.5″ Bi-Metal Saw
  • 1/8 inch Quick Links (x6 pieces)
  • Chain (x3 pieces)
  • 1.5 inch Ring
  • Espoma Organic Potting Mix
  • Espoma Organic Bio-Tone
  • Strawberries of your choice
  • Moss
  • Hook

Step-By-Step Instructions:

Construction

  1. Connect your galvanized tubing. There is a rivet on where they should connect – be sure to work from one end to the other to make sure it is secure.
  2. Drill a drainage hole in the bottom of the cap with a metal drill bit. Place the cap on the corrugated end and use 5 self-tapping screws to secure.
  3. Measure your planting holes. Start an inch away from the seam to keep the integrity of the tubing. Each hole should be 7.5″ away from each other. Use a pencil to mark where to drill. This will be your starting place.
  4. Drill your holes with a 2.5″ bi-metal hole saw. Ask one person to hold the tubing while the other saws. You will end up with about 15-16 holes. Safety tip: Wear long sleeves, gloves and eye protection to protect yourself from the metal.
  5. Keep your gloves on while handling the tube as it is sharp.
  6. Drill 3 holes in the top to get it ready to hang.
  7. Attach 1/8″ quick links to each of the holes. Connect your chain to the quick links. Add one more quick link to the end of each chain and each of those will go into one 1.5″ ring.

Planting:

  1. Starting from the bottom hole, add in Espoma Organic Potting Mix and Bio-Tone Fertilizer. Pro Tip: Mixing Espoma Organic Potting Mix with the Organic Bio-Tone Fertilizer allows the strawberries to get a boost in their new container while releasing nutrients slowly to ensure the edibles are being fed for a long time.
  2. Plant each hole with a strawberry and move your way up! You can also add a plant at the very top!
  3. Take little pieces of moss and add them around the strawberry plant. This will help keep the plant inside of the planter and help clean up your project.
  4. Hang your planter with a hook (Laura uses an S-hook).
  5. Slowly water in your new planter – watering too fast can make the plants fall out since their roots haven’t been established yet.

Enjoy!

See the Total Berry Guide Here

Espoma products to help you grow your best strawberries yet:


Where to Buy
Tags: Berries, Bio-tone Starter Plus, DIY project, Garden Answer, Potting Mix
Share this entry
  • Share on Facebook
  • Share on X
  • Share on WhatsApp
  • Share on Pinterest
  • Share by Mail
https://www.espoma.com/wp-content/uploads/2018/04/IMG_9208.jpg 3368 6000 espoma https://www.espoma.com/wp-content/uploads/2023/05/espoma-logo340w-1.png espoma2018-04-18 10:56:322024-05-20 14:29:38Build Your Own Vertical Strawberry Planter (Quick Version)
You might also like
Video: Houseplant Upkeep with Garden Answer
Use These Garden Staples to Avoid Being Bugged at Your Next Barbecue
Growing Joy with Maria Blog: Culinary Meds From Our Garden
Garden Answer’s Design Tips for a Romantic Cottage Garden
Video: Planting Dahlias with Garden Answer
Laura from Garden Answer in her Raised Bed GardenVIDEO: Planting Fall Crops & Ice Plants with Garden Answer ???
Where to Buy

Get News & Updates

Recent Posts

  • VIDEO: How to Plant a Raised Bed Like a Pro with Farmer Nick
  • VIDEO: Transplanting Magnolias 🪴🌺 with Wyse Guide
  • VIDEO: How to Care for Roses 🌹 & Hydrangeas 🌸 with Garden Answer
  • VIDEO: How to Grow a Hummingbird Garden 🕊️🌿🌺 | Growing Joy with Maria
  • VIDEO: Boost Your Blooms: 🌸 Fertilizing Hydrangeas the Organic Way with Skye Hamilton

Tags

All-Purpose Potting Mix bio-tone Bio-tone Starter Bio-tone Starter Plus cactus and succulents Cactus Mix caring for houseplants Container Gardening DIY project Espoma espoma grown espoma organic Espoma Organics Espoma Video fall gardening flower garden flowers garden Garden Answer Gardening gardening tips gardens grow holly-tone houseplants Indoor! indoor gardening indoor plants Kaleb Wyse organic organic fertilizer Organic Gardening organic plant food Organic Potting Mix Outdoor Gardening Planting plants Potting Mix potting soil Spring Gardening succulents summer rayne oakes vegetable garden Vegetable Gardening Wyse Guide

Espoma. A Family Tradition Since 1929.

Espoma Organic logo
  • Espoma Dealer
  • Espoma Pro
  • Garden Club
  • Privacy Policy

Scroll to top