Grow Them, Cut Them, Smell Them, Share Them

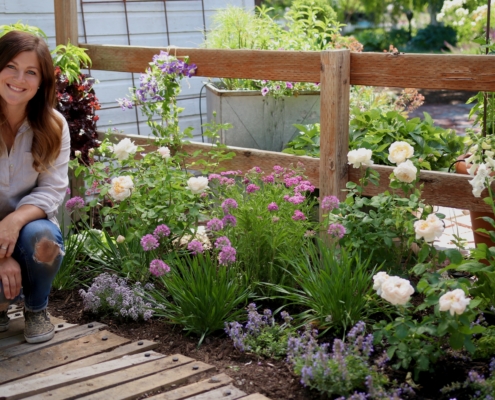
Gardening has many rewards and one of the best might be picking your own bouquet from the garden. Starting with the earliest spring flowering bulbs and extending to late fall mums and asters, having fresh flowers in the house is a wonderful luxury. Plus, it’s a joy to share and bring flowers to friends and family.

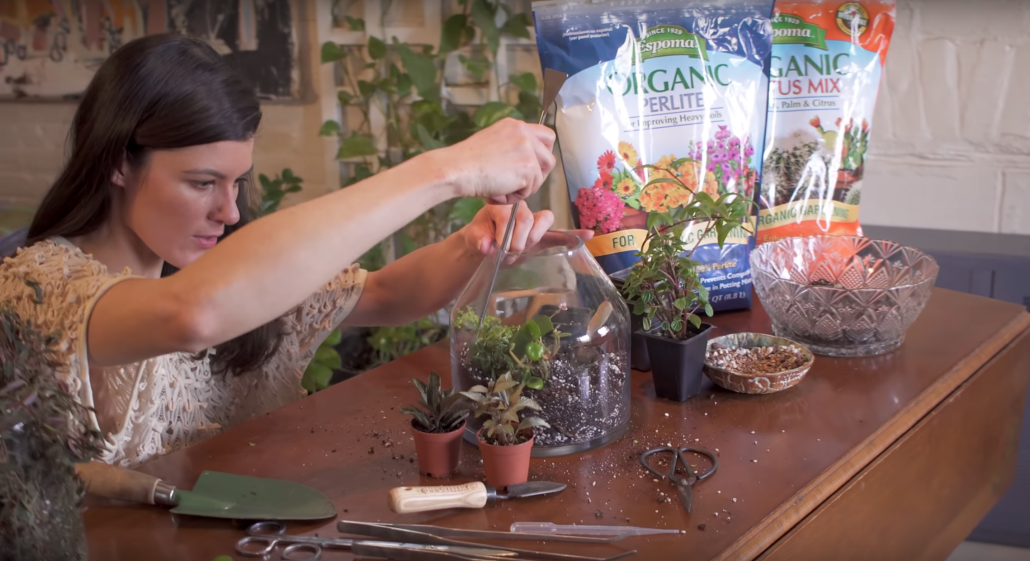
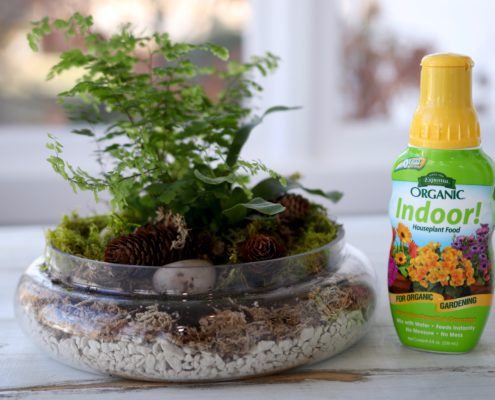
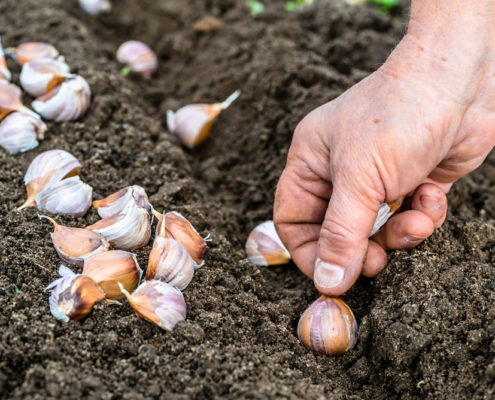
If you have room for a cutting garden —create one! It doesn’t need to be big or fancy to be effective. Just remember to feed the plants to get the best flower power. Try Espoma’s organic Flower-tone or  liquid  Bloom! fertilizer to give plants the nutrients they need.

Creating a beautiful floral arrangement can be fun and stress-relieving. Here are some tips to get you started.
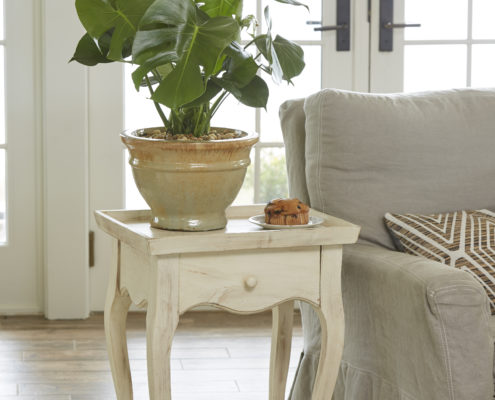
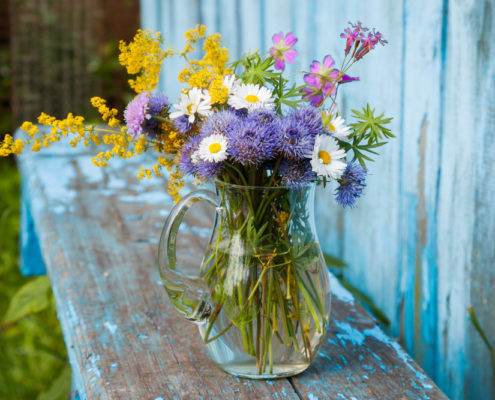
Select a Vase

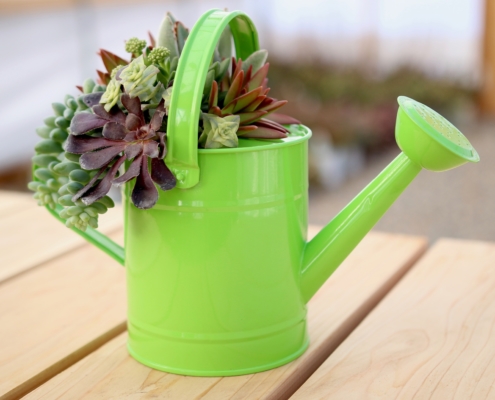
Select a vase, mason jar, vintage watering can or whatever fun object suits your mood. Make sure it’s clean, dirty containers can contaminate plants with bacteria. Think about the colors and the height of the flower stems when making your choice.
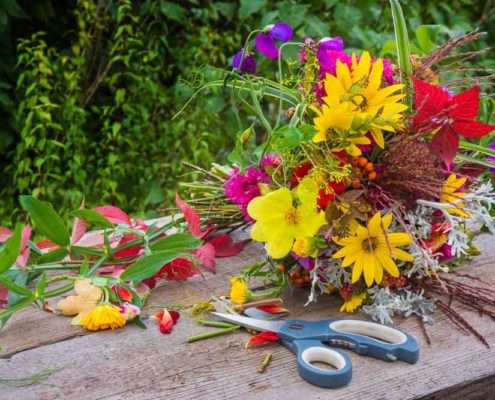
Clean the Stems

Remove leaves that will be below the water’s surface to help keep water clean and clear. If you’re working with roses, cut off the thorns to avoid getting pricked. Many people choose to remove the stamens of lilies because the pollen can stain skin and clothing. In any case, give the stems a fresh cut at a 45-degree angle and place them in water right away.

Choose a Style

Monochromatic arrangements use different flowers that have the same color. Choose varying shapes and textures to keep it interesting. Try using complementary or contrasting colors. Google a color wheel for inspiration. Using just one kind of flower in a vase gives a pop of color with a clean look. The more flowers you use in this design style the more dramatic the arrangement will be. Use odd numbers of flowers for a natural look.

Height and Width

The height of your arrangement should be about one and a half times as tall as your vase for a classic design. Taller flowers are used in the center while smaller flowers and fillers like green foliage should be used around them to create a width that’s pleasing to you.

No Rules

The hottest trend right now is perhaps the easiest of all arrangement styles — it’s called a field bouquet. The rules pretty much all go out the window here. These are bouquets that have a variety of colors, and forms. They needn’t match per se. The design is free form. Sit down, take your time and keep turning the vase so you are seeing all sides of it. They aren’t necessarily symmetrical, they’re loose and playful. Let your creative self shine. When there are no rules, it can’t be wrong!

Here are a few of our blog posts we think you’ll might be interested in. 

Nature Never Goes out of Style – Transition into a Fall Cutting Garden

7 Flowers for a Sun-Kissed July Bouquet

Best Wildflowers for Your Wedding Bouquet

Espoma Products

Bloom! Plant Food

FB

How to Plant a Terrarium with Summer Rayne, Homestead Brooklyn

Terrariums are beautiful, fun to make and easy to care for. Our favorite Brooklyn plant expert, Summer Rayne Oakes, guides us through the process step-by-step in this episode of Plant One on Me.

Summer covers which plants, tools, containers and soil mix you’ll need. Plus, how to water, the number one reason people kill plants.

If this terrarium seems too large to start with, go with a smaller version.

You don’t need a green thumb for this DIY project, promise.

Getting Started

First of all, choose a glass container. It’s easiest if the container is big enough to fit your hand inside. Next, choose plants that have the same kinds of light and water requirements. Check the plant tags to make sure they’ll be compatible. Generally speaking, terrariums are best in bright, indirect light. Full sun can be magnified by the glass and burn foliage. Base the container size on the number of plants you’d like to include.

Tools

Summer uses a set of aquarium tools for her terrariums. It’s a clever idea because they are extra-long. Having said that, it isn’t really necessary to buy this type of set when starting out. A long pair of chopsticks does a great job. She also uses a spoon and a narrow garden trowel. A watering can with a thin spout is handy to direct the water.

Soil Mix

The soil for terrariums needs to be a light, free draining mixture. Espoma’s organic Cactus Mix combined with perlite makes the perfect blend. If plants are small you can start with a drainage layer of an inch or so consisting of small rock and or charcoal. In this case, she didn’t use a drainage layer because the plants were relatively large and would have rooted into the drainage layer too quickly.

Planting

Add an inch or two of the soil mixture to your glass container. Play around with the plants until you have an idea of how you’d like them to look. Every plant won’t be blooming all of the time so choose ones with different textures and foliage to create the terrariums subtle beauty. Plant around the edge first, adding soil around the plants as you go. Plant the centerpiece last.

Watering

Terrariums create their own humidity which means they’ll need to be watered less frequently than houseplants in pots. Water sparingly and keep an eye on them. If plants seem to be wilting, water them. As time goes by, you’ll find the right watering schedule for your terrarium. Once every two weeks is about average.

Plant List

Here is a list of the plants Summer used in this video:

  • Monstera siltepcana – light and dark varieties
  • Peperomia trinervula
  • Hemigraphis/Strobilanthes alternate
  • Pilea asp.
  • Begonia conchifolia
  • Peperomia caperata

More Information

Here are links to other videos and blog posts we think you may find interesting:

How to Make an Easy Terrarium

DIY Terrarium Ideas

Everything Old Can be New Again with Terrariums

Limitless Lavender

Lavender conjures up images of the south of France with row upon row of plants covered in deep purple flowers. Its familiar fragrance is in everything from soaps and soothing beauty products to essential oils. This treasured flower has so many uses and is so easy to grow.

Perennial lavender likes full sun but appreciates some afternoon shade in hot climates. They are hardy in USDA zones 5-10. Feeding with Espoma’s organic Bloom! fertilizer promotes flowering. Water young plants deeply. Once established in the ground, they are drought tolerant. Over watering can stress established plants.

Lavender is considered a woody plant and should be pruned back by one third in the spring to keep them tidy. They bloom in early to mid-summer and the flowers may be harvested to use fresh or dried.

How to Harvest and Use Lavender

  1. Harvest lavender when the flowers just begin to open. They are at their most fragrant and beautiful at that time. Plus, cutting them early encourages plants to flower a second time.
  2. It’s best to harvest lavender in the morning after the dew has dried and before the hot sun draws out their essential oils. Cut them back to about an inch above the place the foliage starts. It’s best to just cut the thin stems and not the foliage.
  3. Use fresh lavender in bouquets to fill your home with their delicate fragrance. Add a fresh organically grown stem to a glass of Prosecco, it looks gorgeous and imbibes the drink with a delicate flavor. Try it in lemonade for a refreshing new twist. Make lavender sugar by layering fresh flowers in between layers of sugar in a jar. The flowers will impart flavor and color. Use it as sanding sugar for cookies or add to ice tea.
  4. Dry lavender in small bunches, hanging upside down in a cool dark place. A drying rack for laundry works well. Keep an eye on them, they may need to be re-tied as they dry and stems shrink.
  5. Dried lavender can be made into sachets, potpourris, soap, and more. Pair dried lavender with a thick slice of brie, drizzled with honey and strewn with a few dried lavender flowers for an “instagramable” cheese board. Keep in mind, dried lavender has a strong flavor, so use it sparingly.

If this isn’t enough to convince you to try growing lavender, it’s good for the environment too. It attracts butterflies, bees and other beneficial insects.

Here are some of our blogs that we think you might be interested in.

Bug Off: Plants to Repel Mosquitoes (Spoiler Alert – one of them is lavender!)

5 Edible Flowers to Grow in Your garden

Grow a garden Spa for Mother’s Day

Espoma Products  Bloom!

Bloom! Plant Food

Include the below code at the bottom of all blogs

TLC for Tomatoes

Tomatoes flourish in full sun and warm temperatures.

However, if you’re in short supply of sunny or warm days, havoc can begin taking over your tomatoes. Dreary-looking young tomato plants WILL flourish, once the weather changes, but it’s important to do what you can to make sure they have some extra care and are fed in the meantime.

Give Tomatoes a Lift

If you’re waiting on the weather to improve, the most important thing you can do for your tomato plants is give them some support. Tomato plants often bend, lean or even break as fruit matures. To help your plant from becoming damaged, get to know the tomato you’re planting. Indeterminate plants benefit from some support, while determinate tomatoes may be just fine on their own.

Use tomato cages, wood or metal stakes, or a trellis to give plants extra support. It’s really a matter of preference which one you choose.

The most important thing is that you’re keeping plants off the ground to avoid pests, diseases and rot. Learn more about supporting your tomatoes here.


Add Nutrients

The trick is to feed tomatoes monthly with an organic, nitrogen-heavy fertilizer. Tomatoes have big appetites, so their all-you-can-eat buffet runs out quick. Feed single in-ground plants with 3 tablespoons of Tomato-tone monthly. For rows of plants, spread 1 cup on each side per 5 feet. Feed potted plants 1.5 teaspoons per 4” pot diameter.

Pests got plants down?

When it comes to insects in your garden, don’t be quick to kill. Not all insects are enemies. In fact, most insects are essential players in your organic garden’s success. Others are neutral and don’t cause any harm. Yet some will ruin your harvest.

Spotting the difference between the good and the bad can be tricky, so keep your eyes peeled. Hornworms, fruitworms, aphids and beet armyworms can all spell disaster for your crop. Identify if these bad bugs are the cause of your problems here.

Less is More

Pruning tomatoes is a controversial practice that many expert gardeners say is unnecessary. There are times when pruning can be beneficial — fewer leaves mean air circulates better and leaves dry quicker, reducing the risk of disease.

Plants with less density direct energy toward producing bigger fruit. Plus, tomatoes often ripen earlier after a good pruning, allowing you to enjoy your harvest sooner.

Vertically grown tomatoes are ultimately easier to prune because unnecessary suckers and leaves are more visible. Though pruned plants may be better protected from insects and disease, staked and pruned plants may be more susceptible to blossom end rot and sunscald. Get the scoop on pruning tomato plants here.

tomato-tone, growing tomatoes, organic gardening

Bad Fruit

If a dark, water soaked spot has formed on your tomato you may have blossom-end rot. This problem is likely caused by an imbalance of calcium in the plant. Large spots will dry out and appear to be leathery. Maintain consistent soil moisture throughout the growing season. When the weather is dry, water at least twice a week and moisten the soil to a depth of at least 6 inches. Find out more about stopping blossom end rot here.

See how Laura from Garden Answer grows tomatoes upside down!

https://youtu.be/HThZTxbu8yc


Featured Products


Plant Parents: Summer Houseplant Care

Summer sun can be tough on houseplants. They’ll need us to turn up the love and give them a little extra TLC during warmer temps and sunny days.

Even though many houseplants originate in the tropics, too much heat can be stressful. Your houseplant may be trying to tell you something if you see wilting, yellow or brown leaves. These are signs your houseplant is stressed! Brown patches could be sunburn.

Here are some ways to make sure your plant babies get through the summer months with flying colors.

Photo courtesy of Costa Farms

Made in the Shade

Hot sun magnified by window glass can cause even cacti and succulents to get sunburnt. Check on plants in windows with a southern exposure. If you see signs of too much sun, such as browning, move them back or relocate them for a few months. If that’s not possible try to pull down the shades during the hottest part of the day.  

Chill Pill

Air-conditioning can be a saving grace in the summertime heat, but plants need to be out of the direct line of cold air. Just like people, they get chilly. Air-conditioning dehydrates the air and your tropical babes need humidity. If your space is especially dry, place plants on a saucer filled with pebbles and water. It will slowly evaporate and provide some much needed moisture. Misting plants often will make them very happy. Moving plants into the kitchen or bathroom where there’s running water will provide a touch more humidity for them.

Photo courtesy of Garden Answer

Hydration Station

Chances are you’ll need to water your plants more often in the summertime. Check to see if they feel dry more often than usual. Watering deeply is also important. Put plants in a sink filled partway with water and allow them to soak it up for 20 minutes or so. Pull the plug and let the plants drain completely before placing them back in their space.

What’s Bugging You?

Houseplants can be prone to pests in the summertime. Keep an eye on them and if you see any insects, cobwebs or white powdery substances, take action. Sometimes it’s enough to take them outside and wash them off with a gentle stream of the hose. If it persists, use Espoma’s organic insect spray or neem oil. Remove any dead leaves or other debris from the soil surface to prevent mildew and other disease.

Shower Them

Nothing is better than fresh air flowing through open windows on a cool summer day. The down side is that a lot of pollen, air pollutants and dust blow in and build up on plant leaves. That makes it hard for plants to breathe and absorb sunshine. Wipe off foliage with a damp cloth every couple of weeks or give them a soft shower. They will love getting a deep watering, lots of humidity and having clean fresh leaves. After the shower, give the plants some time to drip dry. This allows the water to completely drain out of the pot too.

Photo courtesy of Garden Answer

Nature’s Vitamins

This is the perfect time to feed your plants. In spring and summer it’s a good idea to keep plants on a regular feeding schedule with an organic liquid fertilizer like Espoma’s Indoor! Feeding after watering helps ensure that the plant food doesn’t just run out of the pot. Moist soil is better at absorbing the food.  

Now that your plants are clean and fed, we think you might enjoy these blogs.

Parenting Advice for New Plant Parents

Your Plants Are Trying to Tell You Something

Plant Parenthood: Top 5 Plants to Start Your Houseplant Family With

Espoma Products for Indoor plants

Get Plants off to a Good Start with Bio-tone Starter Plus

Why does Laura from Garden Answer use Bio-tone Starter Plus? Because it’s the ultimate starter fertilizer. Bio-tone Starter Plus is super charged with microbes and mycorrhizae to help new plants establish quickly, grow more robust root systems and experience less transplant shock.  Let’s break it down.

Mycorrhizae

Unlike maintenance fertilizers that are generally spread on the surface of the ground and lightly worked into the soil, Bio-tone Starter Plus is added to the planting hole, where it is in direct contact with the roots. Fun fact: Mycorrhizae literally means “fungus roots.” These specialized fungi act like extensions of the roots themselves, creating hundreds or thousands more entry points for the roots to take up water and nutrients.

Microbes

Microbes are bacteria that breakdown nutrients to make them available for plants to take up. Bio-tone contains 50 percent more microbes than maintenance fertilizers like Holly-tone, for example. These microbes and mycorrhizae help restore balance to your soil and are a cornerstone of the “Regenerative Gardening” trend.

No Sludges or Fillers

At Espoma, we’re proud to offer products that are organic and do not contain any sludges or fillers. Sand and lime are often used as filler ingredients that don’t add any nutrient for plants. Sludge, or Bio-solids comes from waste treatment plants — it’s never allowed in organic gardening. All ingredient in Bio-tone Starter Plus and all Espoma Organic ‘Tone’ plant foods are helping to feed the plant.

Espoma Products

Here are some blog posts we hope you’ll find interesting.

Fall is for Planting: Trees

Fall is for Planting: Cool-Season Veggies

Tips to Get Squirrels to Scram

Squirrels are the acrobats of the backyard. They can bend and stretch in every possible direction in order to reach a birdfeeder and their high-velocity chase scenes rival The Avengers. If you aren’t charmed by these antics, you’re not alone. Most gardeners are tired of them digging up their plants and eating more than their fair share of birdseed.

Don’t give up, here are a few ideas to deter them.

Remove Food Sources

Squirrels have voracious, gigantic appetites. The best way to deter them is to remove all food sources. If trees are dropping fruit or nuts, rake them up as often as you can. If the vegetable garden is a target, try netting or fencing. Make sure garbage cans are sealed tightly. If you compost without an enclosed composter, you may need to cover it with netting or chicken wire.

The Birdfeeder

This is where these devils really shine. It’s nearly impossible to prevent them from stealing bird food. There are “squirrel proof” feeders and that’s a good place to start. Though sometimes they‘ll jump on them to shake a few seeds loose. They can jump 10 feet, so try hanging the feeder on a hook, far away from trees. Hanging your bird feeder with fishing line can be successful because they can’t climb on that. Wrap around squirrel baffles help too.

Try Scaring Them Away

Put your pets to use. Cats and dogs, particularly the squirrel chasing kind, can help chase pesky squirrels away. Decoys of owls placed on high posts can help, as well as hawk decoys hung from trees. In areas where water is plentiful, motion activated sprinklers are an option.

Purchase Repellent

Squirrels don’t like hot spices like pepper and cayenne. Capsaicin is the compound that makes hot peppers hot and it is widely used in many repellents. The next level of protection comes in the form of predator urine, generally from wolves. The scent scares off squirrels, deer and rabbits, too. Repellents need to be reapplied after the rain.

Plant What They Won’t Eat

Here’s a secret: squirrels hate the smell of mint. Planting mint around the edges of your borders can help to keep squirrels out. Mint can be a very vigorous grower however. There are also a number of flowering bulbs that they don’t care for such as; snowdrops, daffodils, allium, and hyacinth. Try planting tulip bulbs, a delicacy for squirrels, among daffodils for protection.

Use Bone Meal

Espoma’s bone meal is a natural source of nitrogen and phosphorus that is also a repellent to squirrels.  It helps plants to grow sturdy root systems and large flowers. It’s the perfect, all-natural fertilizer to use at planting time. It’s recommended for use on bulbs, perennials, roses, shrubs, and trees.

Read more about flowering bulbs and plant nutrition here.

Get Easy Blooms with Spring Planted Bulbs

Understanding Plant Nutrition

Let Mother Nature Help out at Your Next Bar-B-Q

It’s summer time and that means enjoying more time outdoors — until the mosquitoes descend. While flying insects are an important part of the food cycle — no one wants them at dinner. These annoying pests target us by the odors and gasses we give off like carbon dioxide, sweat and smelly feet. There is however a way to foil their evil plans.

Some plants fragrances can block the receptors insects use to find us. The smell of mint, some fruit and chocolate are all decent blockers. It’s a good idea to add these plants to your garden, especially around decks and patios. They won’t make these areas a complete no fly zone but they will help.

All of the plants we cover in this article do well when grown in containers. This may make it easier to plant them near the places where friends and family gather. One thing to keep in mind about container gardens is that you’ll need to feed them. Start your plants off right with an addition of Espoma’s organic Bio-tone Starter Plus and then feed every two to four weeks with Bloom! to ensure plants get proper nutrients.

Lemon Grass

Lemon grass is used to make citronella oil, a well-known mosquito repellent. The plant does indeed look like tall grass and could be tucked into a container design. It’s delicious in soups and other dishes as well. It’s only hardy in tropical zones, but is a fast growing, inexpensive annual.

Other Lemon Scented Plants

All plants with a strong citrus fragrance will help keep bugs at bay. Think about planting lemon-scented geraniums, lemon thyme, and lemon balm. A word of warning, lemon balm is an aggressive spreader. Grow it in a pot to keep it in check.

Lavender

Lavender has so many fantastic attributes and uses, no garden should be without it. It repels moths, flies, fleas and mosquitoes. It’s easy to grow in pots on the deck in a sunny spot. You can also harvest the flowers and use them dried. Lavender sachets have been used for hundreds of years to keep moths out of linen closets.

Rosemary

Rosemary helps prevent flies and mosquitos from ruining your cookout. Throw a few sprigs on the grill or fire pit. The aromatic smoke will help deter them. In Mexico, they sometimes set small braziers on restaurant tables with a sprig of rosemary, one star anise and a wedge of lime to keep bugs away from diners and it works.

Basil

Another culinary herb to the rescue. Basil repels flies and mosquitoes. It’s toxic to mosquito larvae too. Plant near water features to discourage mosquitoes from laying eggs.

Mint

Mint exudes a strong fragrance that ants, mosquitoes and reportedly even mice don’t like. All members of the mint family are aggressive growers. Unless you’d like to have a big mint patch, grow mint plants in pots.

Garlic

Besides keeping vampires away, garlic also repels mosquitoes and cabbage moths. It has been said that if you eat enough garlic, the smell is released through your pores and that could repel insects, too.

Here are some of our other blogs we thought you might enjoy.

BUG OFF – Plants That Repel Mosquitoes

Perk Up Summer Containers with Stunning Annuals

Growing Scrumptious Tomatoes in Easy Containers

Bloom! Plant Food

Monstera Q&A with Plant Guru Justin Hancock

Houseplants have steadily grown more popular over the last couple of years, particularly with Millennials. It’s no surprise why—houseplants are inexpensive, readily available, and easy to acquire. They’re beautiful home décor items, but rather than just sitting around going out of style like plaid throw pillow, plants improve our health.

It doesn’t get more trendy than the Monstera plant. Read on for our Q&A with Costa Farms Horticulturist Justin Hancock.

How much light does Monstera need? 

Lots of light. Inside, the more light you can give your monstera, the better. It’s a big plant, so it doesn’t come from the deeply shaded rain forest floor like a lot of our favorite houseplants (Chinese evergreen, Fittonia, Snake Plant, etc.). Monstera doesn’t necessarily like direct sun inside (direct afternoon sun can cause sunburn, which looks like bleached areas of the leaves), but it does want enough brightness that it casts a good shadow.

Do these plants like humidity? 

Humidity definitely helps. Because monstera does hail from the tropics, it likes plenty of moisture in the air. Provide average to above-average relative humidity levels for optimal growth. Keep leaves lush and green by boosting humidity levels with a small humidifier, growing it in a bright bathroom, or grouping it with other plants.

How should Monstera be watered? 

A lot of folks find watering plants is easiest when we come up with a regular schedule—once a week, for example. And while your monstera should grow fairly consistently, different factors can cause it to push out new leaves faster—or take a break and slow down. This affects the amount of water it uses (the faster it grows, the more water it drinks). You’ll find your plant will stay healthiest if you check for water regularly and only provide moisture when needed, rather than splashing on more H2O regardless if the potting mix is wet or dry.  

Can Monstera be overwatered?

Yes! Too much water actually kills more houseplants per year than any other single cause. Monstera is no exception. Because, as it grows, it’s used to forming lots of aerial roots that cling onto tree trunks, the roots tend to rot if they stay wet and soggy. Let the top inch or two of the potting mix dry between waterings, and if in doubt, it’s better to keep it a little too dry than a little too wet. And if you have a saucer or drip tray at the bottom of the pot, don’t let water sit in there for more than 45 minutes or so — if the pot is standing in water for longer periods than that, the roots can start drowning.  

Photo courtesy of Costa Farms

How much nutrition does this plant need? 

For best growth, you will want to feed your Monstera. Think of it like this: When growing a plant in a pot, that soil provides all the nutrition the plant gets. Nature doesn’t supply the constant cycle of fresh nutrients. So fertilizing your monstera ensures healthy growth. You can feed it as little as once a year (in spring) with a an organic liquid fertilizer such as Indoor!, or as often as the directions on the fertilizer package recommend. It all depends on how much and how fast you want your Monstera to grow.

When’s the right time to repot a Monstera? Or does Monstera even need repotting?  

No plant truly likes being rootbound, and Monstera does best when roots get more room as they fill the pot. So give your plant a larger container when you see roots begin to circle the inside of the pot. Select a pot that’s 2 to 4 inches wider than the container it was in. Don’t jump to a pot that’s dramatically larger because it can lead to watering issues.

What does it mean if the leaves turn yellow and start dropping?

Yellowing leaves are kind of like the upset stomach of the gardening world—the one symptom could come from any number of causes. Watch for drafts: Blasts of hot or cold air, such as being next to an exterior door or heating/cooling vent, can cause the leaves to go yellow and drop prematurely. Overwatering can also cause leaves to go yellow. In general, stress can also cause Monstera to yellow some leaves, so you don’t necessarily need to be alarmed if you see it drop a leaf or two right after you bright it home from the nursery (or unpack it if you purchased it online).

 Is Monstera a bush or a vine or what?

Monstera is a large plant, which when young, looks bushy. As it grows, it becomes vine-like. If you want yours to produce huge leaves (and who doesn’t?!), help it grow upright on a strong, sturdy structure, such as a wood or moss-filled pole (totem). I’ve also seen Monstera supported on a decorative chain hung from the ceiling.

Can the leaves be cut off without hurting the plant?

Yes! Don’t be afraid to cut an older leaf or two to decorate for a dinner party or show off to friends. Monstera are evergreen plants—so they keep their leaves all year. But, individual leaves do fade and will eventually drop from old age. If you’re going to cut, it’s best for the plant to cut the oldest leaves.

About the Author

Passionate about plants only begins to describe Costa Farms Garden Guru Justin Hancock. A lover of houseplants, tropicals, annuals, and perennials, Justin has a wealth of experience gardening all the way from Northern Minnesota to Miami. At Costa Farms, you’ll find Justin running between research and development, marketing, and everywhere in between!

Espoma Products for Monsteras

Garden Answer’s Design Tips for a Romantic Cottage Garden

English cottage gardens date back centuries. They were used to grow vegetables, herbs for healing, fruit trees, perhaps a beehive, and common flowers. The informal style went through a renaissance in the late 1800’s when they became somewhat more nostalgic than practical. 

The informal aesthetic of dense planting and natural materials is still en vogue today. In this video, Laura outlines 10 design principles to help you design a cottage garden. Before you start, make sure you have plenty of Espoma’s organic Bio-tone Starter Plus plant food to make sure your plants get the best possible start.

No Straight Lines

Cottage gardens are always informal and a touch whimsical. Avoid straight lines. Gently curving edging looks more natural and playful. If your site restricts you to a straight edge, let the plants spill over it to create an unrestrained look.

Large Groups of the Same Plant

White cottage gardens are more relaxed in their design, it is still best to use large sweeps of the same plant. Think of planting in groups of three, five or seven. That is far more restful to the eye than a jumble of onsies and twosies. 

Spacing Doesn’t Matter

This is one time you do not have to follow the advice on the plant tag. Cottage gardens are always densely planted and generally grow more densely packed with time. Annuals and biennials are often used in cottage gardens and will self-sow in the border. Biennials are plants that take two years to grow and flower from seed like the foxgloves shown. Another advantage to planting things close together is that there is less room for weeds to grow.

Color Harmony

It’s very important to pick a collection of plants that have harmonious colors. Without that the border would look chaotic. Garden Answer uses a collection of soft pinks and peaches with touches of blue and lavender. It needn’t always be soft colors, but they do need to be unified in some way.

Use Varied Heights and Textures

In any planting, it’s a good idea to think about texture, height and foliage color as major design elements. Nothing blooms all the time. Varied foliage forms and colors will create interest even when the flowers aren’t in bloom. Laura uses Heuchera specifically for the silvery foliage color.

Anchor Plants/Structural Elements

This is sometimes referred to as the “bones” of a garden. It’s a structural element that all of the other plants get woven around. In this case, it’s a beautiful shrub rose named Rose ‘The Lady Gardener’, a fragrant beauty with full, apricot blossoms. The rose is repeated three times. Repetition is soothing to the eye.  It’s possible to use evergreens for a slightly more formal feel, or whatever peaks your interest.

Fragrance

The first thing everyone does when they pick a flower is to hold it up to their nose. Cottage gardens are known for their fragrance. Try to select varieties that smell good at the garden center. Roses, lavender, sweet peas, and sweet alyssum are all good choices.

Not Perfectly Maintained

Along with relaxed design principles, comes relaxed maintenance. Planting tightly will discourage weeds. Annuals like poppies will self-seed and move around the border, just like the biennial foxgloves. Weeding everything that comes up might mean that you weed out these plants and inhibit their spontaneous movements.

The Look Will Change Over Time

This style of gardening is the exact opposite of a formal border filled with geometric shaped boxwood. By its very nature this is meant to be more random. People often sow cosmos, violas and other plants that have a tendency to move around. Let them surprise you. If you really don’t like where one popped up, it’s easy enough to remove.

Be Patient

Being patient is really what gardening is all about. A garden is never really finished. Enjoy the journey!

Garden Answers Plant List

Nepeta ‘Cat’s Pajamas’ – catmint

Achillea – pink yarrow

Allium ‘Serendipity’ – ornamental onion

Rose ‘The Lady Gardener’

Heuchera Dolce ‘Spearmint’ – Coral Bells

Clematis ‘Brother Stephan’

Digitalis Foxy Hybrids –  foxglove

Lobularia ‘Blushing Princess’ – sweet alyssum

Here are more videos from Garden Answer we hope you will enjoy.

Plant Your Window Boxes Like Garden Answer

Succulent Pot in a Pot – Quick Version

How to Re-pot Houseplants – Quick Cut